Configuring SharePoint integration connections
Before you can browse or manage the contents of a SharePoint site in Xperience, you need to specify a connection to the SharePoint server. The system allows you to define multiple SharePoint integration connections for the current Xperience site.
Managing SharePoint connections
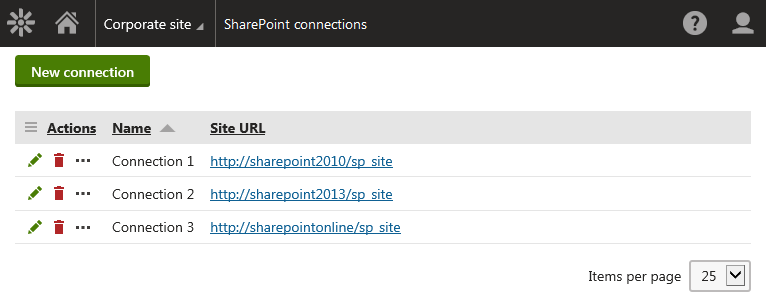
To manage SharePoint integration connections, use the SharePoint connections application. The application allows you to manage all SharePoint connections defined for the currently selected site.

To manage existing SharePoint connections, use the following basic actions:
- Edit () - opens the connection editing interface, where you can view and modify the connection details.
- Delete ()
SharePoint connection properties
|
Section |
Properties |
|
General |
|
|
Authentication |
|
Adding SharePoint connections
To add a new connection to a SharePoint server:
- Open the SharePoint connections application.
- Click New connection.
- Enter the SharePoint connection properties.
- Click Save.
- (Optional) In the Connection test section, click Test connection to verify that the connection is functional.
The system creates a new SharePoint connection. You can now use the connection when defining available SharePoint libraries.
Caching SharePoint data
You can configure the system to cache files downloaded from a SharePoint server.
- Open the Settings application.
- Select the Integration -> Microsoft SharePoint category.
- Enter values into the Cache timeout (minutes) and File size limit (kB) settings.
- Click Save.
Within the specified time, the system caches all downloaded SharePoint files up to the specified size limit.
Testing SharePoint connections
You can verify if the system can connect to the SharePoint server specified in a connection.
- Open the SharePoint connections application.
- Edit () a connection.
- In the Connection test section, click Test connection.
The system informs you about the result of the connection test.
