Marketing automation walkthrough - Managing the process
Enterprise license required
Features described on this page require the Kentico Xperience Enterprise license.
You can now test the sample automation process that you created.
Creating a contact to trigger the process
Create a contact that meets the trigger’s condition to initiate the process:
Open the Contact management application.
On the Contacts tab, click New contact.
Modify the values as follows:
- Email address: your email address
- First name: Eric
- Last name: Roberts
- City: New York
- Country:USA
- State: New York
Click Save.
Managing the process
You can fully administer the process through the user account that you used to create the process (Travis). You can also manage contacts in the process through the Process administrator role (Matt).
Open the Marketing automation application.
Edit the Coffee Merchandise Lead Nurturing process.
Select the Process tab and switch to Contacts mode.
- You can see that the process has been automatically started for the created contact.

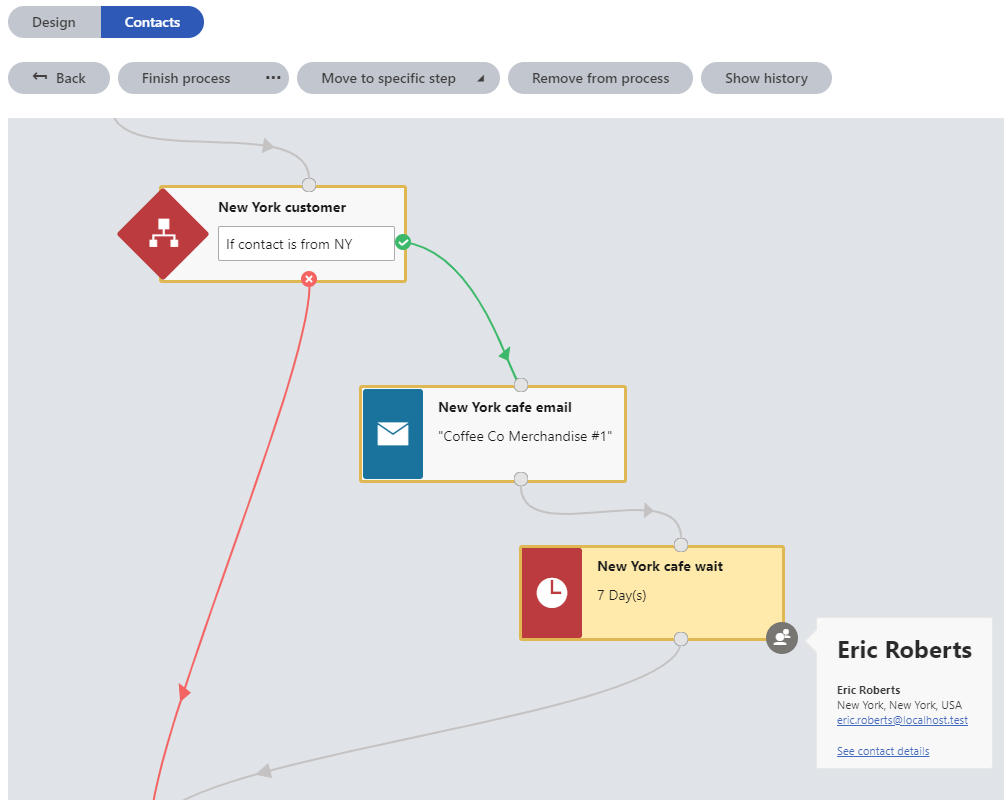
Click the Manage process () action for the contact.
You can see the current state of the process for the given contact. The contact’s current step is highlighted in the process graph, and all previously visited steps have a highlighted border. The Move to next step, Move to specific step, Remove from process and Show history buttons are available to you.

Tip: If you have not set the wait steps to a short time interval, use the Move to specific step button to move the contact forward in the process.
For example, if you manually move the contact into the Set status to prospective client step, the process finishes. If you then view the contact in the Contact management application you can see that the contact’s status changed to Prospective client.
You have created a complete automation process and tested some of the functionality that you can use in your own marketing automation processes.