
Creating page types
This page describes how to create page types in the Page types application.
Creating page types
- Open the Page types application.
- Click New page type.
The New page type wizard opens. Your choices throughout the wizard determine the functionality and purpose of the given pages. The resulting pages may represent actual pages available on the live site, only serve as data containers used by other pages, or simply provide folders for organizing and categorizing the website content tree.
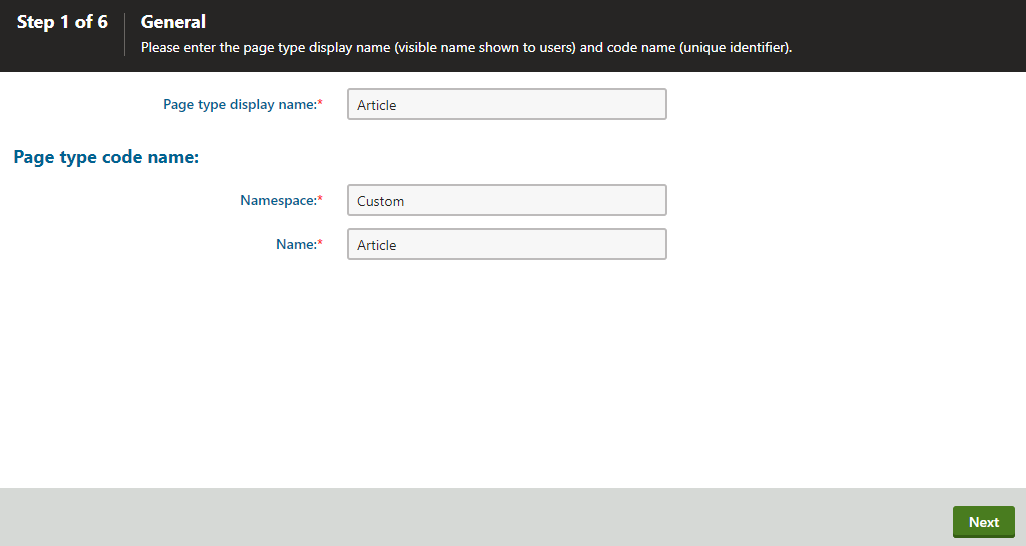
Step 1 – Names
- Fill in the following values:
Page type display name – the system displays this name to users in the administration interface
Namespace – the namespace is a prefix that distinguishes between page types. For example, it can be used to separate page types created for different sites, identify page types imported as part of third-party modules, etc.
Name – a unique page type identifier, which is appended to the namespace.
Important
When creating page types, always use a unique namespace.
Never use the cms, com, om or content prefixes. A recommended option is to use your company name or an abbreviation as the prefix, for example: ACME_MyPageType.
- Click Next.
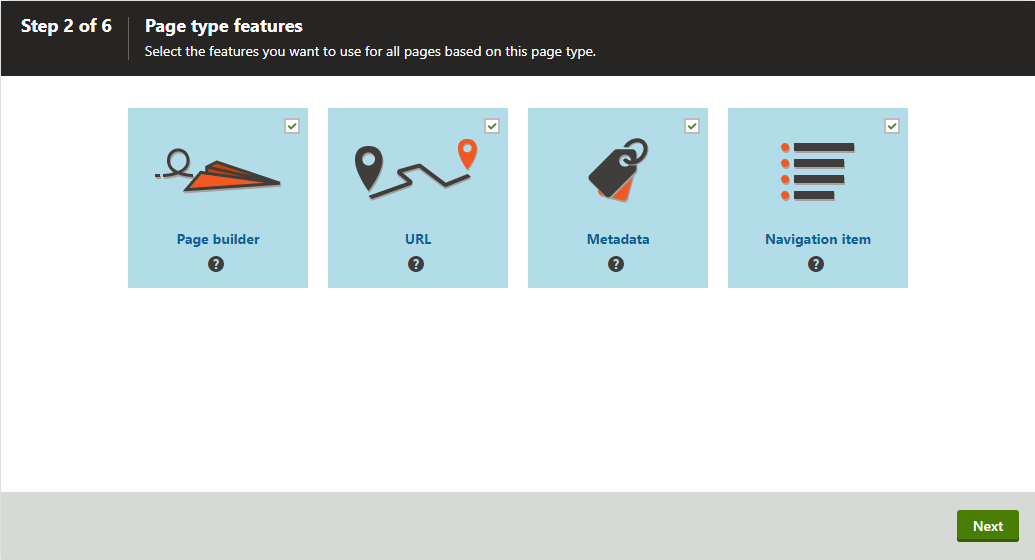
Step 2 – Features
Select the features that you want to enable for the page type, depending on the intended purpose of the given pages:
- Page builder – allows editors to manage page content through a user-friendly interface. This page type feature is required to work with configurable widgets, and adjust the layout of pages by selecting page templates. The page builder feature must also be enabled in the code of the live site application (see Page builder development). Enabling this feature also enables the URL feature – it is not possible to edit page builder pages without the page being accessible in some form.
- URL – allows pages to have URLs configurable depending on the selected routing mode. This feature also controls the visibility of the Alternative URLs editing interface, if enabled for the site.
- Metadata – allows editors to enter metadata for pages. Metadata present details about the content of your pages, which can be used directly as part of your website (e.g. title) or when implementing search engine optimizations. The metadata include page title, description, and keywords. For more information, see Editing metadata of pages and Displaying page content.
- Navigation item – allows content editors to control which pages appear in the website’s navigation menus. For more information, see Building website navigation.
All pages based on this page type will have the selected features.
Note: some features may not be available for editing if pages of the particular page type were already created in the content tree.
Click Next.
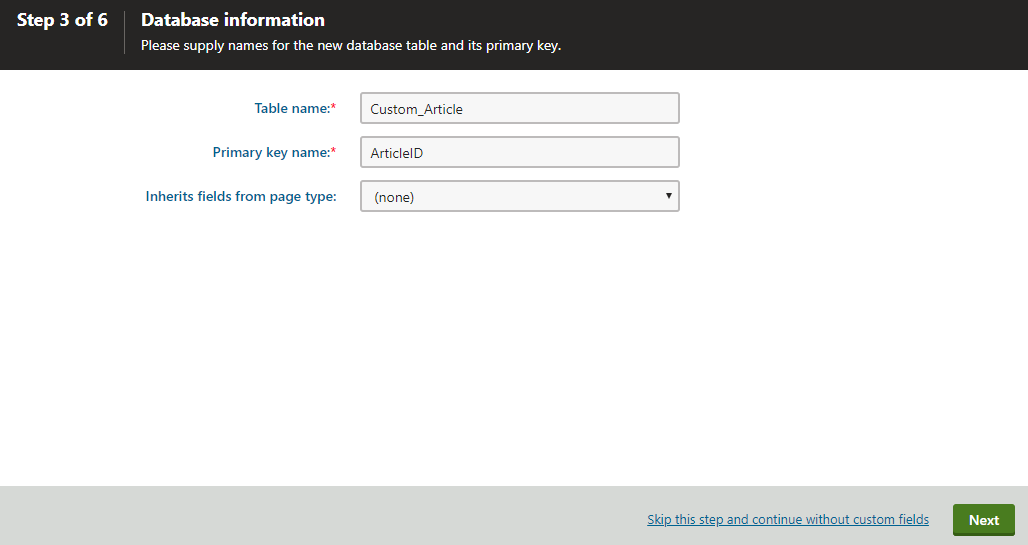
Step 3 – Database information
Choose whether the page type will contain custom fields and have a dedicated database table.
The remainder of this page describes page types with custom fields.
To create a page type without custom fields, click the Skip this step and continue without custom fields link in the wizard footer. To learn more about such page types, switch to the Creating page types without fields page.
Enter a Table name for the database table that stores the data of the page type’s fields.
Enter a Primary key name for the table.
(Optional) Select if you want the page to Inherit fields from page type (reuse the field structure of an existing page type).
Click Next.
The system creates the database table.
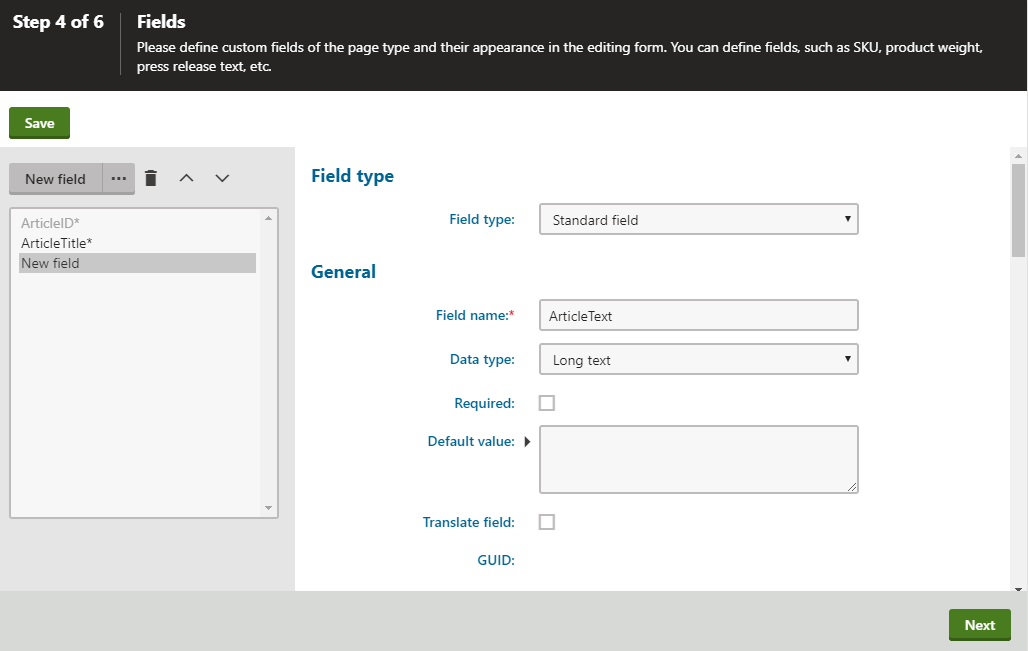
Step 4 – Fields
Now, you need to define the page type’s data fields (columns of the table):
Click New field.
Define the custom field using the field editor.
- You can use the field editor to create new page type fields, or to group the fields into categories.
Click Save.
Repeat the steps above for all required fields.
Click Next after you have prepared all necessary fields for the page type.
You can also make system page fields editable on the Content tab of the Pages application for pages of the given type. To do this, create a new field and select Page field in the Field type drop-down list. You can then choose from the following two groups of system fields:
- Page fields – general page fields that have separate values for each language version of the page.
- Node fields – general page fields that are shared by the entire content tree node (all language versions of the page).
Page or node system fields are then offered in the Field name drop-down list.
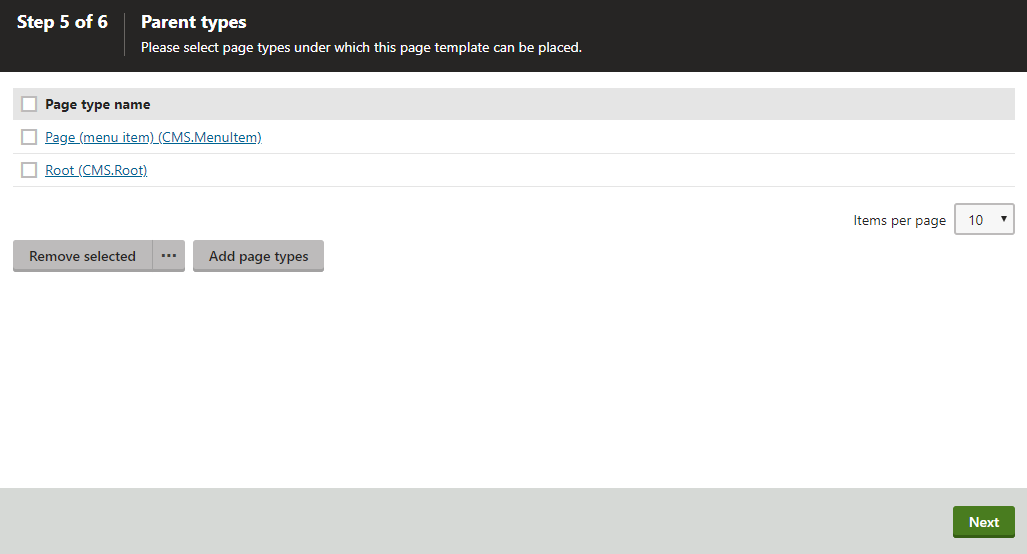
Step 5 – Parent types
Select the parent page types under which pages of the new type will be allowed in the website content tree (when managing pages in the Pages application).
- Click Add page types and select specific page types.
- Click OK.
- Click Next.
Step 6
The wizard has finished the configuration of the new page type.
Click Finish. You have created a new page type.
How content in page types is stored
The new page type has its own database table for its specific fields. The overall data of pages is stored in three tables:
- CMS_Tree (content tree structure)
- CMS_Document (general page properties, metadata and page builder content defined on the Page tab)
- The dedicated page type table, e.g. custom_Article (the page type fields)
For detailed information, see: Page database structure
Step 7 - Generating page type wrapper classes
To simplify working with the page type when developing your website, generate and include wrapper classes for your page type into your live site project.
Since each page type can contain a different set of custom fields, the system cannot provide strongly-typed access to individual fields via a shared general class. For this reason, accessing custom fields can be unwieldy, often needing additional code to be written. The process requires developers to:
- specify database column names to manipulate data from particular fields, and
- manually perform value type conversion and validation on the data as it gets retrieved from and stored to the database.
To alleviate this issue, the system allows you to generate page type-specific classes. The class inherits from the TreeNode base class (representing page objects across the system) and extends it with properties that correspond to custom fields defined for the page type.
Further configuration
After creating a new page type, you may want to continue with the following optional configuration:
- Configure the properties of the page type.
- Set a field as the source for the names of pages – pages can use the value of a specific field as their primary name (e.g. in the content tree):
- Edit the page type in the Page types application.
- Open the Fields tab.
- Select a field in the Page name source field selector below the list of fields. Only fields with the Text Data type that are Required are available.
- Limit the pages users can create – control where in the site’s content tree users are allowed to create new pages.
- Create alternative forms for the page type – adjust the editing interface for pages of the given type.
- Extend the page type’s listing filter – editors use page listing to perform multiple page (batch) operations in the Pages application.