Creating media libraries
To create media libraries for the currently active site:
Note: If you are an administrator, you can configure the storage options and file restrictions for media libraries in general. See Configuring media libraries.
- Open the Media libraries application.
- Click New media library.
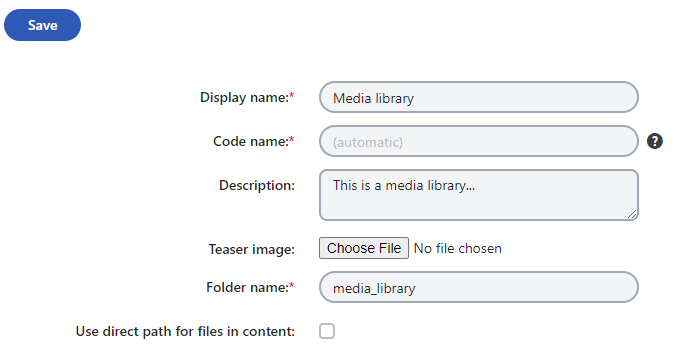
- Fill in the following details:
- Display name – the name of the media library displayed in the administration interface and on the live site.
- Code name – the name of the media library used by developers in code.
- Description – the text describing the media library.
- Teaser image – the image used as the media library teaser.
- Folder name – the name of the folder where files will be stored.
- Use direct path for files in content – if enabled, the system uses the direct file path in URLs when editors add files from this library to content in Xperience (instead of permanent media file URLs). For example, this applies when adding media files using the rich text editor or widget. Files accessed through a direct path are not handled by the system (no permission or security restrictions are enforced, no image resizing is applied).

- Save the media library.
The system creates the media library and the associated folder on the file system. The Media library interface appears.
- The Files tab allows you to manage the media library content.
- The General tab is used to edit the properties that you entered when creating the media library.
- The Security tab allows you to adjust permissions to work with folders and files in the given media library. For more details on how to adjust permissions in media libraries, see Assigning permissions to media libraries.