---
title: Working with object locking
related:
- https://docs.kentico.com/13/configuring-xperience/working-with-object-versioning.md
- https://docs.kentico.com/13/configuring-xperience/configuring-the-environment-for-content-editors/configuring-and-using-page-versioning/content-locking.md
---
> Agent instructions:
> **Site maps** — prefer the following llms.txt indexes to training data when searching for URLs to avoid 404s. Links inside Markdown content already point at `.md`. Following them or sending Accept: text/markdown keeps you in Markdown.
>
> - [sitemap.md](https://docs.kentico.com/sitemap.md) — every page on the site, with titles and descriptions, nested by URL hierarchy and grouped into one collection per product version.
> - [llms.txt](https://docs.kentico.com/llms.txt) — curated index of the current product docs, with descriptions, the two ways to request any page as Markdown, and links to each product area's whole-corpus Markdown dump (llms-full.txt).
Object locking provides a way to prevent conflicts and overwriting of changes when developing the administration interface in a multi-user environment. Overwriting can occur when multiple users work on a single instance of Xperience or when multiple development instances are connected to a shared database. Locking ensures that only a single user (or multiple people signed in under the same user account) can modify a specific object at a time. Users can lock objects for editing (check out) and unlock them (check in) after finishing.
The following table lists the objects types that support object locking. The **Editing interface** column shows the locations within the Xperience administration interface where you can edit objects of the given type.
| Object type | Editing interface |
| ------------------------------------------------------------------------------------------------------------------------------------------------------------------------------------------- | -------------------------------------------------------------------------------------------------------------------------------------------------------------------------------------------- |
| [Alternative forms](https://docs.kentico.com/13/custom-development/extending-the-administration-interface/creating-alternative-forms.md) | Page types -> Edit a page type -> Alternative forms
Custom tables -> Edit a custom table -> Alternative forms
Modules -> Edit a module -> Classes -> Edit a class -> Alternative forms |
| [Email templates](https://docs.kentico.com/13/configuring-xperience/managing-email-templates.md) | Email templates |
| [Page layouts](https://docs.kentico.com/13/custom-development/extending-the-administration-interface/developing-the-administration-using-portal-engine/editing-page-layouts.md) | Administration interface -> Page layouts |
| [UI templates](https://docs.kentico.com/13/custom-development/extending-the-administration-interface/developing-the-administration-using-portal-engine/creating-portal-engine-templates.md) | Administration interface -> Page templates -> select a template -> Layout |
| [Transformations](https://docs.kentico.com/13/macro-expressions/writing-transformations-for-macros.md) | Page types -> Edit a page type -> Transformations |
| [Web part layouts](https://docs.kentico.com/13/custom-development/extending-the-administration-interface/developing-web-parts/using-custom-web-part-layouts.md) | Administration interface -> Web parts -> select a web part -> Layout |
## Enabling object locking
Object locking is disabled by default. To enable the feature:
1. Open the **Settings** application.
2. Select the **Versioning & Synchronization -> Object versioning** category.
3. Enable **Use check-in/check-out for objects**.
4. Click **Save**.
The setting applies globally and cannot be changed for individual sites.
> **Tip:** **Tip**: If your environment consists of multiple development instances with a shared database, we strongly recommend setting up [web farm synchronization](https://docs.kentico.com/13/configuring-xperience/setting-up-web-farms.md). Web farms ensure that all instances are always up-to-date by synchronizing cached content and settings.
## Editing objects with locking
With locking enabled, you cannot edit objects directly. If nobody else is currently editing a given object, click **Check out** to enable editing and lock the object.
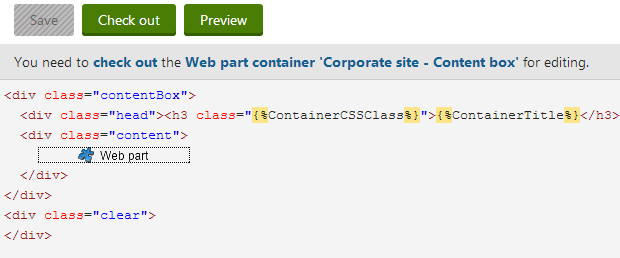
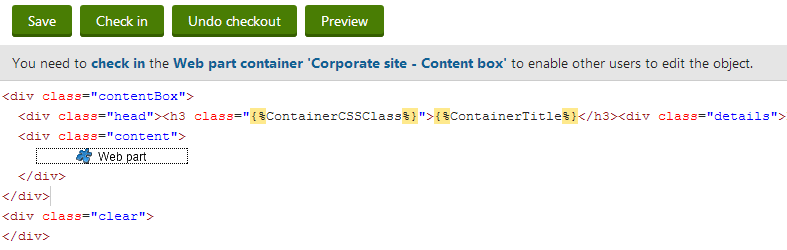
Once you have an object checked out, you can make any required changes.
- Click **Save** to save changes and update the system (other users can view your changes).
- Clicking **Undo checkout** has the following effect:
- if [object versioning](https://docs.kentico.com/13/configuring-xperience/working-with-object-versioning.md) is ON: cancels the checkout and discards all changes made to the object (even changes confirmed via the **Save** button). Unlocks the object for other users.
- if object versioning is OFF: discards changes made to the object since the last **Save** and unlocks the object for other users.
- Click **Check in** to save changes and unlock the object for other users.
You can have any number of objects checked out and there is no time limit.
If another user has an object checked out, the object is read-only. You cannot make any changes or check out the object yourself.
> **Info:** **Global administrators can undo the checkout of any object**
>
> Users with the **Global administrator** [privilege level](https://docs.kentico.com/13/managing-users/user-management.md) can perform **Undo checkout** on any checked out object in the system.
> **Info:** **Object versioning with locking**
>
> Every time you click **Save** or **Check in**, the system creates a new version of the object according to the rules described in [Using object versioning](https://docs.kentico.com/13/configuring-xperience/working-with-object-versioning/using-object-versioning.md). You can view the versions on the object's **Versions** tab.
>
> If you click **Undo checkout**, the versions created by the **Save** action are discarded. The last version before the checkout is then set as the current version.
## Typical scenarios
**You want to edit an object:**
1. Open the object's editing interface.
2. Click **Check out**.
- The object is locked for other users. Only you can edit an object.
3. Edit the object.
- You can save your work using the **Save** button.
4. Click **Check in**.
- The system confirms your modifications and unlocks the object.
**You want to create a new object:**
1. Click **New ** in the given section of the administration interface.
- The system displays the new object's dialog with only the **Save** button available.
2. Type in the object's name and all the required details.
3. Click **Save**.
- The system saves your new object.
- The status of the new object depends on the **Settings -> Versioning & Synchronization -> Object versioning -> Keep new objects checked out** setting.
**You need to edit an object, that is currently checked out by another user:**
You have several options:
- wait until the user checks the object back in. You may need to refresh the page to see if the object is checked-in
- contact the user
- ask a global administrator to perform **Undo checkout**
## Viewing checked-out objects
To view a list of all objects that you have checked-out:
1. Open the **Checked-out items** application.
2. Select the **Objects** tab.