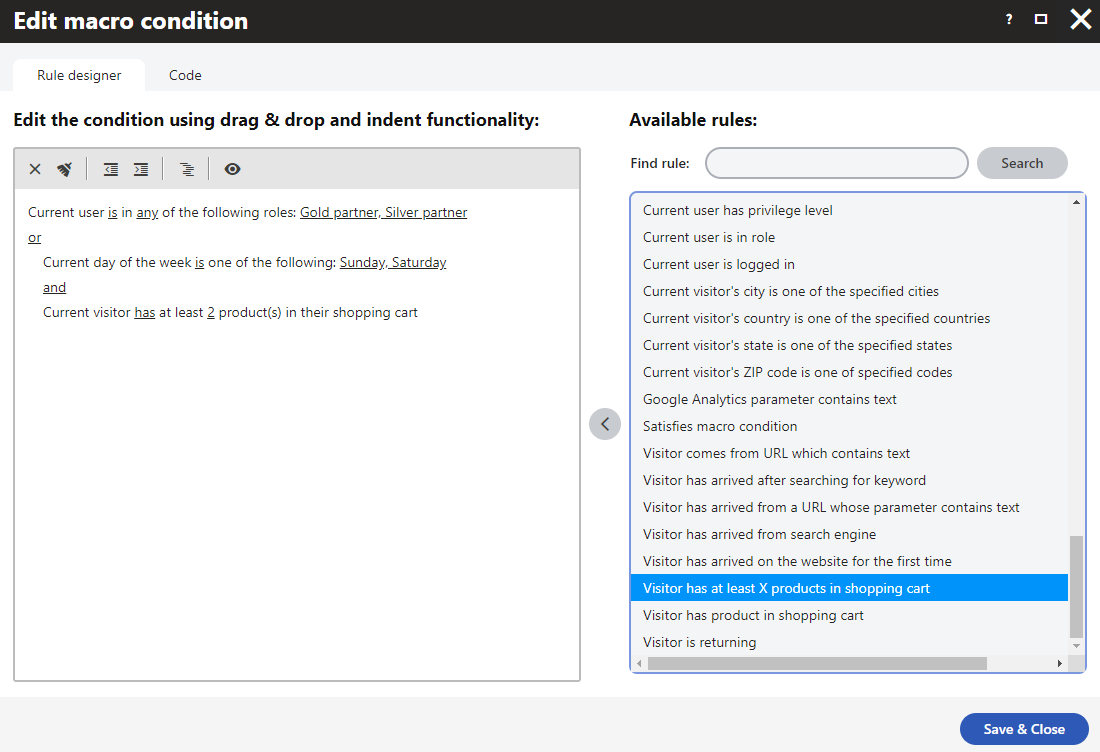
Building conditions using macro rules
Macro rules allow you to create macro conditions without any knowledge of the Xperience macro language (K#). Instead of writing code, you build conditions out of text-based clauses. Each macro rule represents a requirement, which can either be true or false at the time when the system evaluates the condition.
To create a condition using macro rules, click Edit next to a condition field in the user interface. The Rule designer dialog opens.

Adding rules to conditions
Select the rule in the list of Available rules.
Tip: Use the filter above the list to find the rules that you need.
Click Add rule ().
The rule appears in the main designer area, displayed as a text description of the corresponding requirements.
Setting parameters for rules
Parameters allow you to configure the exact requirements of macro rules. For example, in a rule that requires the current user to be a member of certain roles, you select the roles through a parameter.
Macro rules display parameters as underlined sections within the rule text. To set the value of a parameter, click the underlined text and fill in the value inside a separate dialog.
Combining multiple rules together
If you add multiple rules to a condition, the rule designer automatically places operators between the rules.
- The and operator means that the combination of two rules is only true if both rules are also true.
- If two rules are connected using the or operator, the result is true if at least one of the rules is fulfilled.
Click on operators to switch between the two options. The final result of the condition depends on the results of individual rules, and the operators placed between them.
The rule designer uses indentation to group together macro rules and set the precedence of the operators. The system first evaluates the rules on the level with the largest indentation. The result is passed to the level above, and this process continues until the final result of the condition is known.
To increase or decrease the indentation, select a rule and click Indent or Unindent on the toolbar above the designer area. Clicking Auto indent modifies the indentation of all rules in the condition – ensures precedence for all groups of rules connected through the and operator.
You can change the order of the rules by dragging them to different positions in the designer area.
Removing rules from the condition
You can delete rules by clicking buttons on the toolbar above the designer area:
- Delete – removes the currently selected rule
- Clear all rules – removes all rules from the condition
Editing the macro code of conditions
You can view the K# code of the overall condition defined by the added macro rules. Click View condition in K# () on the toolbar.
If you wish to manually edit the code, switch to the dialog’s Code tab.
Note: The system cannot convert general macro code into macro rules. If you edit a condition on the Code tab, the content of the rule designer is deleted.