
Adding custom activities
Kentico EMS required
Features described on this page require the Kentico EMS license.
In addition to the default activity types, you can also define custom activity types for tracking any other actions on your website.
Creating new activity types
To add custom activity types:
Open the Contact management application.
Switch to Configuration -> Activity types.
Click New activity type.
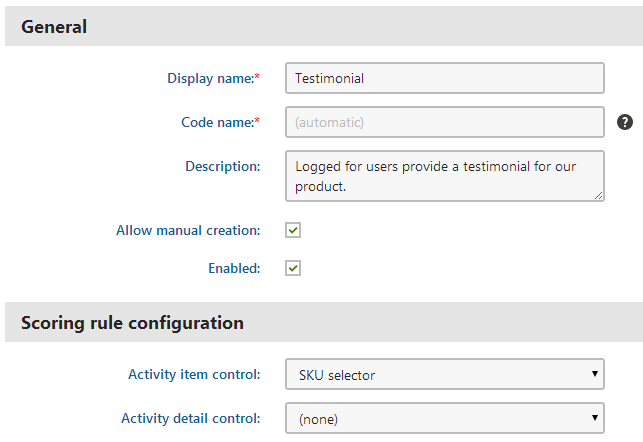
Fill in the following fields as required:
Display name
The name of the activity type used in the Kentico user interface.
Code name
Serves as a unique identifier for the activity type (for example in the API).
You can leave the (automatic) option to have the system generate an appropriate code name based on the display name.
Description
Text description about the purpose of the activity type.
Allow manual creation
If you enable this option, users with access to the on-line marketing administration interface are allowed to manually log activities of this custom type.
Enabled
Indicates whether the system logs activities of this type.
(Optional) Set the Activity item and Activity detail field options in the Scoring rule configuration section.
- The system offers the Activity detail and Activity item fields when defining scoring rules based on the custom activity.
- For example, an activity type representing testimonials has an SKU selector item control. This allows the score administrators to create different scoring rules for testimonials related to different products.
- The (none) value hides the given field when creating scoring rules based on the custom activity.
- The (default) value provides standard comparison options for text and numeric values.
Click Save.
Your custom activity type is now ready. You can either log the custom activities manually in the user interface, or set up the system to log them automatically.
Manually logging custom activities
To log a single activity of a custom type for a contact:
Open the Contact management application on the Activities tab.
Click New custom activity.
Fill in the details of the activity:
Contact
Select the contact associated with the activity.
Activity type
Select one of your custom activity types.
Activity title
Add basic information about the event that the activity represents.
Activity value
Here you can assign a value to the activity. You can associate values with activities such as ratings or e-commerce purchases.
Activity URL
The URL of the page where the activity occurred.
Campaign
The marketing campaign associated with the activity. Used e.g. if you need to monitor the behavior of the visitors of your website.
Created
The time when the activity occurred.
Comment
Here you can add any additional information related to the activity, either as plain text or with basic formatting.
Click Add stamp to insert your stamp into the comment. The default stamp contains the full name of your user account and the current date and time.
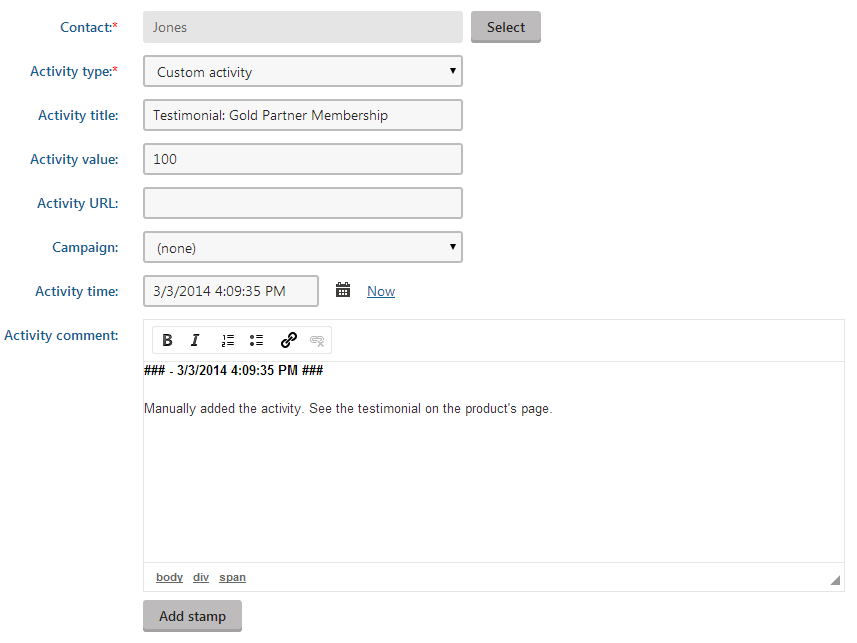
Click Save.
You can now see the custom activity logged for the given contact.
Automatically logging custom activities
In most cases, logging activities manually one-by-one is not a practical option. If you need the system to automatically record custom activities for contacts who perform a specific action, you can use one of the following approaches:
- Log the activity as part of a marketing automation process via the Log custom activity action step.
- Develop custom components for your website that log the activity through the API.