
Managing wireframes
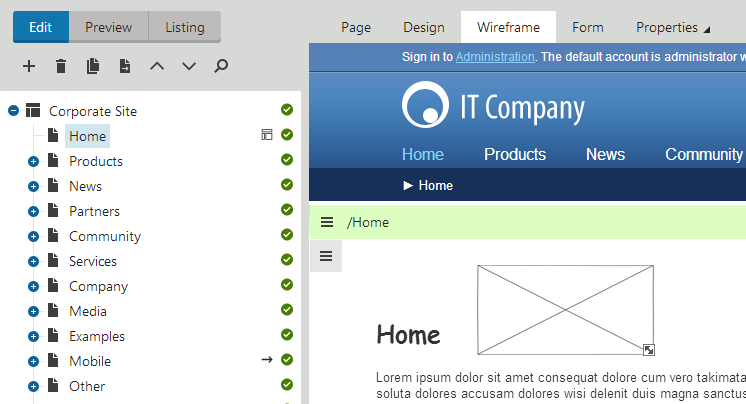
You can create, edit and view wireframes in the Pages application, directly in the content tree alongside the website’s pages and other documents.
Creating dedicated wireframe documents
The Wireframe (CMS.Wireframe) document type allows you to add wireframes into the website’s content tree. The only purpose of wireframe documents is to provide visual guides in the Pages application. They are not actual pages and the system does not include them in the website’s navigation or sitemap. Visitors cannot access wireframe documents on the live site.
- Open the Pages application.
- Navigate to a node in the content tree where you want to place the wireframe.
- Click New ().
- Select the Wireframe document type.
- Type a name for the wireframe into the Page name field.
- Choose a page template for the wireframe.
- Click Save.
- Design the content of the wireframe schematic on the document’s Wireframe tab.
- (Optional) Switch to the Form tab and configure the properties of the wireframe:
- Comments - allows you to type any required notes, such as a description of the wireframe or instructions for other users.
- Exclude from search - by default, wireframe documents are ignored by all forms of search (both the Smart search and the SQL search). Uncheck the box to enable search for the wireframe.
- Page nesting - here you can set the wireframe’s content inheritance options.
Users can now view the wireframe in the content tree and make further modifications if needed.
Combining wireframes with standard documents
The system allows you to integrate wireframes into documents of any other type. For example, this can be useful if you are creating an actual page (document) based on a wireframe or when using wireframes to plan a new design for existing pages.
Converting dedicated wireframes to other document types
Warning: This process is irreversible. You cannot convert combined documents back to dedicated wireframe-only documents.
Select the wireframe document in the content tree.
Switch to the Form tab.
Click Convert to another document type in the header actions.
Select the target document type.
- The wireframe must be placed under a document that allows the new document type as a child. For example, pages cannot be placed under wireframe documents by default.
Choose a template (for pages) or enter values into the form fields of the new document type.
Click Save.
The document keeps the original wireframe definition on the Wireframe tab, but otherwise behaves exactly like a new document of the specified type. Users can refer to the wireframe at any time.
Inserting wireframes into existing documents
- Select the document in the content tree.
- Use one of the following options:
- Switch to the Properties -> General tab, scroll down to the Advanced section and click Add wireframe to this page.
- Right-click the page template header on the Design tab and select Add wireframe to this page in the menu.
- Choose a template for the wireframe.
- Click Save.
The document gains the Wireframe tab in addition to the standard content editing and configuration interface. Inserting a wireframe into a page does not affect its live site appearance in any way.
The result of these procedures is a combined document with both regular content and a wireframe.
You can manage the wireframe content of combined documents on the Wireframe tab, just like for dedicated wireframe documents.
The system displays a status icon () next to documents that contain a wireframe. You can disable this icon in Settings -> Content -> Content management via the Display wireframe icon setting.
To configure the wireframe nesting settings of the document’s wireframe or enter comments, go to Properties -> Wireframe (instead of the Form tab).
There are several ways to delete the document’s wireframe if you no longer need it:
- Open the Properties -> General tab, scroll down to the Advanced section and click Remove wireframe.
- Right-click the page template header on the Design or Wireframe tab and select Remove wireframe in the menu.
- Click Remove wireframe on the Properties -> Wireframe tab.
Adding wireframes to the main page design
You can place wireframes directly into the content of regular pages by adding the Wireframe area web part into a zone on the Design tab of the Pages application. This defines a sub‑section of the page that works just like the Wireframe tab. You can use this approach to create wireframes for specific zones on pages that are already partially implemented.
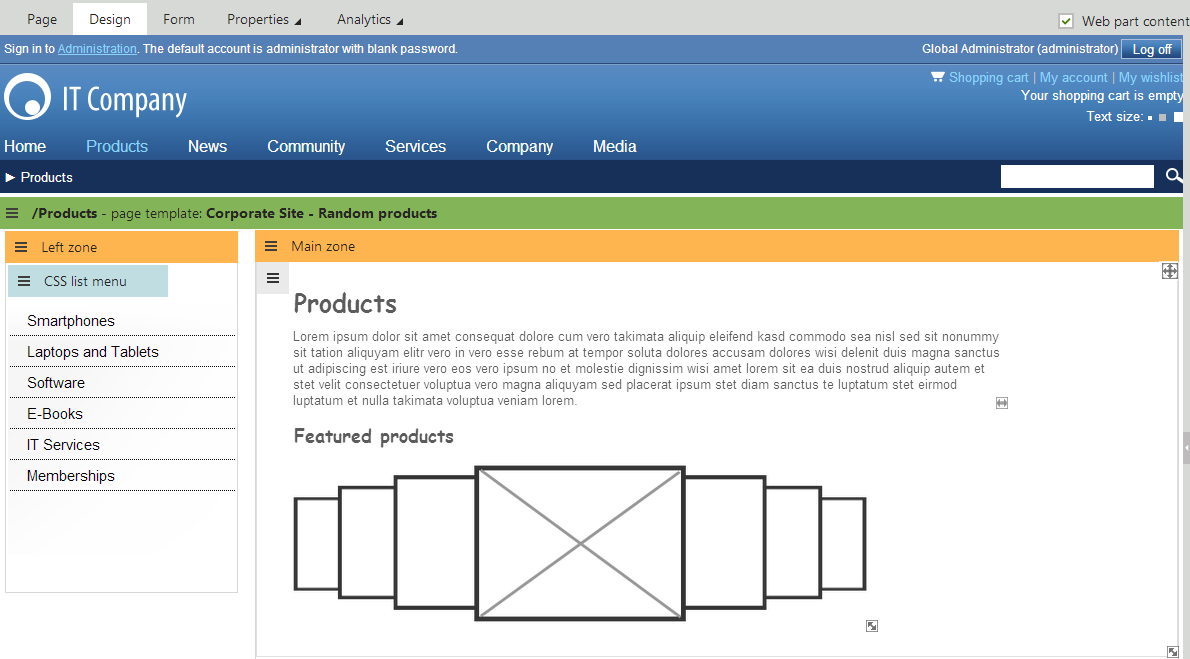
Such pages do not display their wireframe content on the live site, but users can view the wireframe components while editing the document in the Pages application and in Preview mode.
Defining wireframe content
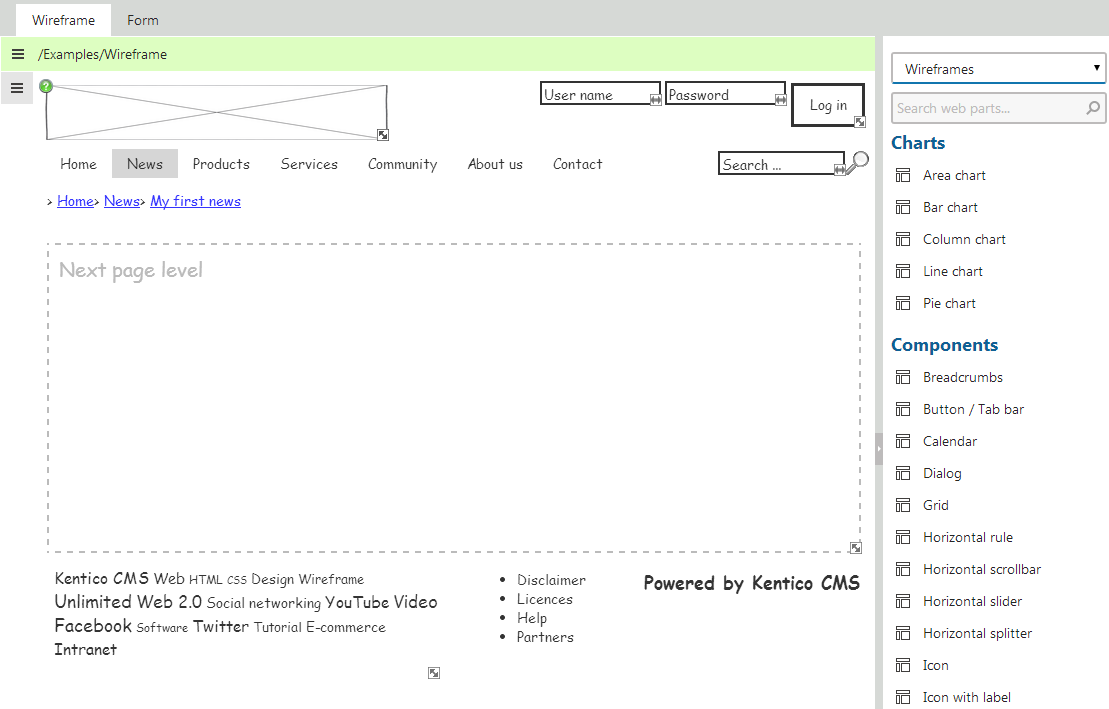
To edit a wireframe, select the corresponding document in the Pages application and switch to the Wireframe tab. You can place any number of components onto the wireframe. Wireframe components are a special type of web parts. Kentico contains a set of default wireframing components and you can also develop your own. When users add content to a wireframe, the system stores it on the assigned template.
Wireframes do not support workflow. Dedicated wireframes always behave as unpublished documents.
Adding components
To add components (web parts) onto the wireframe, drag items from the web part toolbar. You can use two approaches to find components in the toolbar:
- Type the name of the component or its part into the search box
- Select a category at the top of the toolbar
Alternatively, click the menu button () in the corner of the wireframe zone, select Add new web part in the menu, and choose a component through the Select web part dialog.
Editing content
Double-click components to quickly modify their primary content. Depending on the type of the component, you can edit text, select an image, or specify a color. Some components have multiple editable sections.
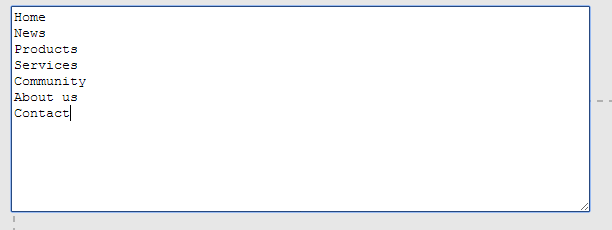
When editing text values, you can use the following formatting syntax:
- [a]Text[/a] - displays the text as a standard hyperlink
- [i]Text[/i] - displays the text in italics
- [b]Text[/b] - makes the text bold
- [u]Text[/u] - underlines the text
- [d]Text[/d] - displays the text as a disabled element (grayed out)
- {color:Red}Text{color} - displays the text in red. You can apply any other CSS styles in format: {cssProperty:Value}Text{cssProperty}
- \n - inserts a line break (for values that have a single-line editing field)
Multiple formatting tags can be applied to the same text.
You can also insert various types of elements into the text by adding transformation expressions:
|
Element |
Text expression |
|
Checkbox (checked) |
[x] |
|
Checkbox (unchecked) |
[ ] |
|
Radio button (selected) |
(o) |
|
Radio button (unselected) |
( ) |
|
Minus icon |
[-] |
|
Plus icon |
[+] |
|
Up arrow |
[^] |
|
Down arrow |
[v] |
|
Up/down icon (spinner) |
[^v] |
|
Left arrow |
[<] |
|
Right arrow |
[>] |
|
Directory icon |
[dir] |
|
File icon |
[file] |
|
Document icon |
[doc] |
|
Indentation space |
[_] |
|
The number of underscore characters determines the indentation size. For example: [____] |
Moving components
You can relocate components by dragging them to any position in the wireframe. Some components with advanced functionality must be moved using the drag icon (). If a component extends beyond the borders of the wireframe after being relocated, the dimensions increase to fit the component.
You can disable automatic zone resizing by holding down the CTRL key while dragging, which crops the component if necessary (i.e. hides the sections that do not fit into the zone).
Grouping wireframe components
To create a group of multiple components that you can move as a single unit:
- Add the Wireframe area component from the Layouts sub-category.
- Place the required components into the new sub-section.
- Drag the Wireframe area to relocate the entire section.
Resizing items
You can dynamically change the dimensions of many types of wireframe components by dragging the arrow icon in their bottom right corner.
Advanced actions
Right-click components to access their menu:
- Configure - allows you to set the component’s web part properties. The available properties depend on the particular component. All wireframe web parts have the Comments property, which allows you to enter annotations or any other notes. The component displays the comment in the wireframe as the tooltip of an additional help icon.
- Bring forward - moves the component to the foreground of the wireframe, in front of all other components that occupy the same space.
- Send backward - moves the component to the background, behind other components that share the same space.
- Copy / Paste - creates a copy of the component. You can copy components to other wireframes on the same website.
Removing components
To delete a component from the wireframe, right-click the item and select Remove in the menu.