
Defining custom form layout
When defining forms (using the Form builder or the Field editor), the created forms use a default table layout. This way, you can only define the fields with their labels and specify the order of the fields.
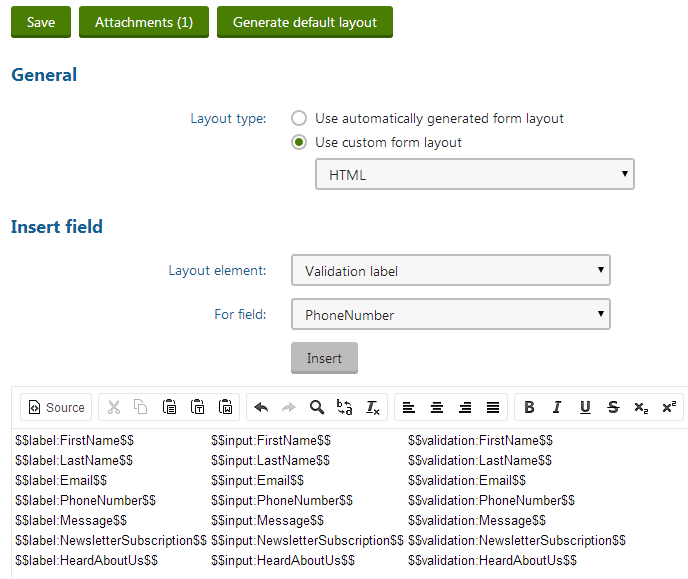
If you’re not satisfied with the default table layout of forms, you can define your own custom layout for individual forms. The custom layout can be defined on the Layout tab of a form’s editing interface in the Forms application.
To modify the default layout of a form:
Open the Forms application.
Edit () a form.
Switch to the Layout tab.
Select Use custom form layout.
Select HTML or ASCX as the Layout type.
Click the Generate default layout button.
- This will generate a table containing all fields of the form with appropriate labels, input controls and validation controls.
- Alternatively, you may select the Layout element and field and click the Insert button. This allows you to include just the fields that you want to appear in the form.
Alter the appearance of the form using actions on the text editor toolbar or using ASCX markup.
For example, type a text above the form, select it and apply the Heading 2 format through the text editor toolbar.
(Optional) Click Attachments in the tab’s header to upload files with the form.
- The form’s attachments can then be pasted into the layout using the Paste to text button.
Click Save to save the new layout.
You have changed the form layout. If you have already added the form to the live site, its appearance changes automatically.