
Working with product options
Product options offer your customers greater variability in choosing the right product. The system allows you to organize the options by dividing them into categories of the following types:
- Attribute (e.g. Color of clothing)
- Products (e.g. Portable PC accessories, Configurable PC - Operating system)
- Text (e.g. Book - Inscription)
You can then offer and sell product options together with selected products and services.
For example, your on-line store sells books (products) and your customers can optionally buy the books with inscriptions (product options). Or perhaps your store sells T-shirts and allows your customers to buy the T-shirts (products) in multiple colors (product options).
Another use of product options consists in offering them as special additions to the products. For example, your store sells portable computers (main products), and your customers can optionally order the computers with portable printers (product options).
Besides, you can offer product options as components of products they constitute. For example, hardware components (product options) of a configurable computer system (main product).
You can also offer combinations of product options from multiple product option categories as variants of the main product. For example, the T-shirts (main products) that you offer in your on-line store are available in different sizes and colors (product options from two different product option categories). Each combination of size and color for a given T-shirt (product variant) behaves in the system as a separate product. This means that each variant has its own product number, price and stock records.
Currently, the system doesn’t support volume discounts for product options.
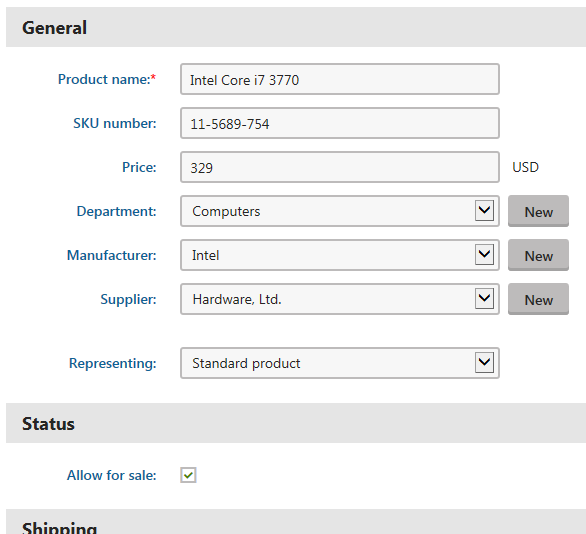
You can manage product options in the Kentico E-commerce Solution administration interface, as described below.
You can also manage product options for selected products in the Pages application while editing the corresponding product documents on the SKU -> Options tab.
Creating product options
Each product option in the Kentico E-commerce Solution belongs to a product option category. To be able to use product options, you first need to create product option categories.
Creating product option categories
You can create product option categories in the Product options application.
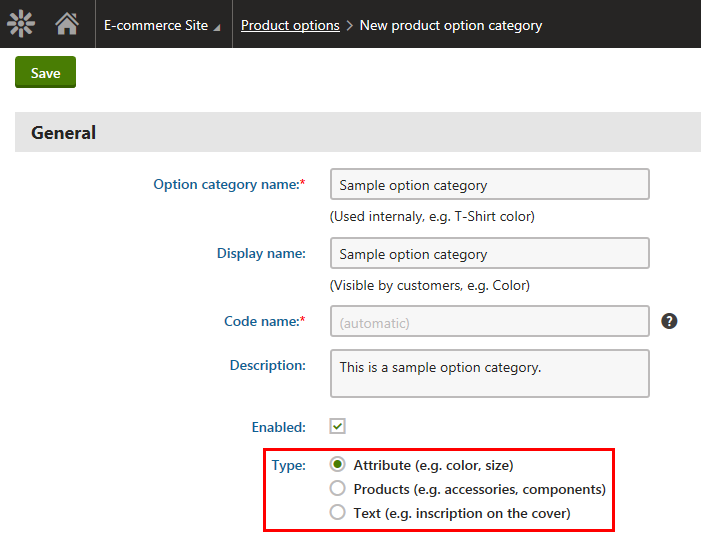
Click New product option category.
Enter category properties in the General section.
Based on your selection of the type of the category, the system displays more properties in the Options section.
- Attribute - the options represent product attributes, e.g. product’s different colors or sizes.
- Products - the options represent separate products that your customers can optionally purchase together with the main product, e.g. you can offer PCs with printers as options. Options in this category can also represent components of a product, e.g. hardware components of a configurable PC.
- Text - the options allow your customers to purchase products with optional texts. For example, you can offer books with inscriptions.
Click Save.
- The system displays the Options section.
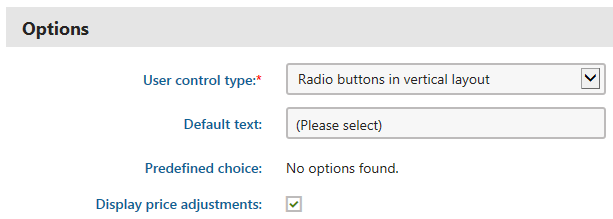
Enter category properties in the Options section.
Options section available for the Attribute and Products type option categories:
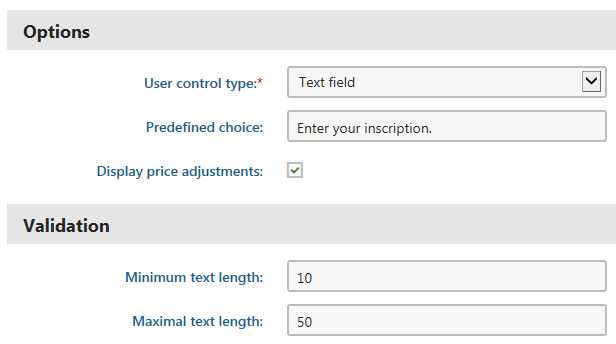
Options section available for the Text type option category:
Click Save.
The system creates an empty product option category of the selected type. You can now add product options to the category.
Creating product option categories while editing products
You can also create product option categories in the Products application while editing products on the Options -> Option categories tab.
- Click New category.
- Enter category properties (see Step 2 through Step 4 in this section).
- Click Save and close the dialog.
If you create a product option category this way, the category is automatically assigned to the respective product.
Adding product options to product option categories
You can add product options only to product option categories of the Attribute and Products types.
This is because categories of the Text type contain only one option, which the system adds automatically.
You can add new product options to existing product option categories in the Product options application.
Select a product option category and click Edit ().
Switch to the Options tab.
Perform the corresponding action:
- Click New option if you are adding a new option to a category of the Attribute type.
- Click New product if you are adding a new option to a category of the Products type.
Enter option properties.
Adding a product option to a category of the Attribute type:
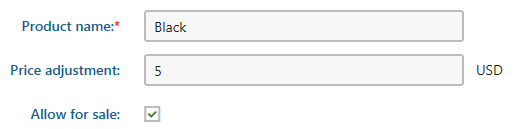
Adding a product option to a category of the Products type:
Click Save.
- (Optional) Click Save and create another (if you want to create more than one option).
The system adds product options to the given category. You can now use the options in your on-line store. For example, you can add the options to selected products, modify options’ properties, etc.
Adding product options to product option categories while editing products
You can also add product options to product option categories in the Products application while editing products on the Options -> Option categories tab.
Select a product option category and click Edit category properties().
Switch to the Options tab .
Perform the corresponding action, i.e. New option or New product.
Enter option properties (see Step 4 in this section).
Click Save and close the dialog.
- (Optional) Click Save and create another (if you want to create more than one option).
Adding product options to products
In Kentico, you cannot add product options to your products directly. If you want to use options for your products, you must add to each product at least one (non-empty) option category. Later you can specify that the system should use for the products only selected options from the assigned categories (applies to Attribute and Products categories only). Otherwise, the system uses all options from these categories.
Adding product option categories to products
You can add product option categories to products in the Product options application.
Select a product option category and click Edit ().
Switch to the Products tab.
Click Add products.
- The system opens the Select products dialog.
Select the required products.
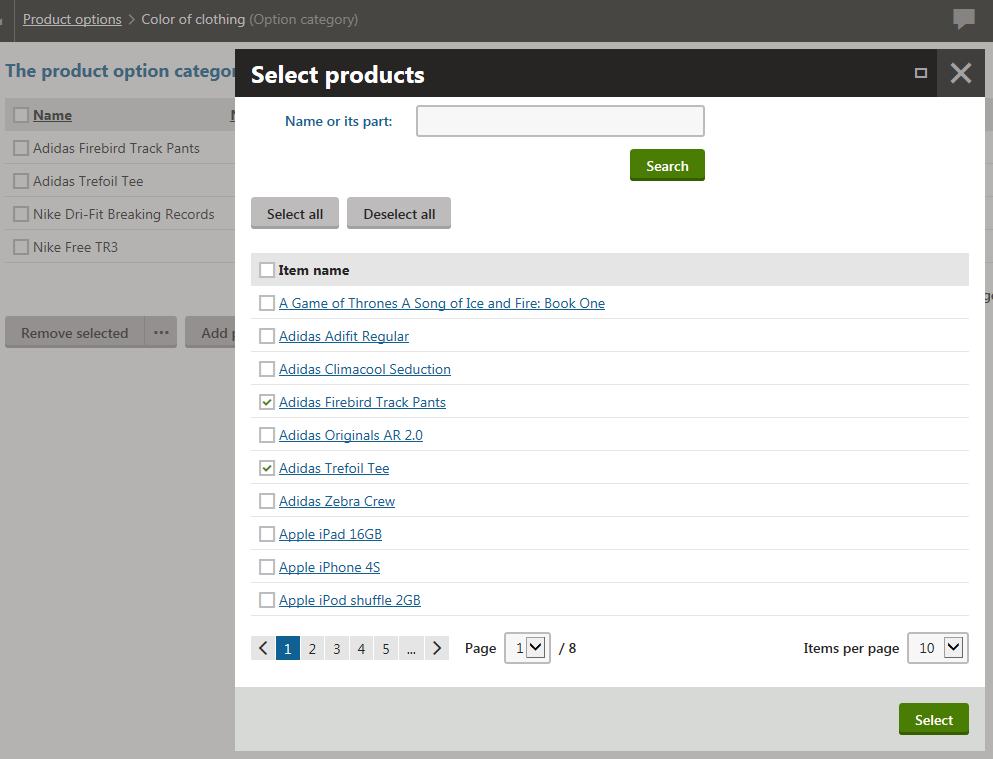
Click Select.
The system adds to the selected products the current product option category including all product options contained in the category. You can now specify which options from this category the system should use for the products.
Adding product option categories to products while editing products
You can also add product option categories to products in the Products application while editing products on the Options -> Option categories tab.
Adding product option categories to multiple products at once (while editing a product)
Select a product option category and click Edit category properties().
Switch to the Products tab.
Click Add products.
- The system opens the Select products dialog.
Select the required products.
Click Select.
The system adds to the selected products the current product option category including all product options contained in the category.
Adding multiple product option categories to the currently edited product
Click Add categories.
- The system opens the Select product option categories dialog.
Select the required categories.
Click Select.
The system adds to the currently edited product the selected product option categories including all product options contained in the categories.
Adding a new product option category to the currently edited product
- Click New category.
- Enter category properties.
- Click Save and close the dialog.
The system assigns to the currently edited product the new option category (empty). Now you need to add some options to this category.
Selecting available options for products
You can specify available options for products while editing the products in the Products application.
Select a product and click Edit ().
Switch to the Options -> Option categories tab.
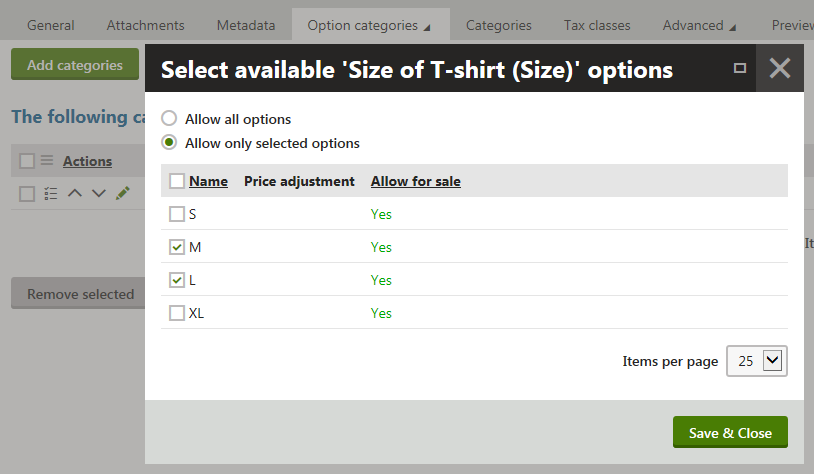
Select a product option category (if available) and click Select available options ().
The system opens a dialog where you can specify available options for the product.
(Optional) If the system doesn’t offer any product option category for the product, you can add some by clicking Add categories.
(Optional) If the system doesn’t offer any product option category for the product, you can add a new category by clicking New category.
Select the options as required.
- Allow all options - the system offers to the users for the product all options from the current category.
- Allow only selected options - the system offers to the users for the product only selected options from the current category.
Click Save & Close.
The system now offers to the users for the product only specified product options.
Applying taxes to product options
The Kentico E-commerce Solution allows you to specify which taxes should apply to product options belonging to product option categories of the Products type.
Product options from other category types (Attribute, Text) use tax classes assigned to the main products.
This means the options use tax classes assigned to the products with which you offer them.
You can add taxes to product options in the Product options application.
Select a product option category of the Products type and click Edit ().
Switch to the Options tab.
Select a product option and click Edit ().
Switch to the Tax classes tab.
Click Add tax classes.
- The system opens the Select tax class dialog.
Select the required tax classes.
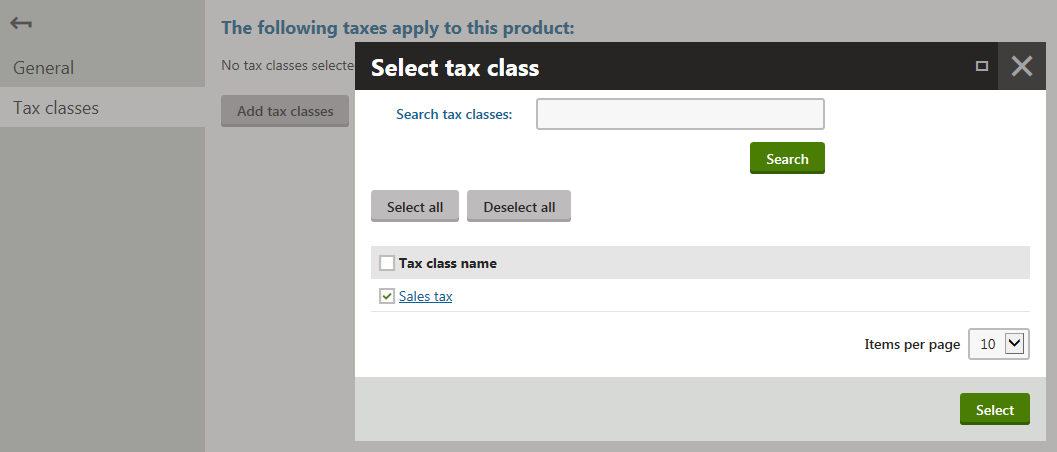
Click Select.
The system adds the tax(es) to the product option. When your customers purchase products with this option, the system applies to the option the selected tax(es).
Applying taxes to product options while editing products
You can also apply taxes to product options in the Products application while editing products on the Options -> Option categories tab.
Select a product option category of the Products type and click Edit ().
Switch to the Options tab.
Select a product option and click Edit ().
Switch to the Tax classes tab.
Click Add tax classes.
- The system opens the Select tax class dialog.
Select the required tax classes.
Click Select.
Modifying product options
You can modify product options in the Product options application.
Select the product option category that contains the option you want to modify and click Edit ().
- This opens the category’s General tab where you can modify option category properties.
Switch to the Options tab.
Select a product option and click Edit ().
Modify product option properties as required.
Click Save.
You can now use the product option (product option category) with its updated settings.
You can also modify product options in the Products application while editing products on the Options -> Option categories tab.
Removing product options
You can remove product options from your on-line store in the Product options application.
You cannot remove product options from Text product option categories. This is because each category of this type contains just one option.
If you need to remove such options, remove the categories in which they are contained.
Select the product option category that contains the options you want to remove and click Edit ().
(Optional) Delete () the category. The system removes all options contained in the category at once.
You cannot remove product option categories:
- if the system uses the contained options in at least one order.
- if the system uses the contained options in at least one product variant.
Switch to the Options tab.
Select a product option and click Delete ().
You cannot remove product options:
- if the system uses the options in at least one order.
- if the system uses the options in at least one product variant.
- (Optional) Repeat this step if you want to remove more options from the category.
The system removes the product option(s) from your on-line store.
You can also remove product options from your on-line store in the Products application while editing products on the Options -> Option categories tab.