Sending marketing emails
Before sending your marketing emails, you need to make sure that you have added their recipients.
Adding recipients to email campaigns
After you have created an email campaign, and also prepared the content of its marketing emails, you can add recipients to marketing emails.
- Open the Email marketing application on the Email feeds tab.
- Edit () an email campaign.
- On the Emails tab, edit () the marketing email for which you want to add recipients.
- Switch to the Email recipients tab.
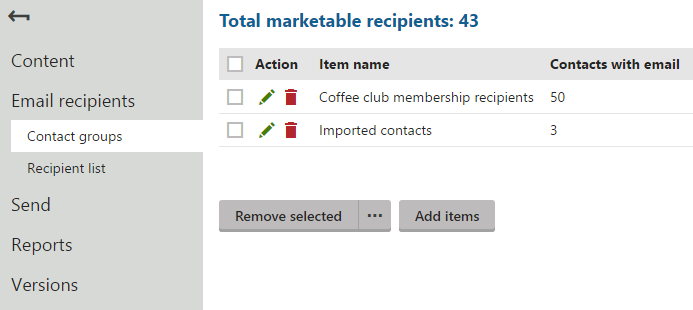
- On the Contact groups tab, click Add items to add contact groups as recipients.

- Select the contact groups and click Select.
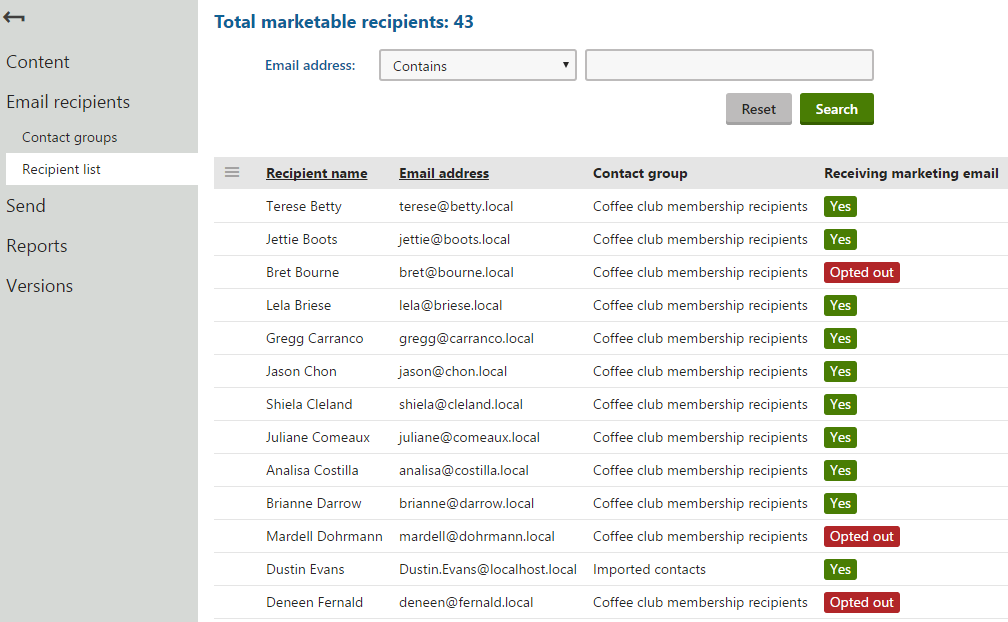
- (Optional) Switch to the Recipient list tab to see whether contacts from the added contact groups are receiving your marketing emails.

You can add different contact groups as recipients for each marketing email of your email campaigns.
Marketable recipients
Marketable recipients are contacts that are receiving your marketing emails and have the Yes status. Contacts that unsubscribed from all marketing emails have the Opted out status. Contacts that reached the maximum number of bounces and do not receive any marketing emails have the Undeliverable status.
Adding recipients to newsletters
After you have created a page-based or template-based newsletter, you can add recipients to newsletters.
- Open the Email marketing application on the Email feeds tab.
- Edit () a newsletter.
- Switch to the Recipients tab.
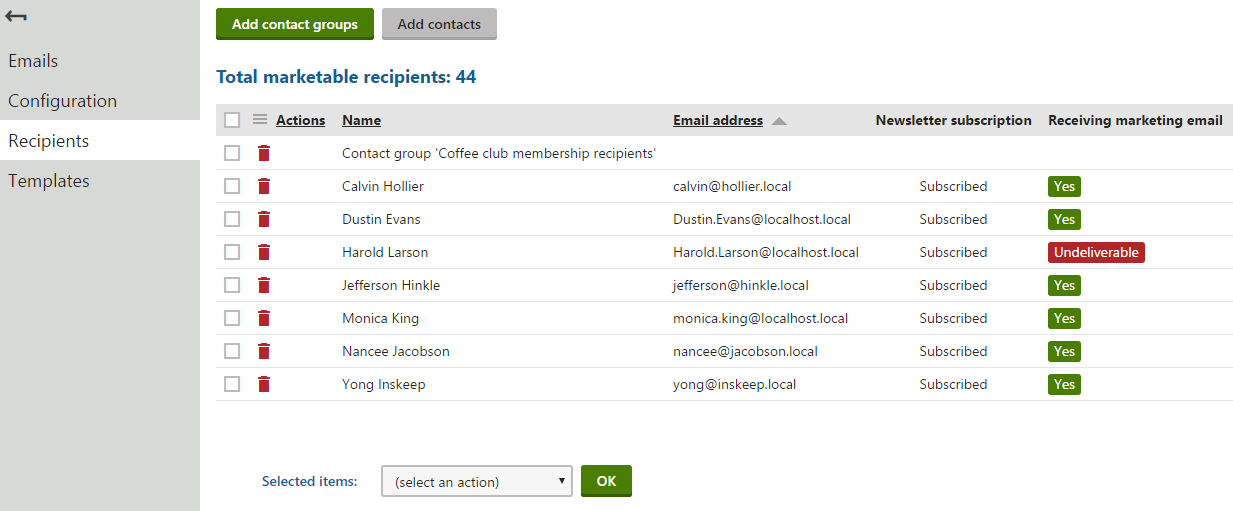
- Click Add contact groups.
- Select a contact group and click Select.
- (Optional) Click Add contacts.
- (Optional) Select contacts and click Select.

You can use the Add contact groups and Add contacts buttons to select contact groups and contacts as recipients of your newsletters.
Newsletter and email campaign unsubscription
The content of a page-based newsletter is loaded from a web page. To allow users to cancel their subscription, place the UnsubscribeLink macro {%UnsubscribeLink|(resolver)subscriber%} on the source page. The macro creates a link that unsubscribes recipients directly.
If you want to allow users to cancel their subscription to a template-based newsletter or an email campaign, place the UnsubscribeLink macro {%UnsubscribeLink%} into the email body.
If you want to allow users to unsubscribe from all marketing emails at once, you will need to place the UnsubscribeFromAllCampaigns macro on the source page: {%UnsubscribeFromAllCampaigns|(resolver)subscriber%}.
Sending template-based marketing emails
After you have prepared the content of template-based marketing emails and added their recipients, you can proceed to send the template-based newsletters and email campaigns.
To send individual template-based marketing emails:
Open the Email marketing application on the Email feeds tab.
Edit () an email campaign or a template-based newsletter.
On the Emails tab, edit () the marketing email which you want to send.
Switch to the Send tab.
Choose when the system sends out the email:
- Click Save schedule to send out the email on the specified date and time.
- Click Send now to send out the email immediately to all recipients.
You can view a list of sent emails on the template-based newsletter’s or email campaign’s Emails tab.
Sending page-based newsletters
Page-based newsletters are sent out automatically using the built-in scheduling system. When creating a page-based newsletter, you can enable scheduling mail-outs and configure the mail-out interval. The system then creates a new scheduled system task named Send page-based email: <newsletter name> for the current site. The system task reads the content of the newsletter’s source page and sends out the newsletters to the recipients according to the set time interval.
You can view a list of sent emails on the page-based newsletter’s Emails tab.
Using the external scheduling service
To ensure reliable sending of page-based newsletters even when your web application is inactive, you can use the external Windows scheduling service.
- Go to Settings -> On-line marketing -> Email marketing.
- Enable the Use external service for page-based newsletters setting for your website.
This does not change the settings of existing page-based newsletter tasks. To configure the existing page-based newsletters to use the external scheduler:
- Open the Scheduled tasks application.
- Select the site and switch to the System tasks tab.
- Edit () the corresponding Send page-based email tasks.
- Enable the Use external service property.
- Click Save.
Manually sending page-based newsletters
You can send out a page-based newsletter at any time through the Send tab. The tab allows sending both regular newsletters to all recipients and draft emails to specified addresses.
To send a page-based newsletter to all recipients manually:
- Open the Email marketing application on the Email feeds tab.
- Edit () the page-based newsletter.
- Switch to the Send tab.
- Select the Send now to all recipients option.
- Click Send.
If you experience problems with sending and receiving emails, try following the instructions on the Troubleshooting marketing emailspage.
Blocking the page-based newsletter mail-out
If you want to block the mail-out of the page-based newsletter (for example if there is no new content on the source page), you can:
- Disable the Schedule mail-outs property of the page-based newsletter on its Configuration tab.
- Set the title of the source page to ##DONOTSEND## (if the source page is managed in Kentico). You can change the page title by selecting the corresponding page from the content tree in the Pages application and editing the Page title field on the Properties -> Metadata tab.
Resending marketing emails
If you want to resend a marketing email, you need to clone it first.
- Open the Email marketing application on the Email feeds tab.
- Edit () an email campaign or a newsletter.
- On the Emails tab, click Other actions () next to the email you need to clone.
- Select Clone.
- (Optional) Change the cloned email’s name in the New object display name field.
- Click Clone.
Now that you have cloned the marketing email, you can manage it on the email campaign’s or newsletter’s Emails tab.