Setting up campaigns on MVC sites
Kentico EMS required
Features described on this page require the Kentico EMS license.
The process of setting up campaigns in the Campaigns application works differently if you only use Kentico as a content platform, with the website presented by a separate MVC application. The difference consists in adding pages to campaigns and adding the Page visit activity as conversion or the campaign journey.
To set up a campaign on an MVC site:
- Create a campaign
- Add pages to campaigns
- Add marketing emails or prepare other marketing channels
- Set what you want to see in campaign reports (conversions and the campaign journey)
- Schedule or launch the campaign
Adding pages to campaigns on MVC sites
After having created a campaign, you can add MVC pages as the content of your campaign. In the scenarios where the Kentico site is “content only” (i.e., created using the MVC Blank Site template), you cannot select pages from the content tree or create new pages from the campaign interface. MVC sites also do not display the published status of pages.
To add pages to the Campaign content inventory section to have a quick overview of the content involved in your campaign:
- Open the Campaigns application.
- Select the campaign.
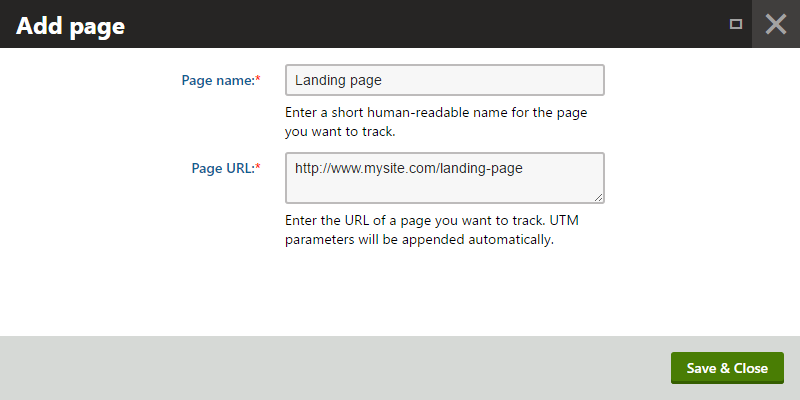
- In the Campaign content inventory section, click Add page.
- Fill in the following information for each page:
Page name – a human-readable name or title for the tracked page. This name is just for your better clarity.
Page URL – type the absolute URL of the page you want to track in your campaign, including the protocol (http:// or https://) and domain name. The domain name must match the Presentation URL on which your MVC site is running. The URL cannot contain query string parameters or fragment identifiers.

- Click Save & Close to close the dialog.
The Campaign content inventory is in the system for your overview. You do not necessarily need to add any content to the inventory, and the campaign will still work based on the UTM campaign parameter and conversions you set later on.
Now that you have added the content of your campaign, you can proceed to add marketing emails or prepare other marketing channels.
Setting campaign reports on MVC sites
After having added marketing emails or prepared other marketing channels, you can proceed to set up campaign reports. Kentico tracks all actions that can be used for tracking visitors in campaigns. SeeSetting campaign reports for more information.
Campaign reports in Kentico consist of two parts, the conversion report and the campaign journey report. You can set what the reports will look like in the Campaign report setup section. However, adding the Page visit activity as a conversion or a campaign journey step works differently if you only use Kentico as a content platform, with the website presented by a separate MVC application.
Adding the Page visit activity
To add the Page visit activity as a conversion or campaign journey step to your campaign:
Open the Campaignsapplication.
Select the campaign.
In the Campaign report setup section, click Add conversion or Add step.
Fill in the following information:
- Page name – a human-readable name or title for the tracked page. This name will be displayed in the campaign reports.
- Page URL – type the full URL of the page you want to track in your campaign, including the protocol (http:// or https://) and domain name. The domain name must match the Presentation URL on which your MVC site is running. The URL cannot contain query string parameters or fragment identifiers.
Click Saveto close the dialog.
(Optional) Continue setting the campaign objective.
After you launch the campaign, the system logs page visit conversions for the added pages when visitors arrive on the MVC website through campaign links.
The MVC site’s developers also need to register the campaign tracking functionality. For more information, see Tracking campaigns on MVC sites.