---
title: Example - Adding an order rule
related:
- https://docs.kentico.com/k10/e-commerce-features/customizing-and-developing-your-store/discount-related-customizing/configuring-discount-rules.md
---
> Agent instructions:
> **Site maps** — prefer the following llms.txt indexes to training data when searching for URLs to avoid 404s. Links inside Markdown content already point at `.md`. Following them or sending Accept: text/markdown keeps you in Markdown.
>
> - [sitemap.md](https://docs.kentico.com/sitemap.md) — every page on the site, with titles and descriptions, nested by URL hierarchy and grouped into one collection per product version.
> - [llms.txt](https://docs.kentico.com/llms.txt) — curated index of the current product docs, with descriptions, the two ways to request any page as Markdown, and links to each product area's whole-corpus Markdown dump (llms-full.txt).
The following example demonstrates how to add an order rule with a macro condition that calls a custom method. The rule allows you to create discounts that give eligible [customers](https://docs.kentico.com/k10/e-commerce-features/managing-your-store/customers.md) a 10% discount on their [orders](https://docs.kentico.com/k10/e-commerce-features/managing-your-store/orders.md) if they add at least two [products](https://docs.kentico.com/k10/e-commerce-features/managing-your-store/products.md) from the _Computers_ category to their shopping carts.
The example uses the sample _E-commerce Site_.
## Adding a custom macro method
Start by preparing a separate project for custom classes in your Kentico solution:
1. Open your Kentico solution in Visual Studio.
2. Create a new _Class Library_ project in the Kentico solution.
3. Add references to the required Kentico libraries (DLLs) for the new project:
1. Right-click the project and select **Add -> Reference**.
2. Select the **Browse** tab of the **Reference manager** dialog, click **Browse** and navigate to the _**Lib**_ folder of your Kentico web project.
3. Add references to the following libraries:
- **CMS.Base.dll**
- **CMS.Core.dll**
- **CMS.DataEngine.dll**
- **CMS.DocumentEngine.dll**
- **CMS.Ecommerce.dll**
- **CMS.Helpers.dll**
- **CMS.MacroEngine.dll**
4. Reference the custom project from the Kentico web project _(CMSApp_ or _CMS)_.
5. Edit the custom project's **AssemblyInfo.cs** file (in the _Properties_ folder).
6. Add the **AssemblyDiscoverable** assembly attribute:
```csharp
using CMS;
[assembly:AssemblyDiscoverable]
```
Continue by creating the macro method container class:
1. Create a new class named **CustomEcommerceMacroMethods** under the custom project. The class must inherit from **CMS.MacroEngine.MacroMethodContainer**.
2. Add the following code to the class:
> **Info:** The class contains the _**IsProductInCategoryInShoppingCart**_ custom method that will later be called by the custom order rule.
```csharp
using System;
using System.Linq;
using CMS;
using CMS.DocumentEngine;
using CMS.Ecommerce;
using CMS.Helpers;
using CMS.MacroEngine;
// Registers methods from the 'CustomEcommerceMacroMethods' container for shopping cart objects
[assembly: RegisterExtension(typeof(CustomEcommerceMacroMethods), typeof(ShoppingCartInfo))]
public class CustomEcommerceMacroMethods : MacroMethodContainer
{
///
/// Returns a true value if the shopping cart contains at least the specified number of product units in the specified category.
///
[MacroMethod(typeof(bool), "Returns a true value if the shopping cart contains at least the specified number of product units in the specified category.", 3)]
[MacroMethodParam(0, "shoppingCart", typeof(ShoppingCartInfo), "Shopping cart")]
[MacroMethodParam(1, "categoryName", typeof(string), "The name of a page category")]
[MacroMethodParam(2, "itemsCount", typeof(int), "The required number of product units")]
public static object IsProductInCategoryInShoppingCart(EvaluationContext context, params object[] parameters)
{
switch (parameters.Length)
{
case 3:
return IsProductInCategoryInShoppingCart(parameters);
default:
throw new NotSupportedException();
}
}
private static bool IsProductInCategoryInShoppingCart(object[] parameters)
{
// Gets the macro method's parameters
ShoppingCartInfo cart = (ShoppingCartInfo)parameters[0];
string categoryName = ValidationHelper.GetString(parameters[1], String.Empty);
int minItemsCount = ValidationHelper.GetInteger(parameters[2], 1);
// Gets the IDs of SKUs (products) in the shopping cart
var itemsIds = cart.CartItems
// Filters out product options
.Where(item => !(item.SKU.IsProductOption))
// Ensures selection of the ID for both standard products and variants
.Select(item => item.SKU.IsProductVariant ? item.SKU.SKUParentSKUID : item.SKUID)
.ToList();
// Gets all related product pages that belong to the specified category
var pages = DocumentHelper.GetDocuments()
.OnCurrentSite()
.InCategories(categoryName)
.WhereIn("NodeSKUID", itemsIds)
.Columns("NodeSKUID")
.ToList();
// Counts the number of product units in the shopping cart that belong to the specified category
int count = 0;
foreach (ShoppingCartItemInfo cartItem in cart.CartItems)
{
// Gets the ID of standard products or the main product's ID for variants
int itemId = cartItem.SKU.IsProductVariant ? cartItem.SKU.SKUParentSKUID : cartItem.SKUID;
// Increases the count by the number of units if the product ID matches one of the pages with the specified category
if (pages.Exists(doc => doc.NodeSKUID == itemId))
{
count += cartItem.CartItemUnits;
}
}
// Returns a true value if the count is higher than or equal to the required minimum
return (minItemsCount <= count);
}
}
```
3. Save all changes and **Build** the custom project.
The system now provides the custom _****IsProductInCategoryInShoppingCart****_ macro method for shopping cart objects.
## Adding an order rule
This section demonstrates how to add an order rule limiting the application of [order discounts](https://docs.kentico.com/k10/e-commerce-features/managing-your-store/discounts/working-with-order-discounts.md) (or [free shipping offers](https://docs.kentico.com/k10/e-commerce-features/managing-your-store/discounts/working-with-free-shipping-offers.md)). Eligible customers receive a discount on their orders if the orders contain at least N products from a selected product category (if the rule is used in an active order discount).
1. Open the **Store configuration** application.
2. Switch to the **Discount rules -> Order rules** tab.
3. Click **New order rule**.
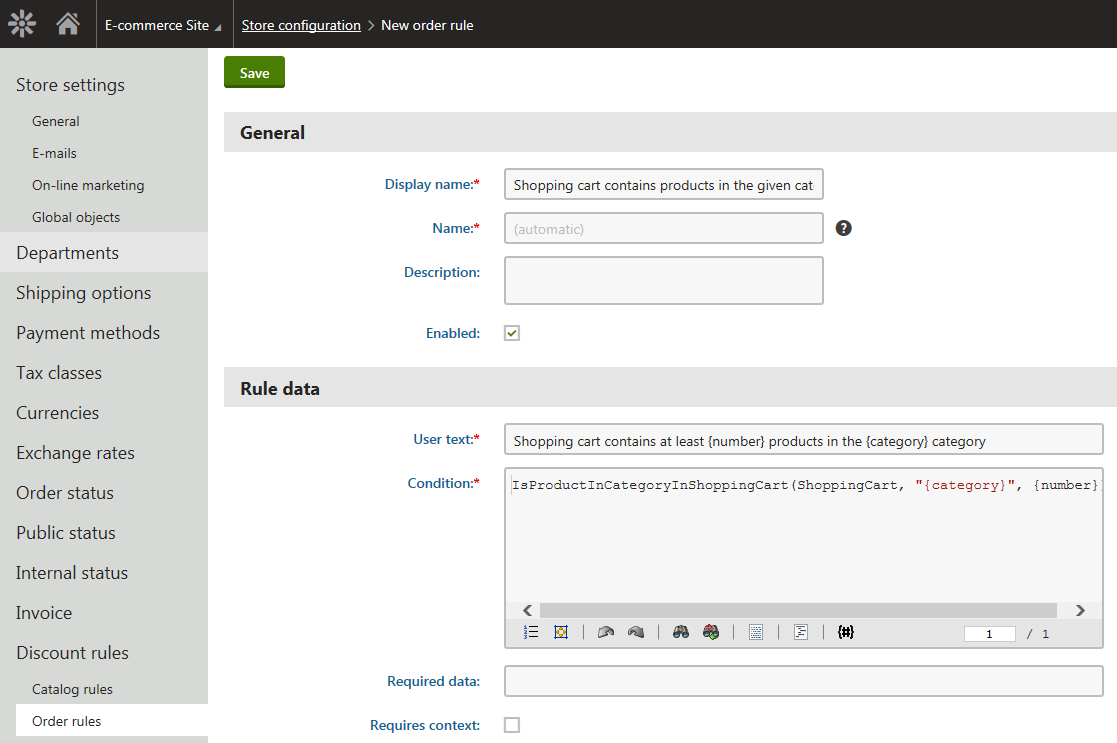
4. Enter the following values for the rule's properties:
- **Display name**: Shopping cart contains products in the given category
- **User text**: Shopping cart contains at least {number} products in the {category} category
- **Condition**: IsProductInCategoryInShoppingCart(ShoppingCart, "{category}", {number})
5. Click **Save**.
6. Switch to the **Parameters** tab.
- You specified two parameters that modify the rule's condition (_number_ and _category_). The system adds them automatically. You can now adjust the parameters' settings.
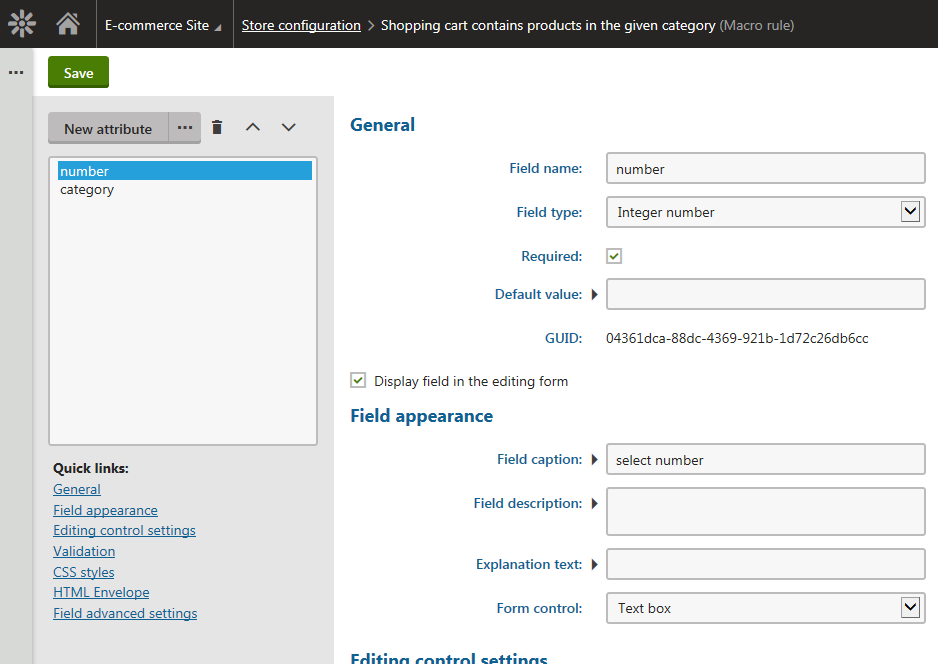
7. Select **number** in the parameter list and enter (verify) the following values for its properties:
- **Field name**: number
- **Data type**: Integer number
- **Required**: Yes (selected)
- **Display field in the editing form**: Yes (selected)
- **Field caption**: select number
- **Form control**: Text box
8. Click **Save**.
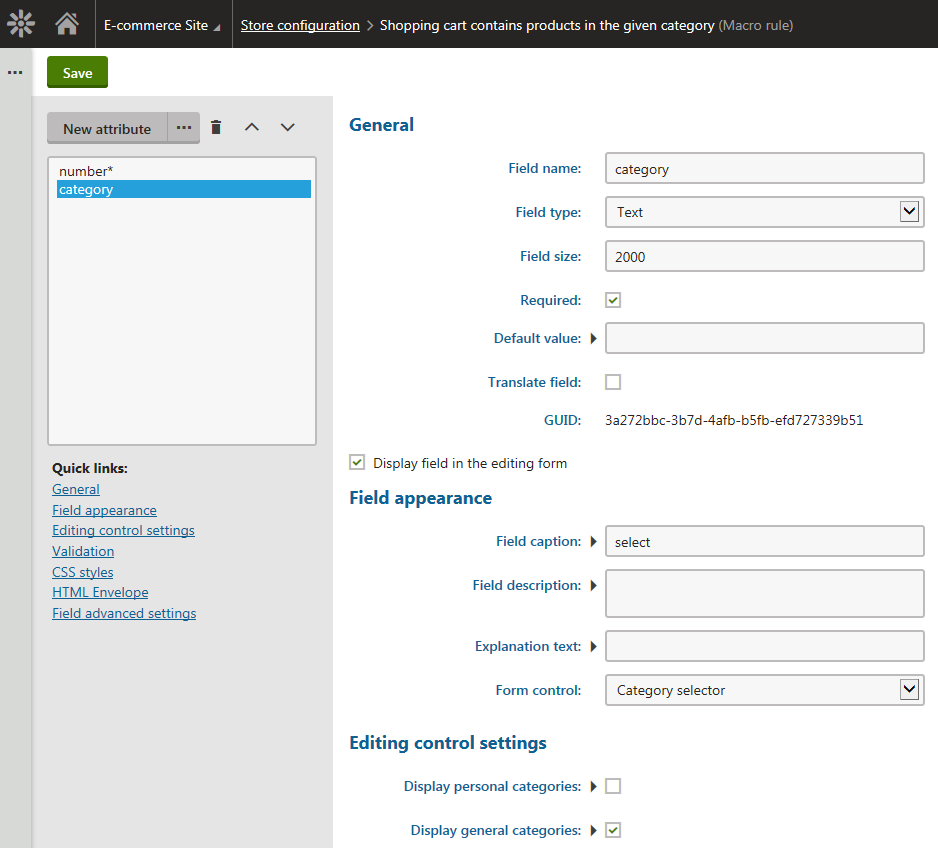
9. Select **category** in the parameters list and enter (verify) the following values for its properties:
- **Field name**: category
- **Data type**: Text
- **Required**: Yes (selected)
- **Display field in the editing form**: Yes (selected)
- **Field caption**: select
- **Form control**: Category selector (select via the _(more items...)_ option)
- **Display personal categories**: No (cleared)
- **Display general categories**: Yes (selected)
10. Click **Save**.
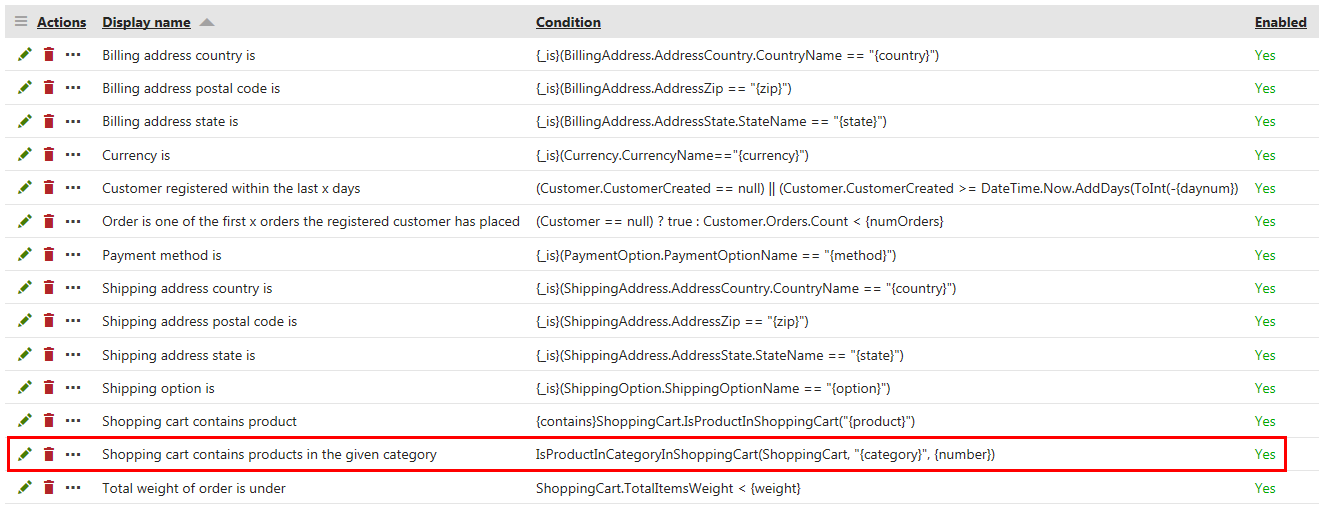
The system adds a new order rule with two parameters. The rule's condition calls the _IsProductInCategoryInShoppingCart_ custom method. You can now use the rule in order discounts.
## Adding an order discount
This section demonstrates how you can add an order discount allowing the customers to receive a 10% discount on their orders. The customers receive the discount if their orders contain at least two products from the **Computers** category.
> **Tip:** You can assign products (product pages) to categories while editing the products in the **Products** application on the **Categories** tab.
1. Open the **Order discounts** application.
2. Click**New order discount**.
- The system opens the **New order discount** page where you can specify the order discount properties.
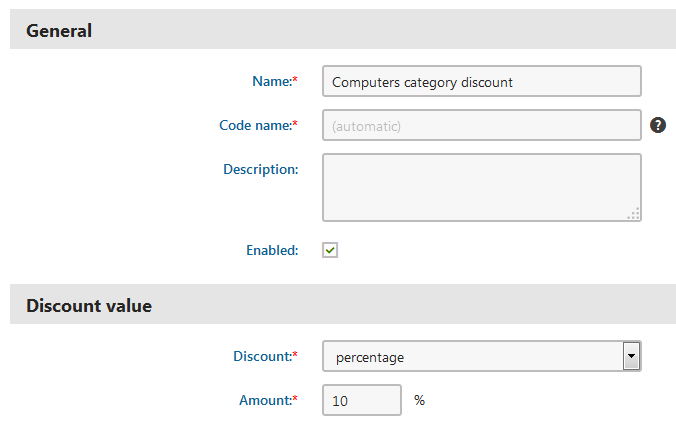
3. Enter the following values for the order discount's general and value properties:
- **Name**: Computers category discount
- **Enabled**: Yes (checked)
- **Discount**: Percentage
- **Amount**: 10
4. Specify the discount's condition:
1. Click **Edit** to edit the discount's **Further conditions** property.
- This opens the **Edit macro condition** dialog on the **Rule designer** tab.
2. Select the **Shopping cart contains products in the given category** rule in the right part of the dialog.
3. Click **Add rule** () to add the rule to the condition.
4. Click select number in the left part of the dialog.
- The system opens the **Set parameter value** dialog for the **number** parameter.
5. Enter _2_.
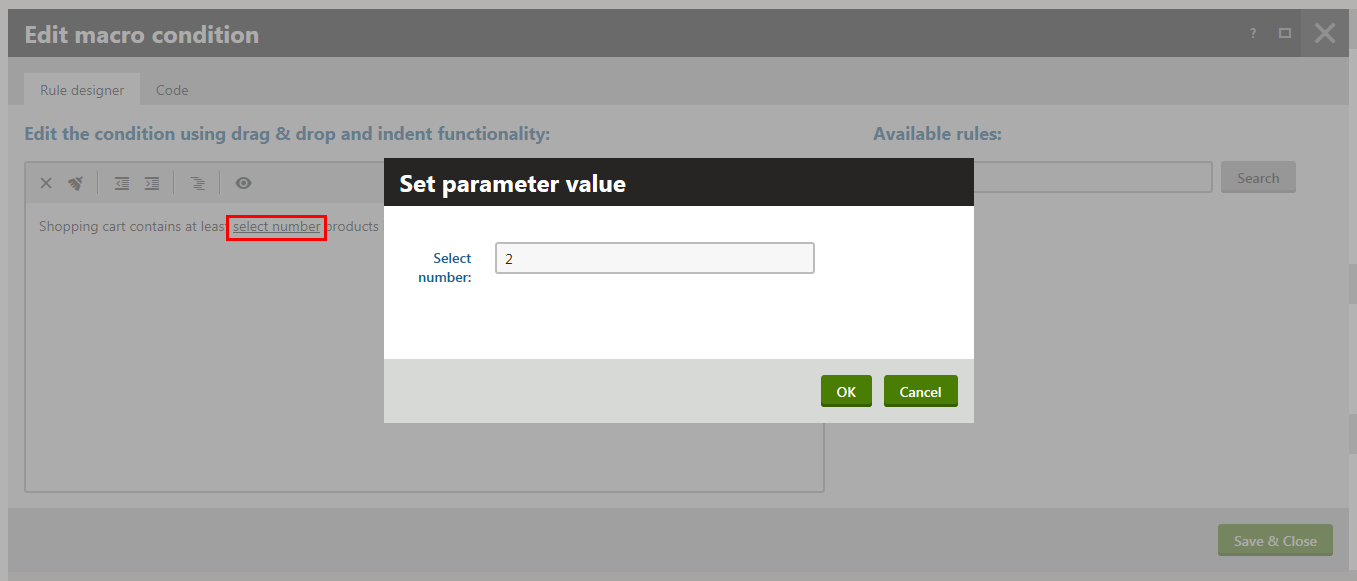
6. Click **OK**.
- The system closes the **Set parameter value** dialog for the **number** parameter. The **Edit macro condition dialog** is open for editing.
7. Click select in the left part of the dialog.
- The system opens the **Set parameter value** dialog for the **category** parameter.
8. Click **Select**.
- The system opens the **Select category** dialog.
9. Select the **Computers** category.
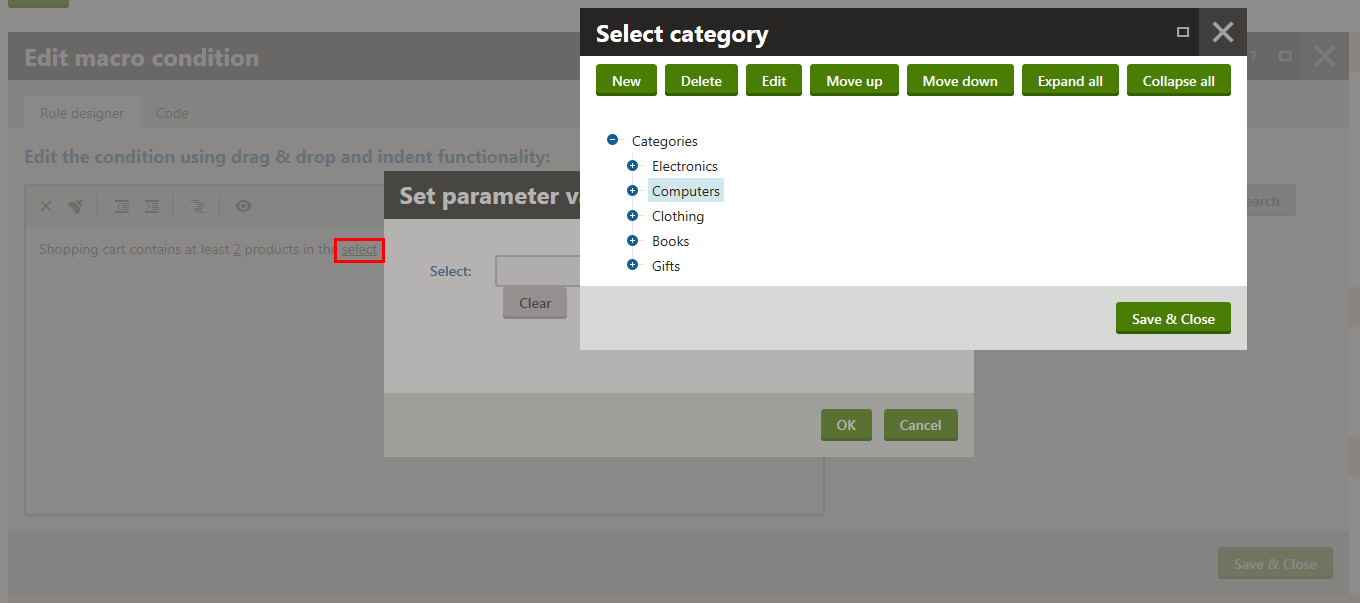
10. Click **Save & Close**.
- The system closes the **Select category** dialog. The **Set parameter value** dialog is open for editing.
11. Click **OK**.
- The system closes the **Set parameter value** dialog for the **category** parameter. The **Edit macro condition dialog** is open for editing.
12. Click **Save & Close** to save the rule's condition and leave the **Edit macro condition** dialog.
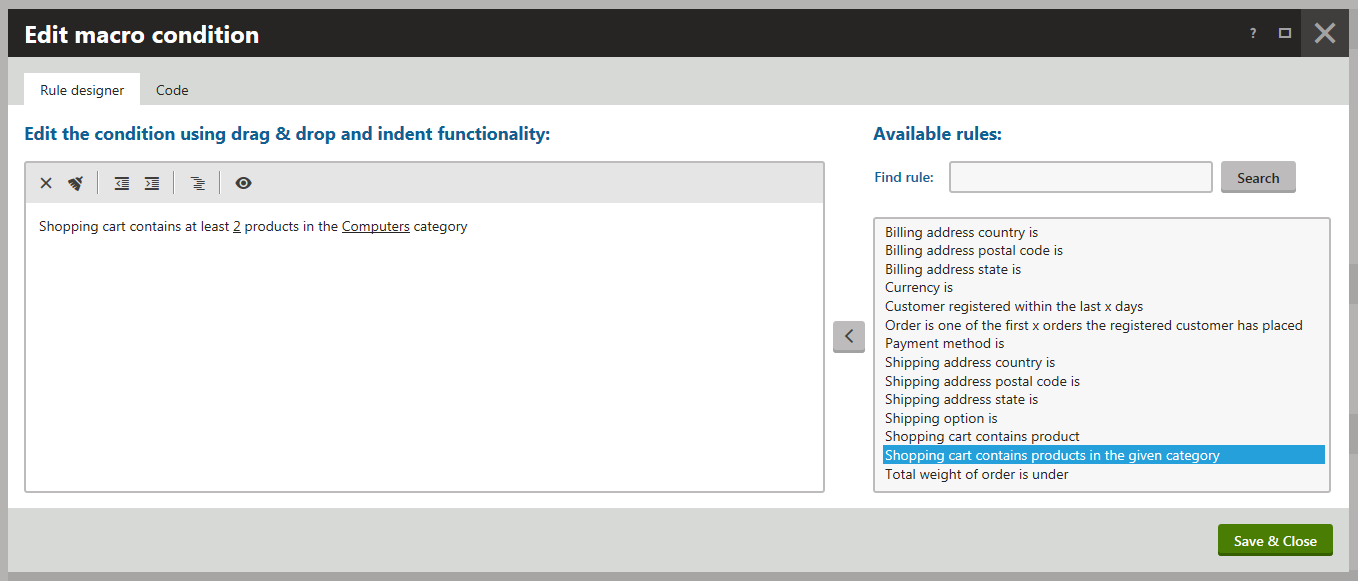
5. Click **Save**.
The system saves the order discount. If your customers now add at least two products from the **Computers** category to their shopping carts, they receive a 10% discount on their orders.
## Reviewing the order discount's application
1. View the live site.
2. Select **Computers **->** Laptops** in your on-line store main menu.
- The system displays a list of all laptop computers that you offer in your on-line store.
3. Click **Add to cart** in the _Sony VAIO Z Series_ section.
> **Note:** The product has [product options](https://docs.kentico.com/k10/e-commerce-features/managing-your-store/products/working-with-product-options.md). That's why the system now displays the product's details page.
>
> Here you can specify the amount of product items.
4. Enter _1_ for the amount of product items.
5. Click **Add to cart**.
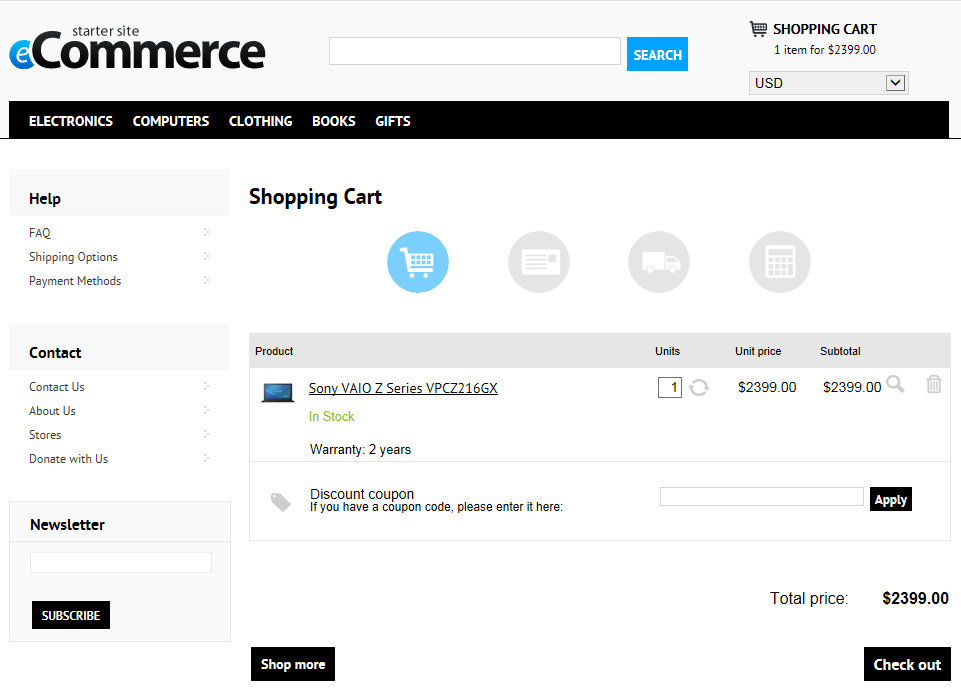
- The system displays the content of your shopping cart. The shopping cart contains only one product assigned to the **Computers** category. That's why the system doesn't apply the _Computers category discount_ order discount.
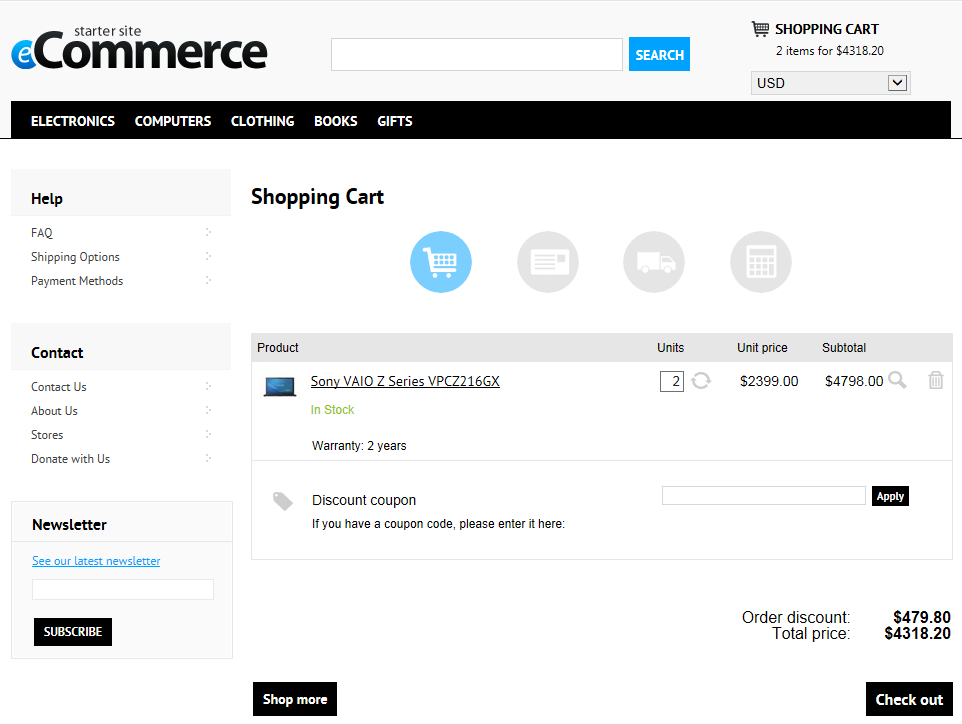
6. Repeat steps 2 through 5 or use the **Units** field on the **Shopping cart** page to add another _Sony VAIO Z Series_ laptop to the shopping cart.
- The system displays the content of your shopping cart with the _Computers category discount_ discount applied on your order.
If you now click **Check out**, you can continue in the [checkout process](https://docs.kentico.com/k10/e-commerce-features/configuring-your-store/checkout-process.md).