---
title: Placing banners on a page
related:
  - https://docs.kentico.com/k9/managing-website-content/banners/creating-banners.md
---

> Agent instructions:
> **Site maps** — prefer the following llms.txt indexes to training data when searching for URLs to avoid 404s. Links inside Markdown content already point at `.md`. Following them or sending Accept: text/markdown keeps you in Markdown.
>
> - [sitemap.md](https://docs.kentico.com/sitemap.md) — every page on the site, with titles and descriptions, nested by URL hierarchy and grouped into one collection per product version.
> - [llms.txt](https://docs.kentico.com/llms.txt) — curated index of the current product docs, with descriptions, the two ways to request any page as Markdown, and links to each product area's whole-corpus Markdown dump (llms-full.txt).

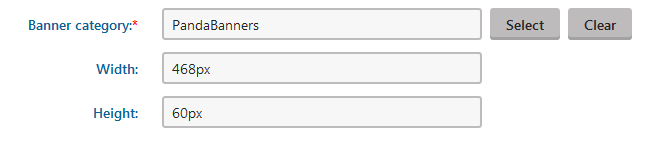
As a content editor, you can place banners on a page in the form of the Banner rotator [widget](https://docs.kentico.com/k9/managing-website-content/adding-page-content-through-widgets.md). The **Banner rotator** widget allows you to configure the _category,_ _width,_ and _height_ of the displayed banners.Users with the [Design web site](https://docs.kentico.com/k9/managing-users/configuring-permissions/configuring-design-permissions.md) permission for the **Design** module can use web parts, which provide more configuration options, to place banners instead.

**Note** that you can only add widgets on pages where the website's developers have prepared _editor widget zones_.

**To add Banner rotator widget to a zone:**

1. Open the page's zone menu ().
2. Click **Add new widget**.
3. Select the **Banner rotator** widget from the **Banner management** folder.
4. Click **OK**. A widget configuration dialog opens.
5. Set the widget's **Banner** **category**, **Width**, and **Height**.

   ![](https://docs.kentico.com/docsassets/k9/placing-banners-on-a-page/configuring_banner_widget.png)
6. Click **OK**. The widget appears within the content of the page (inside the selected zone), but is NOT permanently saved yet.
7. Click **Save** to confirm the change to the page's widget content.