Adding styles to the website
This page is a part of a tutorial, which you should follow sequentially, from the beginning to the end. Go to the first page: Getting started with Kentico.
When you have a website created, it is a good practice to first define its appearance and design. This is achieved by using CSS styles, which can be managed in the CSS stylesheets application in Kentico.
Download the code files
You can copy the code blocks required for the Tutorial from this and the following pages..
To define the styles for the website in this tutorial:
Download the tutorial website package with sample CSS and HTML code.
Open the CSS stylesheets application in Kentico.
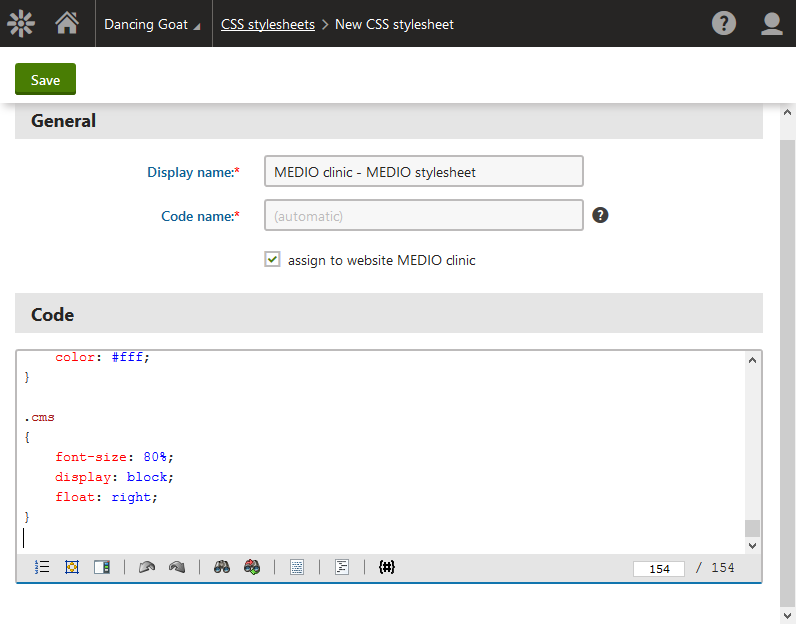
Click New CSS stylesheet.

Type MEDIO clinic - MEDIO stylesheet as the Display name.
Copy and paste the CSS code from the provided sample website – the styles.css file.
Tutorial CSS code/* GLOBAL */ section, footer, header { display: block; clear: both; } h1, h2, h4, p, a, li { font-family: 'Lato'; } p { line-height: 1.75em; } /* HEADER */ header { line-height: 5em; } header, section:last-of-type { position: relative; z-index: 500; -webkit-box-shadow: 0px 3px 6px 0px rgba(50, 50, 50, 0.22); -moz-box-shadow: 0px 3px 6px 0px rgba(50, 50, 50, 0.22); box-shadow: 0px 3px 6px 0px rgba(50, 50, 50, 0.22); } .logo { font-family: 'Lobster', cursive; font-size: 250%; text-decoration: none; color: #ce0000; line-height: 2em; } .logo:hover { color: #900; } .nav { text-align: right; } nav { display: block; } nav ul li { display: inline-block; } nav a { padding: .5em 1em; line-height: 2em; text-decoration: none; color: #222; display: inline-block; text-align: right; } nav a:hover { color: #ce0000; text-decoration: underline; } /* TEASER */ .teaser { display: block; background: #ccc; padding: 1em 0; font-size: 1.3em; } .teaser p { background: #fff; padding: .8em 1.2em; opacity: 0.8; text-align: left; } /* CONTENT */ .content { padding: 1em 0; font-size: 1em; } h1 { font-size: 150%; font-weight: bold; } /* FOOTER */ footer { background: #680000; color: #fff; padding: 2em 0; } footer ul { list-style-type: none; padding: 0; margin: 0; font-size: 90%; } address { display: inline; } footer ul li { line-height: 2em; } footer ul .fa { width: 16px; text-align: center; } footer a { color: #fff; text-decoration: underline; } footer a:hover { text-decoration: none; color: #fff; } .cms { font-size: 80%; display: block; float: right; }
Click Save.
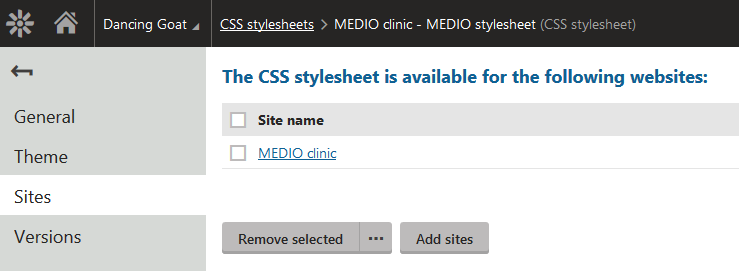
Switch to the Sites tab and ensure that the stylesheet is available for MEDIO clinic.

If not, click Add sites and select MEDIO clinic.
You have imported the stylesheet to the system and made it available for the website. Now you need to assign the stylesheet to the website so that all pages use it by default.
Add the stylesheet to the website:
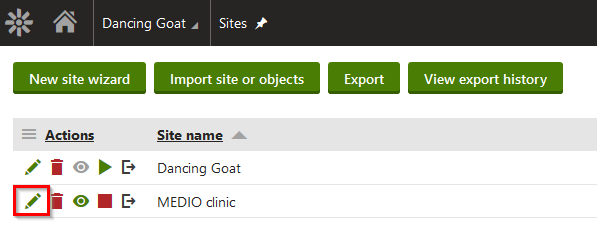
Open the Sites application.
Edit MEDIO clinic.

On the General tab, in the Site CSS stylesheet drop-down list, select MEDIO clinic - MEDIO stylesheet.

Click Save.
This ensures that all pages of MEDIO clinic load the prepared stylesheet.
Previous page: Creating a new website — Next page: Working with the Pages application
Completed pages: 4 of 9
ΟΟΟΟΟΟΟΟΟ