
Configuring e-commerce email notifications
With e-commerce email notifications, you can set when and how the Kentico E-commerce Solution notifies administrators and customers about their activities in your on-line store. Email notifications in Kentico can notify about:
- New orders (an email to the customer and the administrator)
- Order payments (to the customer and the administrator)
- Changing the order status of orders (to the customer and the administrator)
- Automatic registrations, typically after making an order (to the customer)
- Expiration dates of being allowed to download an e-product (to the customer)
Do not forget to configure basic notification settings first. Finally, set up the templates of the notifications.
You can set the email notifications in the Store configuration or Multistore configuration application and their templates in the Email templates application.
If you sell memberships, you can also send notifications about expiring of the membership. See Membership management to learn more details about membership notifications.
Before starting to configure e-commerce email notifications, check the email settings of your site.
Configuring basic settings of notification emails
Basic settings of the notification emails are the sender’s email address, the administrator’s email address who gets notifications for administrators, and whether emails to customers should use the user’s culture language or not.
To set the notification emails in general:
Open the Store configuration application if you want to set the emails for the current site, or open the Multistore configuration application if you want to set the emails globally.
If you are not sure what to choose, see Choosing site or global e-commerce configuration. If you are not sure about specifics of configuring in these applications, see Configuring e-commerce settings for a specific site or globally.
Switch to the Store settings -> Emails tab.
Enter the desired properties on the page:
Send e-commerce emails from: Specify an email address from which e-commerce notification emails for customers are sent.
E-commerce notification emails to administrators are always sent from the customer’s email. Store managers can then easily reply to the email if necessary.
Send e-commerce emails to: Specify an email address to which e-commerce notification emails for administrators are sent.
If you want to set more recipients of administrator notifications, separate the emails with semicolons.
Use customer’s culture for emails: Specify if the system sends the customer emails in the shopping cart culture.
If you are in the Store configuration application, clear the Inherit from global settingsoption first.
Click Save.
The system saves the settings, which will be then used when sending emails.
Configuring new order notifications
To set the notification emails when a new order is created, follow the same process as when configuring basic settings of notification emails. On the Emails tab, select the Send order notification field.
Configuring payment notifications
To set the payment notification emails, you need to enable the payment emails and then choose the order status which switches the order payment status.
First, enable the payment emails. Follow the same process as when configuring basic settings of notification emails. On the Emails tab, select the Send payment notification field.
Second, choose the order status which switches the order payment status:
Open the Store configuration application if the desired order status is only in the current site, or open the Multistore configuration application if the order status is global.
If you are not sure what to choose, see Choosing site or global e-commerce configuration. If you are not sure about specifics of configuring in these applications, see Configuring e-commerce settings for a specific site or globally.
Switch to the Order status tab.
Edit () the order status which should send the payment notification.
Select the Mark order as paid field.
The Mark order as paid field brings more functionality than just sending notification emails, see more details in Order statuses.
Click Save.
The system saves the order status and starts to send payment notification emails when you change the order status to the modified one.
Configuring order status change notification
To set the order status change notification emails:
Open the Store configuration application if the desired order status is only in the current site, or open the Multistore configuration application if the order status is global.
If you are not sure what to choose, see Choosing site or global e-commerce configuration. If you are not sure about specifics of configuring in these applications, see Configuring e-commerce settings for a specific site or globally.
Switch to the Order status tab.
Edit () the order status which should send the notification.
Select the Send notification field.
Click Save.
The system saves the order status and starts to send notification emails about the order status change when you change the order status to the modified one.
See more information about order statuses in Order statuses.
Configuring automatic registration notification
The automatic registration notification is automatically sent when:
- You edit a customer in the Customers application and on the Login details tab, you create a login for the customer.
- You create an order in the Orders application with a new customer where you select the Create login field.
- You enable the system to register customers automatically after their first order.
To disable the automatic registration notification, you can either delete the email template (which can lead to error records in the event log) or customize Kentico. You cannot disable the automatic registration notification in the user interface.
When you edit the template you can use, for example, the following macros:
- UserFullName – displays the user’s full name.
- UserName – displays the user name used for logging in.
- Password – displays the password generated by the system.
Configuring e-product expiration date notification
To set how many days before the expiration date of being allowed to download an e-product:
Open the Store configuration application if you want to set the notifications for the current site, or open the Multistore configuration application if you want to set the notifications globally.
If you are not sure what to choose, see Choosing site or global e-commerce configuration. If you are not sure about specifics of configuring in these applications, see Configuring e-commerce settings for a specific site or globally.
Switch to the Store settings -> Emails tab.
In Send e-products reminder (days), type the number of days before the expiration date when the system should send the notification.
- If you are in the Store configuration application, clear the Inherit from global settingsoption first.
Click Save.
The system saves the settings and starts to send expiration emails of e-products the typed days before the e-products expires.
To disable e-product expiration notifications, disable (or delete) the global E-product reminder scheduled task which sends the expiration notifications.
Editing email notification templates
When an event triggers sending of a notification email, the system sends an email based on the template which has a specific code name.
|
Event |
Template name |
Template code name |
|
New order |
E-commerce - Order notification to administrator |
Ecommerce.OrderNotificationToAdmin |
|
E-commerce - Order notification to customer |
Ecommerce.OrderNotificationToCustomer |
|
|
Paying of an order |
E-commerce - Order payment notification to administrator |
Ecommerce.OrderPaymentNotificationToAdmin |
|
E-commerce - Order payment notification to customer |
Ecommerce.OrderPaymentNotificationToCustomer |
|
|
Changing the order status of an order |
E-commerce - Order status notification to administrator |
Ecommerce.OrderStatusNotificationToAdmin |
|
E-commerce - Order status notification to customer |
Ecommerce.OrderStatusNotificationToCustomer |
|
|
Automatic registration after making an order |
E-commerce - Automatic registration |
Ecommerce.AutomaticRegistration |
|
For the Automatic registration after making an order notification, you can easily choose another template in theStore configurationorMultistore configurationapplication on the Store settings -> General tab in the Registration after checkout email template field in the Unregistered customers category. |
||
|
E-product expiration date reminder |
E-commerce - E-product expiration notification |
Ecommerce.EproductExpirationNotification |
You can have either site or global email templates. The default notification templates are global. If you create a site template with the same code name, the site template will be used primarily.
To edit an email template:
Open the Email templates application.
In Site, switch to (global).
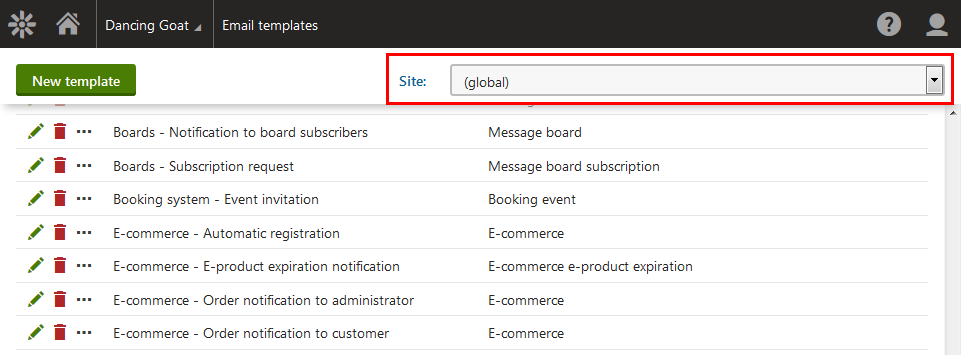
Edit () a specific notification.
Modify the desired properties.
See Managing email templates to learn more information about email template properties.
Click Save.
The system saves the template and starts to send notifications of the given type based on the modified template.
You can look at the templates in the sampleDancing Goatsite to see examples of notification emails.