Setting up Kentico in Azure Web Apps
This scenario expects that you want to create a new Kentico website as a Azure Web Apps service. You can create a new Kentico website:
- From the Microsoft Azure Marketplace
- From Visual Studio
- Setting up Kentico in Azure Web Apps
- See other options of deploying Kentico to Azure Web Apps in the Microsoft documentation
Creating Azure Web Apps from the Microsoft Azure Marketplace
You can find a Kentico package in the Azure marketplace. Creating new web apps using the provided template is quick and easy.
Open the Azure Management Portal.
Click New -> Web + Mobile.
Click See all and search for Kentico CMS.
Select Kentico CMS from the list of results and click Createon the newly opened tab.
Type the URL (name) of your web app.
Select a Resource Group.
Set your preferred App Service plan.
Select an existing or create a new SQL database and server.
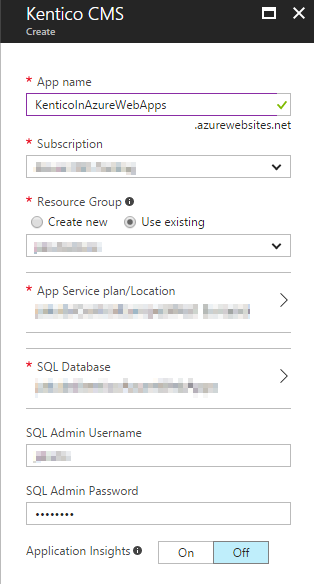
Click Create.
Database installation
Access the created website.
Provide the server name and credentials for the server where you created the database.
Click Next.
Select Use an existing database and type the name of the database created for the website.
Click Next.
Click Next without filling in any fields.
Select Create a new site or import an existing Kentico site and click Next.
- The installer redirects you to the Kentico administration interface.
Switch to the Licenses tab and add the license for the website domain.
Perform the following final configurations:
- Adjust the web hosting plan mode for your web app.
- Configure the tier of your Azure SQL database according to our recommendations.
Creating Azure Web Apps from Visual Studio
This scenario presumes that you already have a Kentico project installed on a local computer and you want to deploy it to the Azure Web App service using Visual Studio. You can also create the Web App service directly from Visual Studio.
In Microsoft Visual Studio 2012 and 2013, the service is still called Azure Websites.
Open your Kentico project in Visual Studio.
Open the Server Explorer tab (or Database Explorer tab in Express editions of Visual Studio).
Expand the Azure section, right-click App Service, and select Create New App Service…
- A Create App Service window opens.
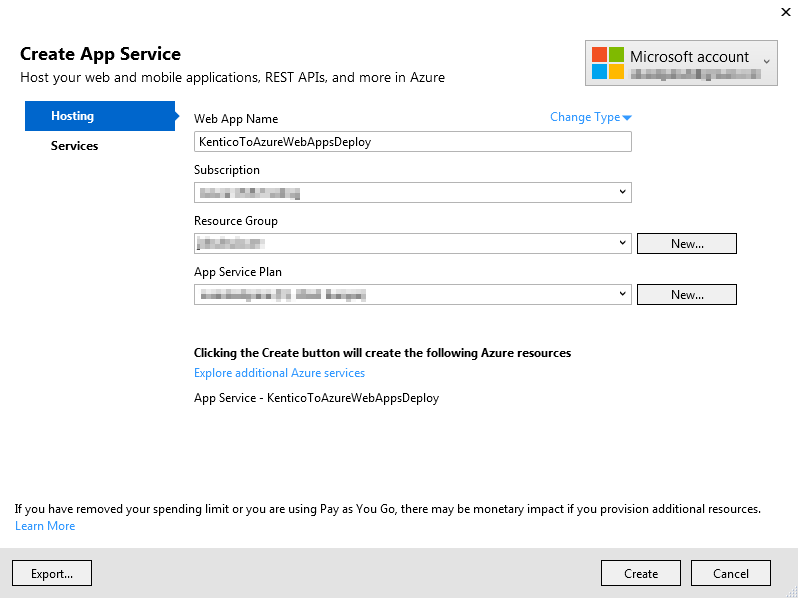
On the Hosting tab:
Type the web app name (URL).
Select the Azure subscription under which the Web App will be created.
Select an existing Resource Group or create a new one.
Select an existing App Service plan or create a new one.
Switch to the Services tab and create a new SQL Database for the application:
Select an existing or create a new SQL server.
Provide administrative credentials for the server.
Specify a name for the application’s database.
Set Connection String Name to CMSConnectionString.
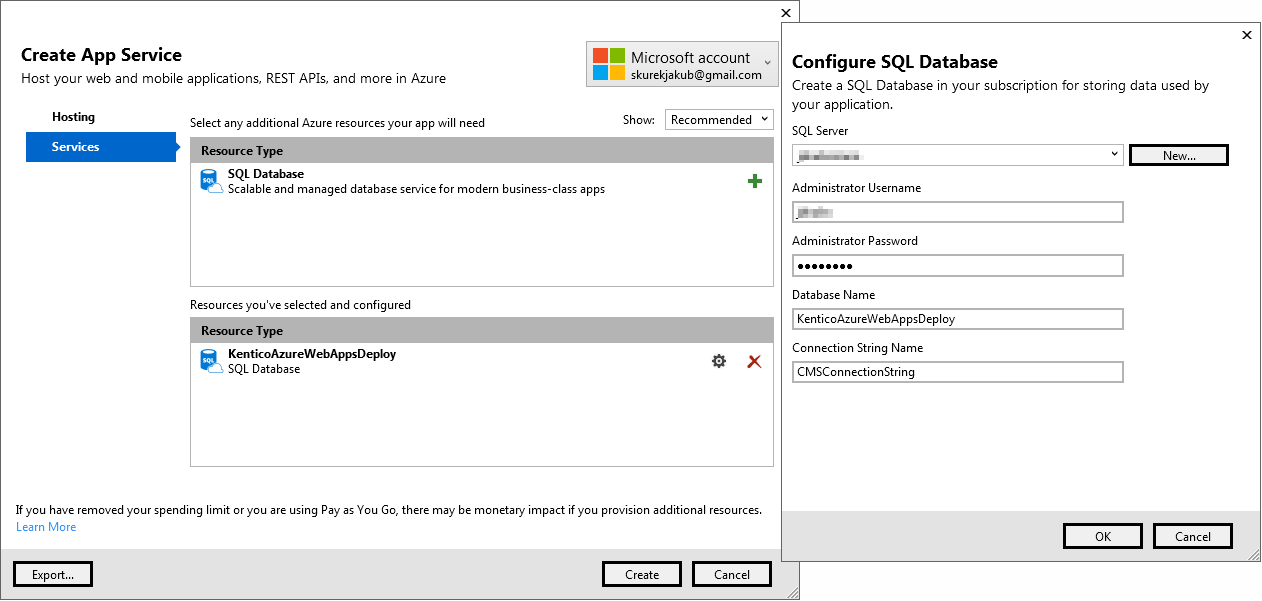
Click Create.
Visual Studio creates the Web App service. Continue with adjusting the configuration of the web.config file of your project, and deploying.
Right-click the created web app and select View settings.
Copy the connection string value and paste it to the web.config file of your project.
 <connectionStrings>
     <add name="CMSConnectionString" connectionString="Data Source=tcp:YourServerName.database.windows.net,1433;Initial Catalog=YourDatabaseName;User Id=YourUsername@YourServerName;Password=YourPassword;" />
 </connectionStrings>
Replace YourServerName, YourDatabaseName, YourUsername and YourPassword with your own values.
Configuring the connection string after deployment
You can also configure the connection string through the Azure Management Portal in App Services -> select a web app -> Application settings -> Connection strings section. To set the connection string for the web app, change the defaultConnection name to CMSConnectionString.
Make sure that the sessionState mode is set to InProc in the web.config file.
<sessionState mode="InProc" />Use InProc mode if you plan to use one instance of the Web App service. If you want to scale your web app to more instances, you will need to configure the session state differently. See Storing cache and session state data in Azure environment.
Right-click the project folder (CMSApp or CMS) in the Solution Explorer and select Publish (or Publish Web App).
- A Publish dialog opens.
Click Microsoft Azure App Service.
Select the created web app from the drop-down list.
Click OK.
Leave the settings as they are.
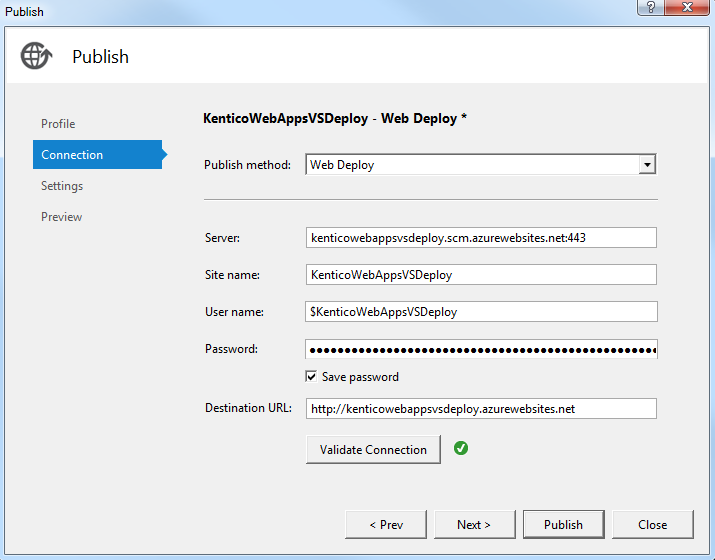
Click Publish.
When the project is published and the website of your project is automatically opened in a browser, complete the database installation.
Perform the following final configurations:
- Adjust the web hosting plan mode on your web app.
- Configure the tier of your Azure SQL database according to our recommendations.
Uploading Kentico to Azure Web Apps over FTP
This scenario presumes that you already have a Kentico project installed on a local computer and you want to deploy it to the Azure Web App service over FTP. Uploading Kentico projects to Azure Web Apps through a FTP client is easy, but it can take a lot of time, so we recommend using a reliable client, for example FileZilla.
You also need to create the Web Apps service first, through the Azure Management Portal.
Creating Azure Web Apps through the Azure Management Portal
- Open the Azure Management Portal.
- Open New -> Web + Mobile -> Web App + SQL -> Create.
- Enter the URL (name) of the web app.
- Select the Azure subscription under which the Web App will be created.
- Select an existing Resource Group or create a new one.
- Select an existing App Service plan or create a new one.
- Select an existing SQL database and server or create a new one.
- Click Create.
The system creates a new Web App service and an Azure SQL database.
Uploading Kentico to Azure Web Apps over FTP
When you have created a Web App service, you can upload your Kentico project over an FTP connection. You can also upload just updated files over FTP after the deployment.
Open the Azure Management Portal.
Select your web app on the App Services tab.
Switch to the Deployment credentials tab.
Enter a user name and password and click OK.
Use the FTP host name and Deployment / FTP User information displayed on the application’s Overviewtab to configure your FTP client.
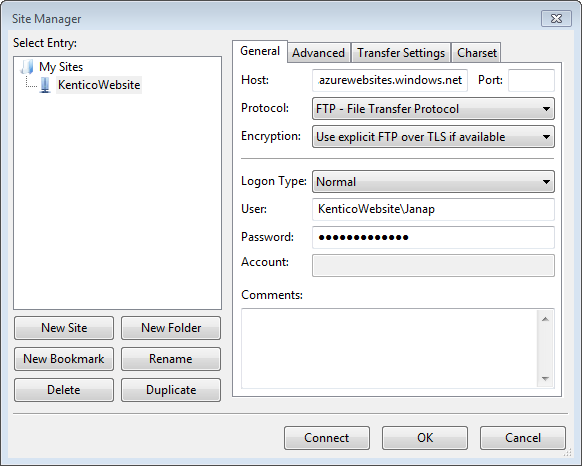
Copy the content of the CMS folder in your Kentico project to the site\wwwroot folder on the Web App file system.
When the copying is finished, open the website and finish the database installation.
Perform the following final configurations:
- Adjust the web hosting plan mode on your web app.
- Configure the tier of your Azure SQL database according to our recommendations.