
Configuring taxes
In Kentico, tax classes allow you to configure taxes the customers pay when purchasing in your on-line store. You can specify different tax classes with different rates for each country or state and then apply the taxes to particular products and shipping options.
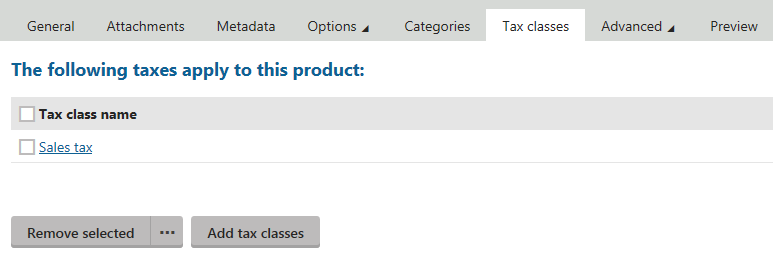
When editing a product (on the Tax classes tab), you can specify which tax classes apply to this product when purchased in your on-line store. You can do this by clicking Add tax classes and selecting appropriate tax classes in the displayed selection dialog.
In the same way, you can assign tax classes also to default based on weight shipping options (in the Store configuration application, navigate to the Shipping -> Shipping options tab, edit a shipping option and switch to the Tax classes tab).
It is also possible to connect Kentico to external tax calculation services (for example Avalara). To achieve that, you can customize the Kentico E-commerce Solution or you can check Kentico Marketplace for third party integration features.
To configure tax classes, you need to:
- Configure basic tax settings
- Create a new tax class
- Assign a percentage value to the tax class
- Assign the tax class to your products
Configuring tax settings
In tax settings, you can set whether tax classes should be applied based on the billing address or the shipping address of the order.
If the order is without shipping information, taxes are applied based on the billing address regardless of this setting.
In the e-commerce settings, set the default country, which preselects the country in the drop-down list when customers enter billing and shipping details of their orders.
Open the Store configuration application (if you want to set the preselected country on the current site) or the Multistore configuration application (if you want to set the country globally).
If you are not sure what to choose, see Choosing site or global e-commerce configuration. If you are not sure about specifics of configuring in these applications, see Configuring e-commerce settings for a specific site or globally.
In the Default country field in the Taxes category:
- If you operate in the Store configuration application, clear the Inherit from global settings field.
- Select the desired default tax country.
In the Apply taxes based on field:
- If you operate in the Store configuration application, clear the Inherit from global settings field.
- Select Billing address or Shipping address according to your needs.
Click Save.
The system now applies taxes based on your selection and preselects the selected country to your customers in the checkout process.
Creating and modifying new tax classes
To create or modify a new tax class:
Open the Store configuration application to create or edit tax classes on the current site, open the Multistore configuration application to create or edit global tax classes.
If you are not sure what to choose, see Choosing site or global e-commerce configuration. If you are not sure about specifics of configuring in these applications, see Configuring e-commerce settings for a specific site or globally.
Switch to the Tax classes tab.
To create a new tax class, click New tax class. To edit an existing tax class, click Edit () next to respective tax class item.
Enter the following properties:
Display name
The name of the tax class that is also displayed to customers on the live site.
Code name
The unique identifier of the tax class object used by developers in the code.
Unless there is a reason to set a particular value, you can leave the default (automatic) option, and the system generates an appropriate code name automatically.
Zero tax if tax ID is supplied
If selected, the tax class will be charged as 0 % to customer organizations which enter their tax ID during the checkout process.
Click Save.
The system saves the tax classes. You can now assign the tax class to any product.
Assigning values to tax classes
You can assign values to either countries or states. The tax is then applied based on the billing or shipping address.
If the tax is specified for both a country and a state, the system applies only the tax specified for the state.
To assign a value to a tax class:
Open the Store configuration application (if you want to add a value to a site tax class) or open the Multistore configuration application (to add a value to a global tax class).
If you are not sure what to choose, see Choosing site or global e-commerce configuration. If you are not sure about specifics of configuring in these applications, see Configuring e-commerce settings for a specific site or globally.
Switch to the Tax classes tab.
Edit () and existing tax class.
Switch to the Countries tab to enter a value to a country, or switch to the States tab to enter a value to a state.
Type the value to the Amount column next to the respective country or state item.
Click Save.
The system saves the taxes. The entered value of the tax class is now calculated to orders where the tax class is applied.
Assigning tax classes to groups of products
If you configure your on-line store and you have not created or imported products, see Assigning taxes to products automatically, where you can find information about automatic assigning of taxes to new products.
If you want to assign taxes to already existing products, you can assign the taxes either one by one from the Products application or you can assign the tax classes to more products at once while editing taxes in the Store configuration application.
The following procedure is available only for site tax classes in the Store configuration application. In the Multistore configuration application, the Products tab is hidden when modifying tax classes.
To assign a tax class to already existing products:
- Open the Store configuration application.
- Switch to the Tax classes tab.
- Edit () an existing tax class which you want to assign to the products.
- Switch to the Products tab.
- Click Add products.
- Select all products to which you want to assign the currently edited tax class.
- Click Select.
The system assigns the edited tax class to all selected products.