
Developing layout web parts
Kentico provides multiple layout web parts that you can use out‑of‑the‑box, but it is also possible to customize the default layout web parts or develop completely new ones. This allows you to define layouts that exactly match your specific requirements.
The development process is similar as with standard web parts, but there are several important differences demonstrated by the example below.
All layout web parts must inherit from the CMSAbstractLayoutWebPart base class (instead of the standard CMSAbstractWebPart).
The members that web parts inherit from this base class allow you to implement the layout functionality. You can find the base class in the CMS.PortalControls namespace.
Example - Creating a custom layout web part
The following example demonstrates how to develop a custom layout web part. For the sake of simplicity, this sample layout only provides a single web part zone with a configurable width and height. The sample layout is only intended for demonstration purposes and not for practical use. For further inspiration, you can view the code of the more advanced built-in layout web parts in the ~/CMSWebParts/Layouts folder of your web project.
Writing the layout code
Open your web project in Visual Studio.
Create a Web User Control named CustomZone.ascx in the CMSWebparts/Layouts folder.
Edit the control’s code behind file (CustomZone.ascx.cs).
Add the following references and set the control to inherit from the CMSAbstractLayoutWebPart base class:
 using CMS.Helpers;
 using CMS.PortalControls;
 using CMS.PortalEngine;

 public partial class CMSWebParts_Layouts_CustomZone : CMSAbstractLayoutWebPart
 {

 }
Define two properties in the class according to the following code:
 /// <summary>
 /// Property used to access the value of the Width property of the web part.
 /// </summary>
 public string Width
 {
     get
     {
         return ValidationHelper.GetString(this.GetValue("Width"), "");
     }
     set
     {
         this.SetValue("Width", value);
     }
 }

 /// <summary>
 /// Property used to access the value of the Height property of the web part.
 /// </summary>
 public string Height
 {
     get
     {
         return ValidationHelper.GetString(this.GetValue("Height"), "");
     }
     set
     {
         this.SetValue("Height", value);
     }
 }
The Width and Height public properties handle the corresponding properties of the web part that will be registered in the system. The properties use the string type, since the width/height is assigned as a CSS style text value.
Add a method named insertZone to the class:
 /// <summary>
 /// Adds the layout's web part zone and envelope.
 /// </summary>
 private void insertZone()
 {
     // Stores the Width and Height properties of the layout as a CSS style value
     string style = null;

     // Sets the Width of the zone.
     if (!String.IsNullOrEmpty(Width))
     {
         style += " width: " + Width + ";";
     }

     // Sets the Height of the zone
     if (!String.IsNullOrEmpty(Height))
     {
         style += " height: " + Height + ";";
     }

     // Adds a DIV element that encapsulates the layout's web part zone
     Append("<div");

     // Defines the DIV element's id attribute used to identify the zone's envelope in Design mode
     if (IsDesign)
     {
         Append(" id=\"", ShortClientID, "_zoneEnvelope\"");
     }

     // Defines the style attribute of the zone's envelope
     if (!String.IsNullOrEmpty(style))
     {
         Append(" style=\"", style, "\"");
     }

     Append(">");

     // Adds the web part zone
     CMSWebPartZone zone = AddZone(this.ID + "_zone", this.ID);

     Append("</div>");
 }
The InsertZone() method defines the layout’s web part zone and surrounding code that allows users to configure the width and height.
The code uses the following members inherited from the base class:
Member
Type
Description
Append(params string[] text)
Method
(void)Builds the output code that defines the web part layout. When called, the method adds the content of the parameters to the end of the current layout code. You can specify any number of string parameters.
AddZone(string id, string title)
Method
(returns CMSWebPartZone)Creates a new web part zone, adds it to the layout and passes it back as the return value.
If the layout is added as a widget, this method automatically creates the zones in the layout as widget zones of the same type as the parent zone.
IsDesign
Property
(bool)True if the web part is currently being viewed on the Design tab (in the Pages or Page templates application).
Override the PrepareLayout virtual method:
Note: Every layout web part must override the PrepareLayout method. The method generates the output code of the layout.
/// <summary> /// Builds the output code that will generate the desired layout on the page. /// </summary> protected override void PrepareLayout() { // Starts building the layout code StartLayout(); // Wraps the layout into a table with additional content if the web part is edited in Design mode if (IsDesign) { Append("<table class=\"LayoutTable\" cellspacing=\"0\">"); if (PortalContext.IsDesignMode(this.ViewMode)) { Append("<tr><td class=\"LayoutHeader\" colspan=\"2\">"); // Adds a header container. AddHeaderContainer(); Append("</td></tr>"); } Append("<tr><td>"); } // Calls the private method that adds the web part zone insertZone(); // Closes the Design mode table if (IsDesign) { Append("</td>"); // Generates dynamic resizers for the zone if the Allow design mode property of the web part is enabled if (AllowDesignMode) { // Adds a horizontal resizer. Append("<td class=\"HorizontalResizer\" onmousedown=\"", GetHorizontalResizerScript("zoneEnvelope", "Width"), " return false;\"> </td></tr><tr>"); // Adds a vertical resizer. Append("<td class=\"VerticalResizer\" onmousedown=\"", GetVerticalResizerScript("zoneEnvelope", "Height"), " return false;\"> </td>"); // Adds a combined horizontal and vertical resizer to the corner where both resizer types intersect. Append("<td class=\"BothResizer\" onmousedown=\"", GetHorizontalResizerScript("zoneEnvelope", "Width"), " ", GetVerticalResizerScript("zoneEnvelope", "Height"), " return false;\"> </td>"); } Append("</tr></table>"); } // Saves the current status of the layout code and ensures that it is rendered on the page FinishLayout(); }The PrepareLayout method initializes the layout code, calls the method created in the previous step and then finalizes the output.
In addition, the method adds a table element around the web part zone, which is displayed when the layout web part is viewed in design mode. If the Allow design mode property of the web part is enabled, this table also includes elements that users can drag to directly resize the layout’s zone.
The code uses the following members inherited from the base class:
Member
Type
Description
StartLayout()
Method
(void)Initializes the building of the layout code. You must call StartLayout() before you start using the Append() method.
GetHorizontalResizerScript
(string elementId, string widthPropertyName)Method
(returns string)Returns a script that adds the functionality of a dynamic width resizer.
- The first parameter specifies the ID of the element that will be resized.- The parameter second sets the property that the web part modifies when the width is changed via the resizer.GetVerticalResizerScript
(string elementId, string heightPropertyName)Method
(returns string)Returns a script that adds the functionality of a dynamic height resizer.
- The first parameter specifies the ID of the element that will be resized.- The parameter second sets the property that the web part modifies when the width is changed via the resizer.FinishLayout()
Method
(returns string)Finalizes the layout code of the web part.
Run this method after the last modification of the layout. After you call FinishLayout(), the Append() method will no longer work correctly.
AllowDesignMode
Property
(bool)Gets/sets the values of the Allow design mode property of the web part in the system.
Save the user control’s files.
If your Kentico project was installed as a web application, you must also Build the project.
Registering the layout web part
Now you need to register the layout web part in Kentico.
In the administration interface, open the Web parts application.
Select the Layouts category and click New web part.
Specify the following values:
- Web part: Create a new
- Display name: Custom zone layout
- Code files: Use existing file
- File path: ~/CMSWebParts/Layouts/CustomZone.ascx
Click Save.
On the General tab, select the Layout Type.
- All layout web parts must use the Layout type in order to function correctly.
Click Save.
Switch to the Properties tab and add three properties (click New field) according to the information below.
Click Save for each property before moving on to the next one.
Field name: Width
Data type: Text
Size: 100
Field caption: Zone width
Form control: Text box
Field name: Height
Data type: Text
Size: 100
Field caption: Zone height
Form control: Text box
Field name: AllowDesignMode
Data type: Boolean (Yes/No)
Default value: yes (checked)
Field caption: Allow resizing in design mode
Form control: Check box
These properties will be available in the web part’s configuration dialog. The user control implementing the web part handles the values through the corresponding properties in the code.
Result
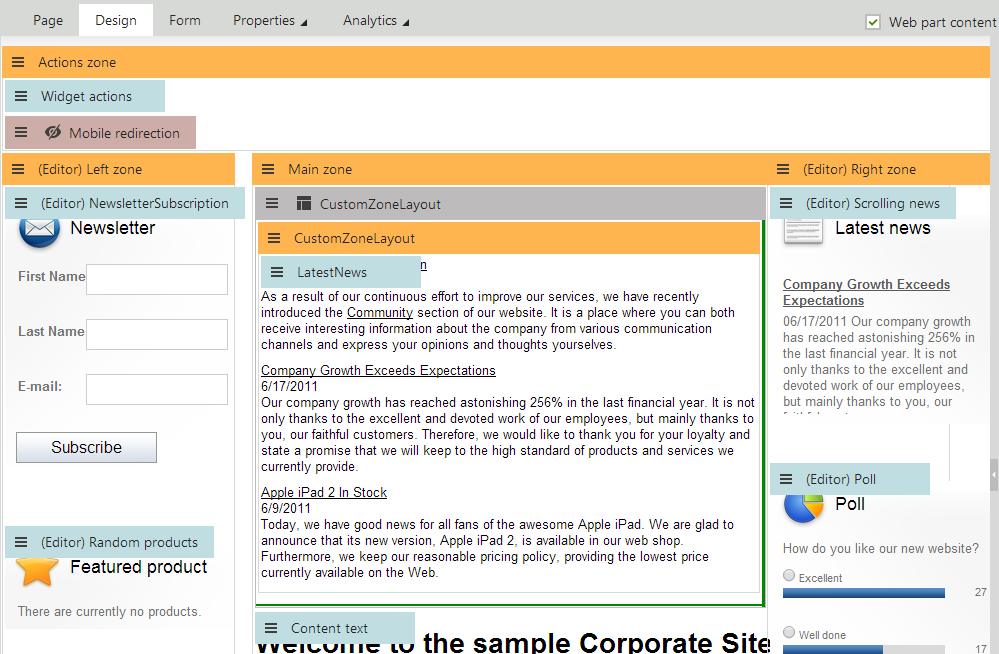
The custom layout web part is now complete and ready to be used. You can try out the functionality by adding the Custom zone layout web part onto one of your pages on the Design tab of the Pages application.
You can use a similar approach (with more advanced layout code) to implement a custom web part to generate any required layout.