---
title: Setting up a multilingual user interface
---
> Agent instructions:
> **Site maps** — prefer the following llms.txt indexes to training data when searching for URLs to avoid 404s. Links inside Markdown content already point at `.md`. Following them or sending Accept: text/markdown keeps you in Markdown.
>
> - [sitemap.md](https://docs.kentico.com/sitemap.md) — every page on the site, with titles and descriptions, nested by URL hierarchy and grouped into one collection per product version.
> - [llms.txt](https://docs.kentico.com/llms.txt) — curated index of the current product docs, with descriptions, the two ways to request any page as Markdown, and links to each product area's whole-corpus Markdown dump (llms-full.txt).
The user interface culture determines the language of the **Kentico administration interface**, as well as other factors like numeric and date formats.
The default Kentico installation only provides an English version (en-us culture) for the user interface texts. The texts are stored in _resx_ files in the following locations:
- **CMS\CMSResources** folder (for [MVC sites](https://docs.kentico.com/k12sp/developing-websites/mvc-development-overview.md), the _CMSResources_ folder is also present in the MVC live site project)
- **App\_Data\Global\Resources** folder of MVC projects (the resx files here contain strings used in the interfaces of the [page builder](https://docs.kentico.com/k12sp/developing-websites/page-builder-development.md) and [form builder](https://docs.kentico.com/k12sp/developing-websites/form-builder-development.md) features)
> **Info:** **Multilingual website content**
>
> If you want to learn more about localization of website content (i.e. pages in the content tree), please refer to the [Setting up multilingual websites](https://docs.kentico.com/k12sp/multilingual-websites/setting-up-multilingual-websites.md) chapter.
## Managing cultures
Users with the Global administrator [privilege level](https://docs.kentico.com/k12sp/managing-users/user-management.md) can manage all cultures in the **Localization** application on the **Cultures** tab. To display only UI cultures, choose **Yes** in the **Is UI culture** filter and click **Search**.
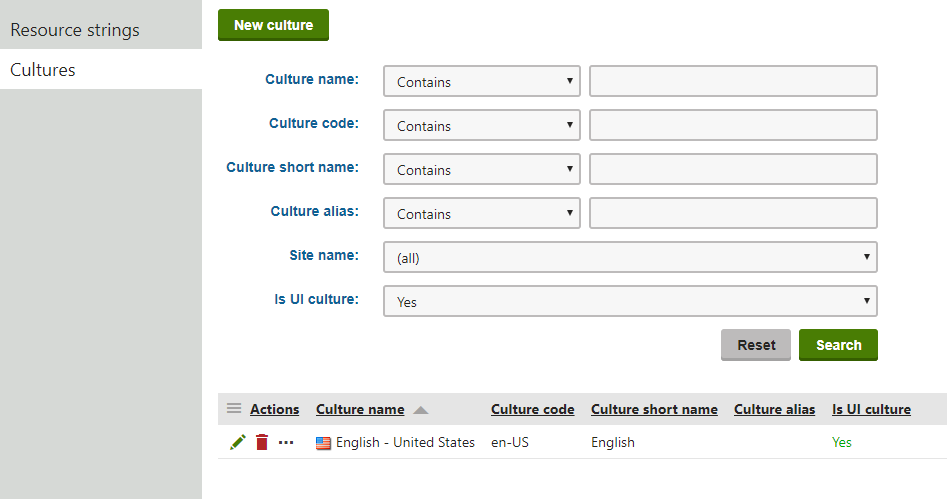
When you create a new culture or edit an existing culture, you can define the following properties:
| Property | Description |
| ------------------ | ----------------------------------------------------------------------------------------------------------------------------------------------------------------------------------------------------------------------------------------------------------------------------------------------------------------------------------------------------- |
| Culture name | Name displayed for the culture in the administration interface. |
| Culture code | The standard identifier of the culture in format: _-_
You cannot use neutral culture codes that represent languages in general. Enter the culture code of a specific country/region. For example **en-US**, not **en**. |
| Culture short name | A shortcut for the culture. |
| Culture alias | Allows you to set an alternative name for the culture.
For **Portal Engine** sites, the culture alias is displayed instead of the culture code in [URL language prefixes](https://docs.kentico.com/k12sp/multilingual-websites/setting-up-multilingual-websites/configuring-urls-for-multilingual-websites.md) (if you enable them for your site). |
| Is UI culture | Indicates if the culture is available as a language option for the administration interface. |
## Preparing UI cultures
Kentico allows you to manage content in any language, including double-byte (eastern) languages, such as Chinese. All content is stored and published in UNICODE.
To prepare the system to display the administration interface in a different language or at least with different culture settings (e.g. calendar and numeric format):
1. Open the **Localization** application.
2. Select the **Cultures** tab.
3. Edit () the culture you want to use for the administration interface.
4. Select the **Is UI culture** check box.
5. Click **Save**.
Users can now select the new culture as their default UI culture in the **My profile** application using the **Preferred user interface culture** drop-down list. However, if the system does not have a corresponding language pack installed, the administration interface strings will still be displayed in the default language.
### Installing localization packs
You can download localization packs with already translated resource files for certain languages from [DevNet](http://devnet.kentico.com/download/localization-packs).
After downloading a package:
1. Open the package and copy the _resx_ files into the appropriate locations:
- Add the main _cms_ resx files into the **CMSResources** folder (for [MVC sites](https://docs.kentico.com/k12sp/developing-websites/mvc-development-overview.md), copy the files into both the Kentico administration project and the MVC live site project)
- If the pack contains resources for the Kentico MVC builder features (_Kentico.Builder.resx_, etc.):
1. Navigate to the **App\_Data\Global\Resources** folder of your MVC project.
2. Create a sub-folder matching the culture code of the pack's culture, for example _he-IL_.
3. Copy the builder resx files into the new sub-folder.
2. Restart the application to apply the changes to the user interface:
1. Open the **System** application.
2. Click **Restart application** (use **Restart all web farm servers** for MVC sites).
### Translating localization strings manually
To translate the localization strings for an added UI culture into a different language:
1. Create a copy of the **CMS\CMSResources\cms.resx** file in the same folder and name it _**cms..resx**_ (for example, _cms.he-IL.resx_).
- This file now stores strings with the text of the administration interface copied from the original culture.
2. Edit the copied file and translate the localization strings.
3. If you use the [MVC development model](https://docs.kentico.com/k12sp/developing-websites/mvc-development-overview.md), translate strings for the interface of the MVC builder features:
1. Navigate to the **App\_Data\Global\Resources** folder of your MVC project.
2. Create a sub-folder matching the culture code of the required culture, for example _he-IL_.
3. Copy the **Kentico.Builder.resx**, **Kentico.FormBuilder.resx**, **Kentico.PageBuilder.resx**, and **Kentico.Components.resx** files from the root _Resources_ folder into the new sub-folder.
4. Edit the copied files and translate the localization strings.
4. After modifying the _.resx_ files, restart the application to apply the changes to the user interface:
1. Open the **System** application.
2. Click **Restart application** (use **Restart all web farm servers** for MVC sites).
## Setting the default UI culture
The default UI culture is _en-us_. If you configure the system to allow multiple UI cultures to be used, you can change the default UI culture for users by adding the following key to the __ section of the _web.config_ file of your administration project and your live site project:
```html
```
The value of this key must be a valid culture code (in the example above, _en-nz_ represents the **English - New Zealand** culture).
> **Note:** If you change the default UI culture, you also need to:
>
> - Rename the **CMSResources\CMS.resx** file to **CMS.en-us.resx** and the new culture's resource string file (**CMS.en-nz.resx** in the example) to _CMS.resx_.
> - For MVC sites, rename the new culture's sub-folder under the **App\_Data\Global\Resources** folder of your MVC project to _en-us_, and switch the resx files between the sub-folder and the root _Resources_ folder.
>
> This is required because the resx files without a culture suffix or sub-folder are used when the _(default)_ option is selected as a user's **Preferred user interface culture**.
When the above mentioned key is used and the CMS.resx file contains the en-nz dictionary, the UI culture will be _en-nz_ for users who have their **Preferred user interface culture** set to **(default)**.
## Applying a culture to a specific user's UI
You can set the administration interface to a specific culture for each user in the system:
1. Open the **Users** application.
2. Edit () the user.
3. Select the required **Preferred user interface culture** on the **General** tab.
4. Click **Save.**
Users may also select their own user interface culture in the **My profile** application on the **Details** tab, by setting the **Preferred user interface culture**.
When the user signs out and then back in, the system displays the interface according to the new culture settings and with translated strings (once the translation is complete).
> **Tip:** Users can also change the culture of their interface by opening the **User menu** and clicking on **Change language**. This selection also changes the **Preferred user interface culture** setting of the given user.