
Managing events and event attendees
You can add, edit and delete existing event attendees or add new attendees in the Events application. Here, you can see a list of all events defined on the currently edited site, their capacity, current numbers of registered attendees, and other information.
To manage event attendees
- Open the Events application.
- (Optional) Limit the listed events using the Event scope drop-down list.
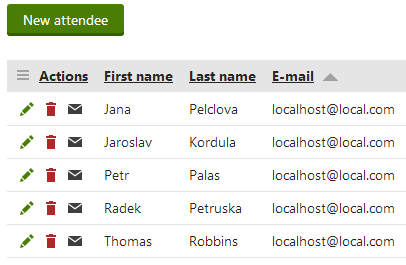
- View the event that you want to manage. A list of event attendees opens.
- You can now perform the following actions:
- Add New attendees.
- Edit () the current attendees - redirects you to the registration editing form where you can modify details submitted by the attendees on registration.
- Delete () attendees - clicking this icon removes the attendee from the event.
- Resend invitation email () to attendees - clicking this icon sends the invitation email to the respective attendee.
Sending event email invitations
When an attendee registers for an event, they receive an automatic email notification to their email address. You can also send the invitation to any of the event attendees later. For example, to attendees that were added to the event manually.
To send an email invitation to an event attendee
- Open the Events application.
- (Optional) Limit the listed events using the Event scope drop-down list.
- View the event for which you want to send an email invitation. A list of event attendees opens.
- Click on Resend invitation email () next to an attendee to whom you want to send an email invitation.
Sending emails to all event attendees
You can send an email to all event attendees. For example, with an update on the event, such as a change in the schedule, or any other information.
To send an email to event attendees
- Open the Events application.
- (Optional) Limit the listed events using the Event scope drop-down list.
- View the event under which you want to send an email to all attendees. A list of event attendees opens.
- Switch to the Send email tab.
- Fill in the following information:
- Sender name - a name that the recipients see as a sender of the email.
- Sender email - an email address that the recipients see as belonging to the sender of the email.
- Subject - subject of the email the recipients receive.
- Compose the body of the email using the editor.
- Click on Send.
The system sends the email to all the event attendees.