
Composing forms
After you create a new form, you can compose it on the form’s Form builder tab. The Form builder tab offers an intuitive graphical interface intended for content creators and marketers.
To open the Form builder tab:
- Open the Forms application.
- Edit () a form.
- Switch to the Form builder tab.
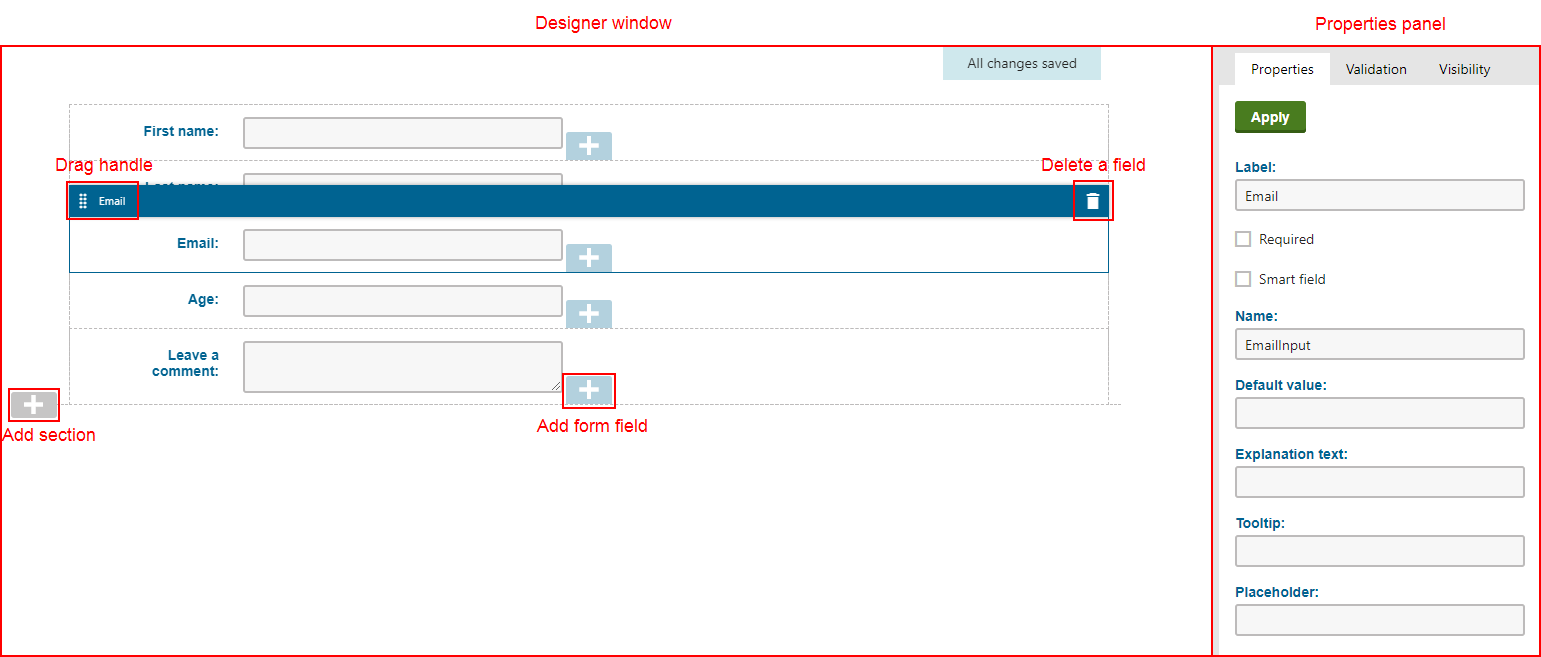
The Form builder interface is divided into two parts:
- The designer window, located in the middle, used to add, reorder, or remove individual form fields and set the form’s layout.
- The properties panel, located on the right, enabling further configuration and customization of each selected form field.
Adding new fields
To add new form fields to an existing form:
- Open the Forms application.
- Edit () a form.
- Switch to the Form builder tab.
- Click on the Add Field () button.
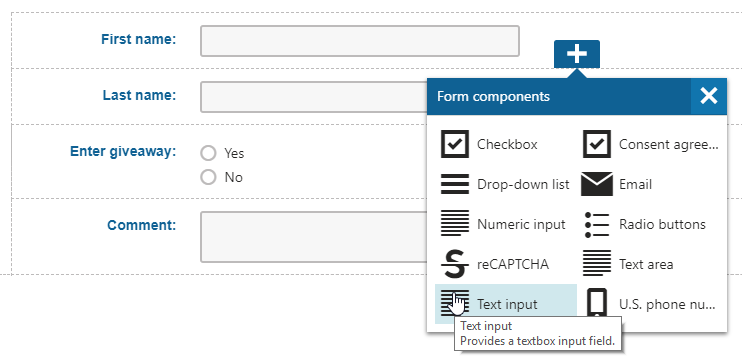
- Click on the field you wish to add from the list of available form components.
You have added the selected field to the form.
Tip: After creating a new field, we recommend setting an appropriate Name property based on the field’s purpose. By default, the Name is generated based on the type of the selected form component and changing the value later once the form starts collecting data can be problematic. See Configuring field properties for details.
Moving and reordering fields
To change the order of existing fields or move them between different zones in the form layout:
- Open the Forms application.
- Edit () a form.
- Switch to the Form builder tab.
- Click and drag the field by the drag handle () or the header that appears when you select or hover your mouse over a field.
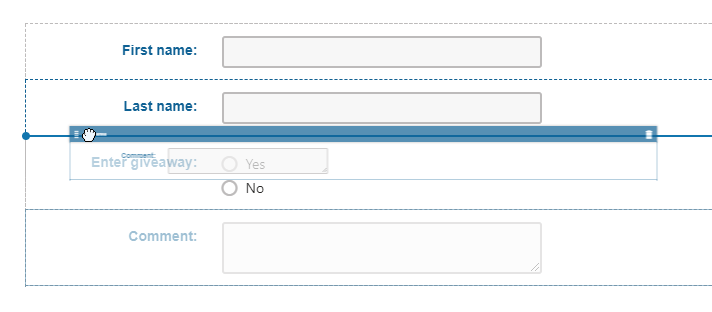
You have changed the position of the field within the form.
Removing fields
To remove a field from a form:
Removing fields from forms with existing records
Removing a field from forms with existing recordsalso deletes all data gathered using that field.
- Open the Forms application.
- Edit () a form.
- Switch to the Form builder tab.
- Click on the field you wish to remove.
- Click on the delete () icon in the upper right.
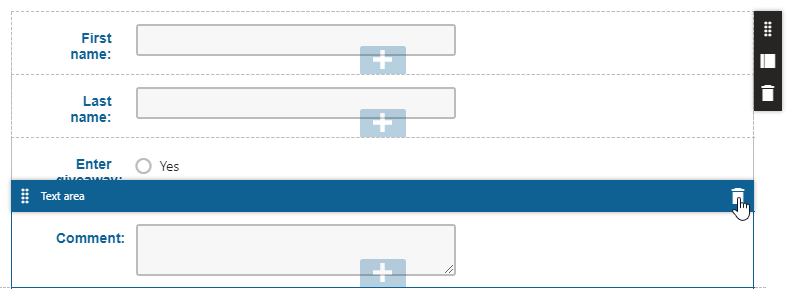
- Confirm the removal on the popup dialog.
You have removed the field from the form.
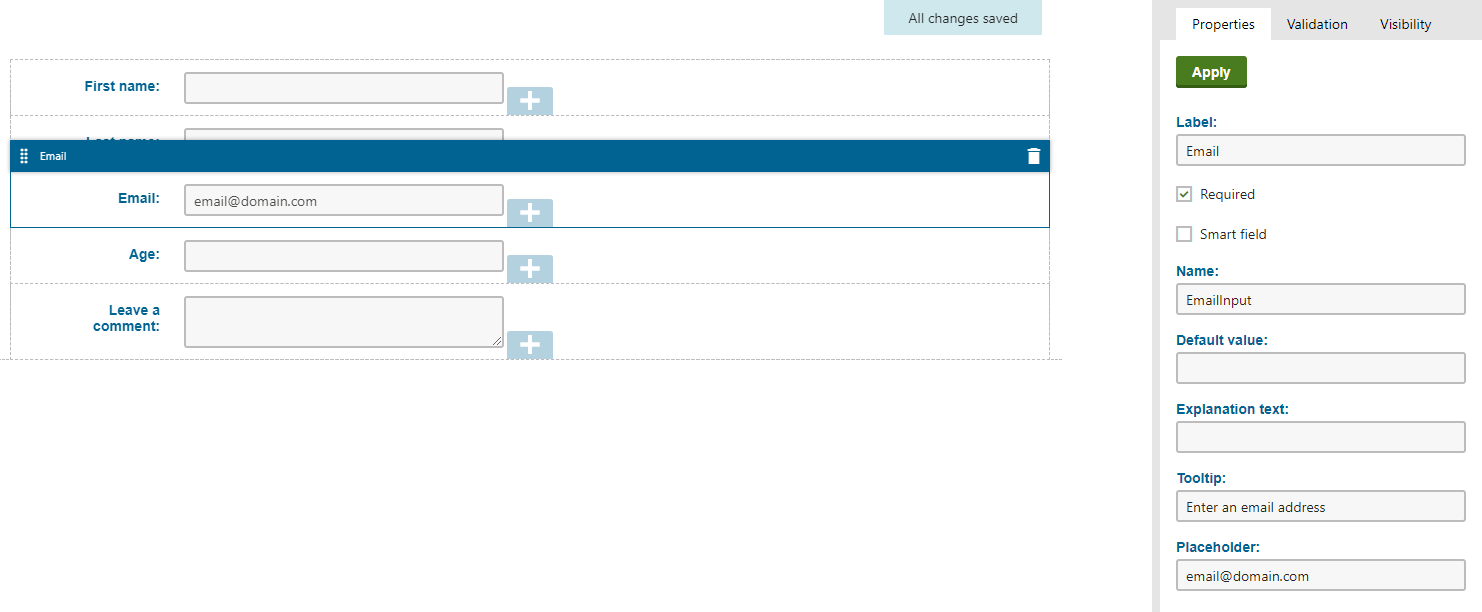
Configuring field properties
When you add new form fields or select existing ones, the panel on the right side of the form builder interface is replaced with the selected field’s properties panel. The properties panel allows you to configure the field’s label, tooltip, default value, and other properties.
- Open the Forms application.
- Edit () a form.
- Switch to the Form builder tab.
- Click on the field whose properties you wish to configure.
- Specify the field’s properties in the panel on the right
- Click Apply to save any changes of the field properties.
You have configured the selected form field.
Tip: You can configure fields to behave as “smart fields”, which means they are only displayed on repeated views of a form, as a replacement for other fields that were already filled in by the given visitor. For more information, see Using smart fields in forms.
Editing form layout
The overall layout of a form is composed of elements called sections. Each section contains one or more zones, to which you can add fields.
The system provides a Default section which organizes fields in a basic single-column layout. Your developers may prepare additional types of sections that allow you to create more advanced form layouts.
To edit the layout of a form:
Open the Forms application.
Edit () a form.
Switch to the Form builder tab.
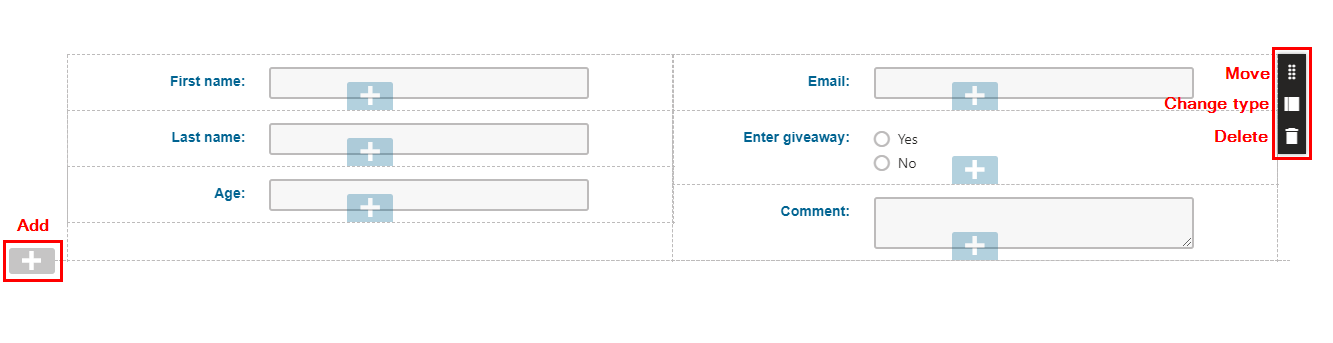
Add or adjust sections using the gray UI elements:
- Add section – click a gray plus button located on the left to insert a new section. The list of available section types depends on the implementation of your website.
- Move section – hover over a section and drag it by the drag handle among the section buttons on the right.
- Change section type – you can change the type of a section to adjust the layout of the form. Hover over the section you want to modify, click the Change section type button, and select the section type you want to use.
- Delete section – hover over the section you want to remove and click the delete button on the right. This also removes all form fields in the section.
Changes made to sections are saved automatically. After you create the required form layout through sections, you can move fields between the resulting zones.
Adding field validation
Validation rules allow you to define constraints on user input. Each field can contain multiple validation rules.
If a form field with validation rules is submitted unfilled, the system skips the evaluation of all associated validation rules. If you wish to enforce user input for a particular field, mark it as Required.
To add a field validation rule:
- Open the Forms application.
- Edit () a form.
- Switch to the Form builder tab.
- Click on the field whose validation rules you wish to configure.
- In the properties panel on the right, switch to the Validation tab.
- Click Add validation rule.
- Select a rule from the drop-down list.
- Configure the rule according to your requirements and specify its Error message.
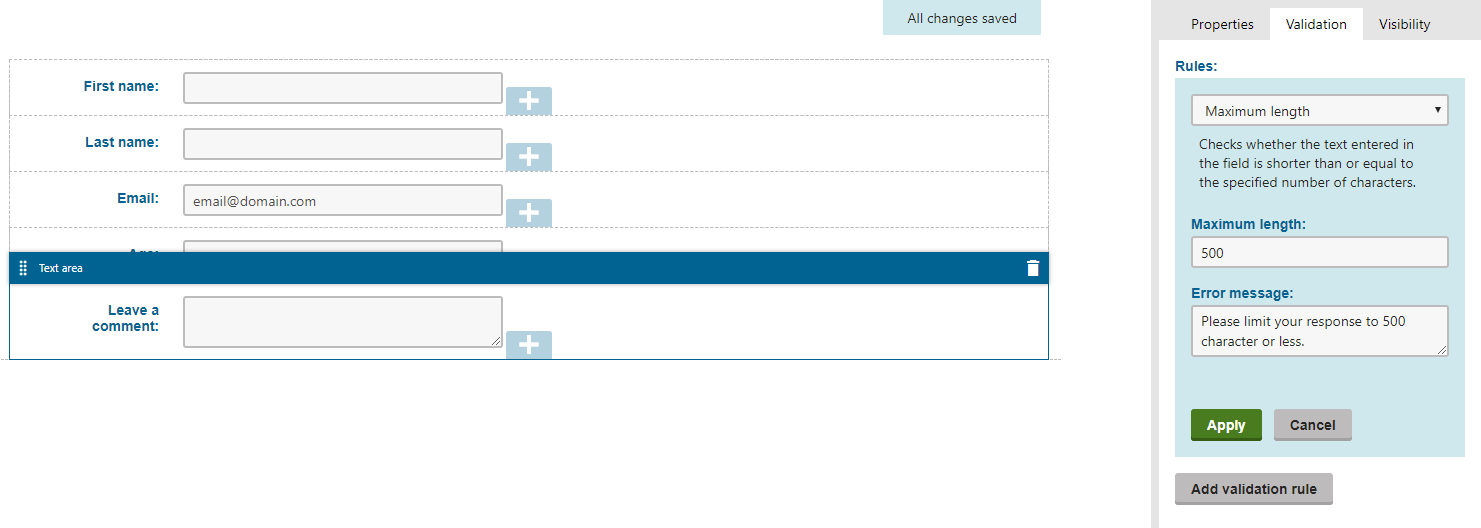
- Click Apply.
You have added the validation rule for the selected form field.
Adding field visibility conditions
Field visibility conditions allow you to specify rules based on which certain form fields can be hidden or displayed to users. By default, you can specify field comparison validation rules that set the visibility of fields based on values provided elsewhere in the form.
Your developers can extend this functionality with other conditions by utilizing contextual information provided by the system. For example, based on whether the user is in a certain persona, belongs to a specific contact group, is subscribed to an email feed, and so on.
Each form field can only have one visibility condition specified. Moreover, certain visibility conditions are only available if fields of a matching type precede the field that you are configuring (i.e., are placed “above” the field in the form builder).
To configure a field’s visibility:
- Open the Forms application.
- Edit () a form.
- Switch to the Form builder tab.
- Click on the field whose visibility condition you wish to configure.
- On the properties panel, switch to the Visibility tab.
- Select from the available options:
- Always – the field is always visible. This is the default state for all fields.
- Never – the field is always hidden. Useful if you need to remove a field from the form but want to keep its associated data stored in the system.
- Condition – the field is displayed based on a set condition.
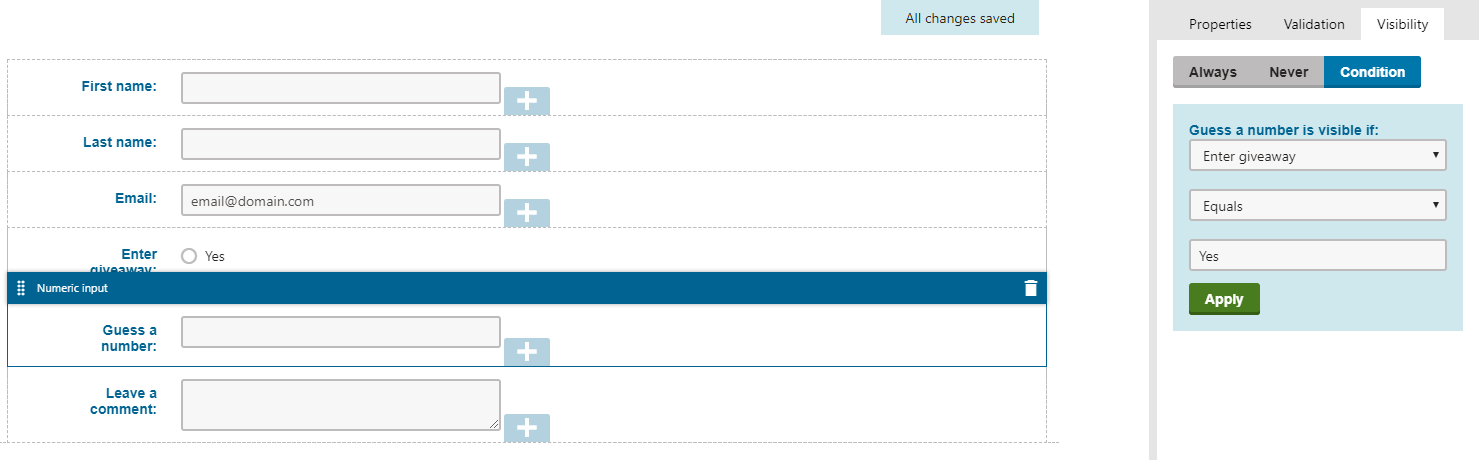
- Click Apply to save your changes.
You have added the visibility condition to the selected field.