
Creating a document library
This page explains how to create a document library on your website. We will create a sample page with two Document library web parts, each displaying files from a different folder.
The first step when creating a document library is to choose a location in the site’s content tree where the files will be stored. A single document library web part can display documents from only one location. As we want two separate libraries on a single page, we will create a page in the content tree where two Document library web parts will be placed. Under the page, we will create two separate folders where the actual files will be stored.
- Open the Pages application.
- Select the root of the content tree.
- Click New ().
- Choose the Page (menu item) page type.
- Type My document library into the Page name field and choose the Create a blank page option.
- Click Save.
Next, create the folders:
- With the new page selected, click New ().
- Choose the Folder page type.
- Type My images as the Page name.
- Click Save.
- Repeat the same once again to create another folder named My Office documents.
You now have a page and two child folders.
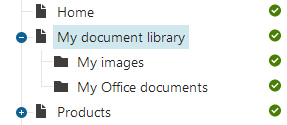
Now add the document libraries to the page:
- Select the My document library page.
- Switch to the Design tab.
- Add the Document library web part.
- Configure the web part’s properties:
- Library path: /My-document-library/My-images
- HTML Envelope -> Content before: <h2>My images</h2>
- Click OK.
- Add another Document library web part to the page. Set the following properties:
- Library path: /My-document-library/My-Office-documents
- HTML Envelope -> Content before: <h2>My Office documents</h2>
- Click OK.
You can now see the document library web parts on the Design tab.
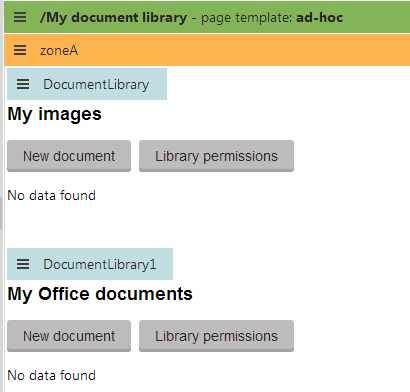
The document libraries are now configured and ready to be used by live site users. Please proceed to the Managing files in document libraries page to learn how live site users can upload and manage document library files.