Example - Importing new products using Kentico Import Toolkit
Kentico Import Toolkit is a utility that allows you to import products to the system.
This example demonstrate importing new products from an XLSX file to the sample E-commerce Site using Kentico Import Toolkit.
Preparing a source file
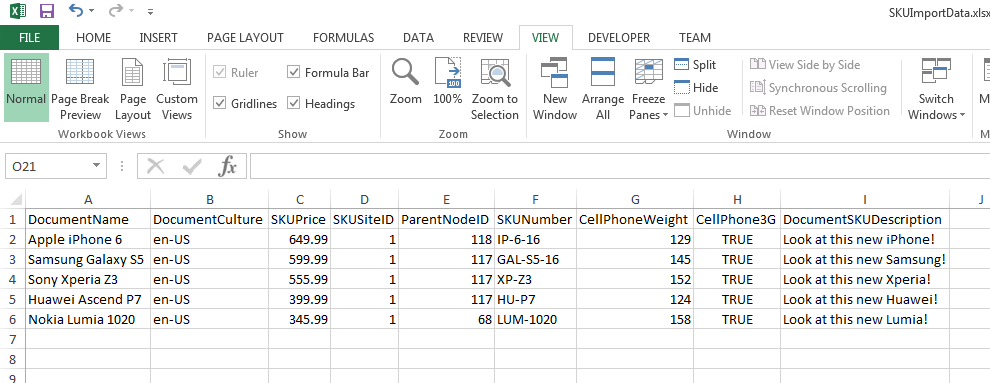
Before starting to import new products, prepare your XLSX file with products. The top row should contain the column names from the database table. We add five cellphones to sections according to their operating system:
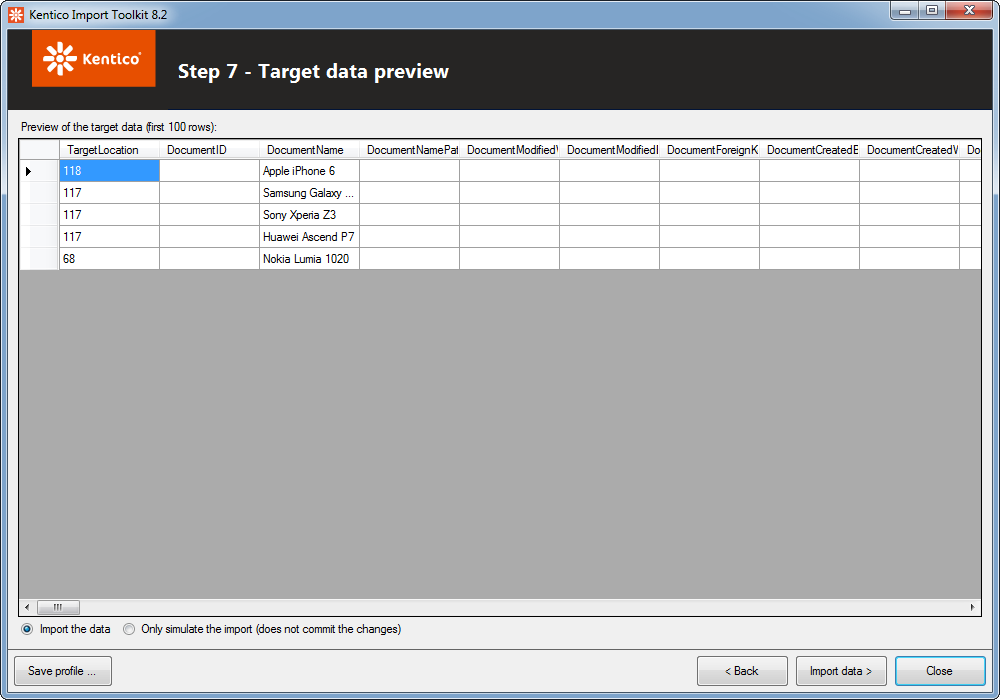
- iOS (Node ID: 118) – Apple iPhone
- Android (Node ID: 117) – Samsung Galaxy S5, Sony Xperia Z3 and Huawei Ascend P7
- Windows Phone – Nokia Lumia 1020
Since the sample E-commerce Site does not have a section for Windows Phone, the parent node of Nokia Lumia 1020 will be Cellphones (Node ID: 68).
Importing the products
Launch Kentico Import Toolkit.
Select Start new import session, and click Next.
In Step 1, specify the root folder of the project into which you want to import the products.
Confirm that you did a backup of your project, and click Next.
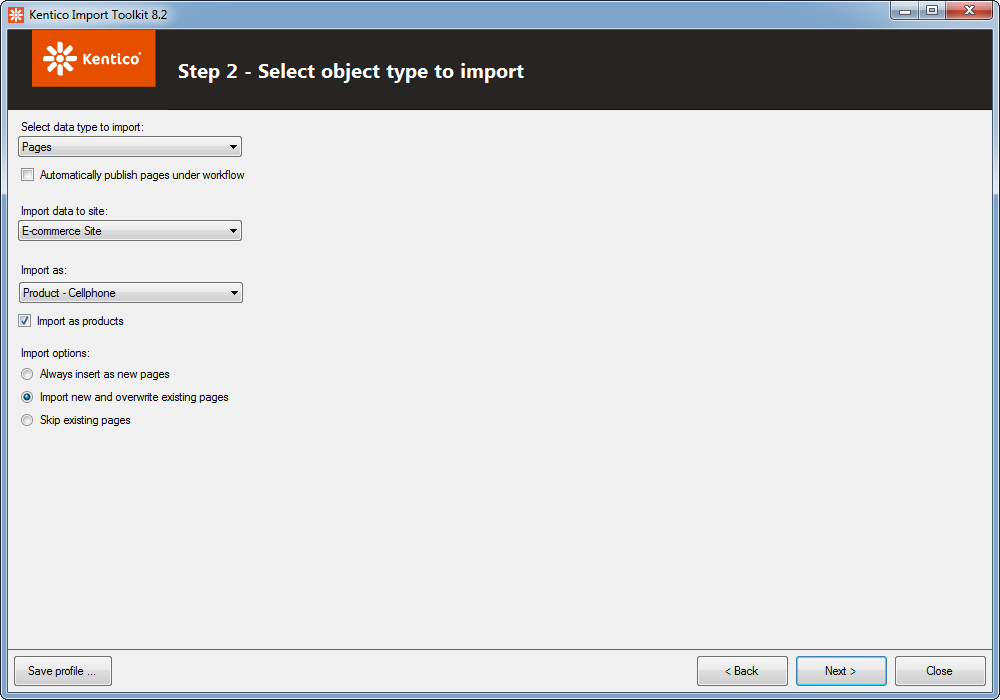
In Step 2, select the following properties, and click Next:
- Select data type to import: Pages
- Automatically publish pages under workflow: No (cleared)
- Import data to site: E-commerce Site
- Import as: Product - Cellphone
- Import as products: Yes (selected)
- Import options: Import new and overwrite existing pages
- Note: In this case, all of the options in the Import options field would work (since the sample E-commerce Site does not contain the imported products).
- Note: In this case, all of the options in the Import options field would work (since the sample E-commerce Site does not contain the imported products).
In Step 3, select the File (XML, CSV or Excel formats), browse for the prepared XLSX file, and click Next.
Since the data starts in the A1 cell, just click Next in Step 4.
In Step 5, click Next.
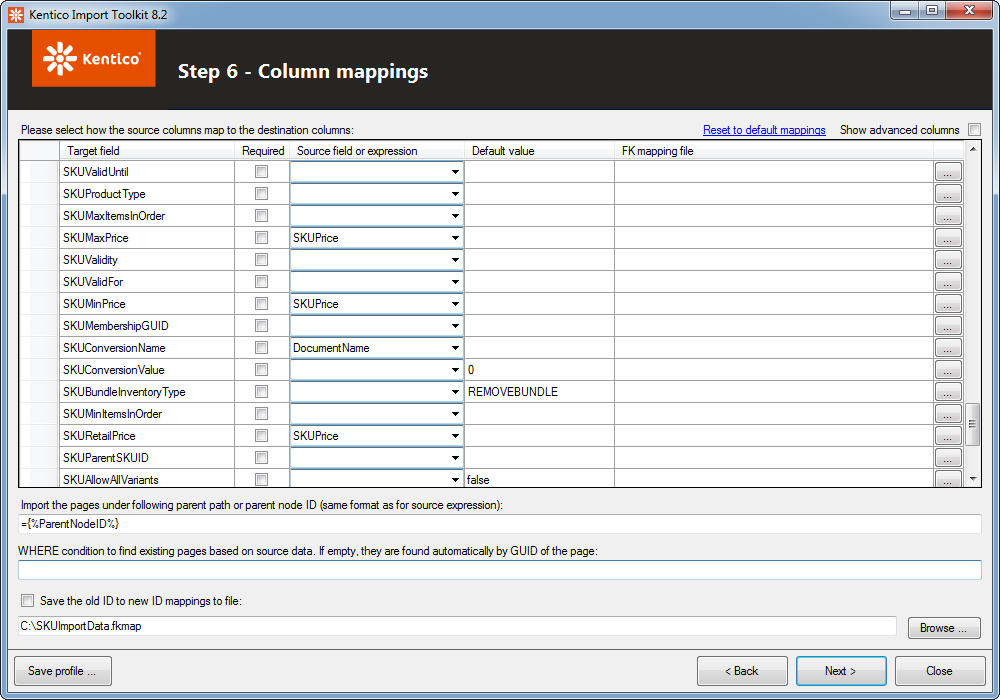
In Step 6, map the following target fields to the following source fields:
- CellPhoneWeight: CellPhoneWeight
- CellPhone3G: CellPhone3G
- DocumentName: DocumentName
- DocumentCulture: DocumentCulture
- DocumentSKUName: DocumentName
- DocumentSKUDescription: DocumentSKUDescription
- SKUNumber: SKUNumber
- SKUName: DocumentName
- SKUDescription: DocumentSKUDescription
- SKUPrice: SKUPrice
- SKUSiteID: SKUSiteID
Some of the fields are mapped automatically (from the list above and also not from the list above). Check whether these fields are mapped correctly.
To the Import the pages under following parent path or parent node ID field, enter the ={%ParentNodeID%} macro expression.
Leave the WHERE condition field blank, clear the Save the old ID to new ID mappings to file field, and click Next.
In Step 7, select Import the data, and click Import data.
Close the Toolkit.

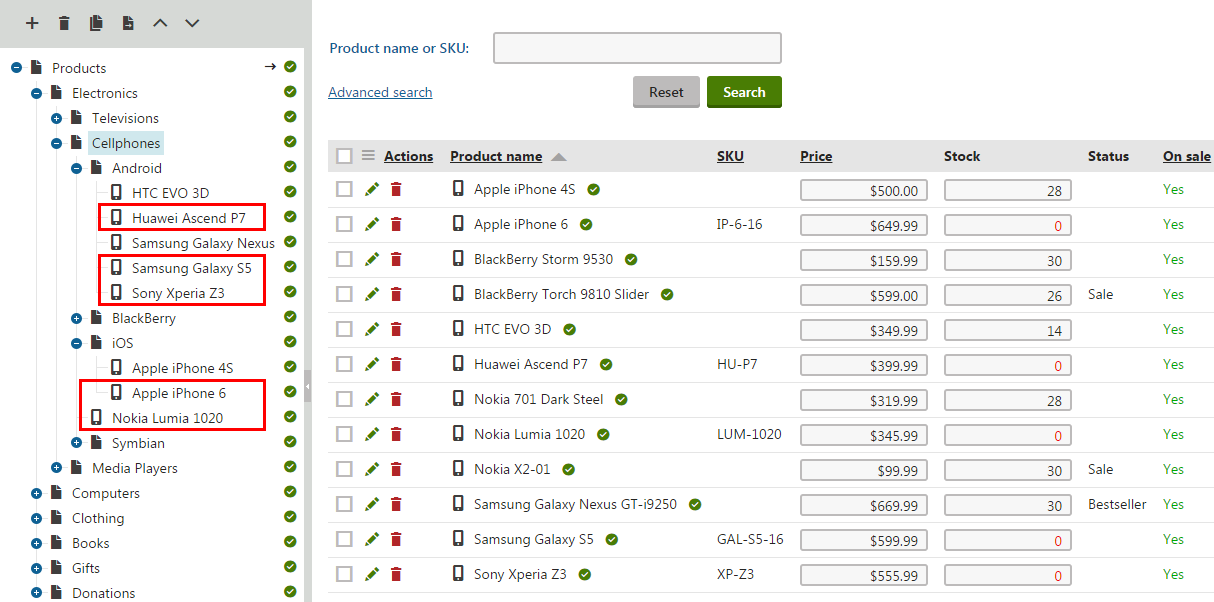
The system now contains the five products you just added. Open the Products application in the administration interface to see the products assigned to the specified sections.