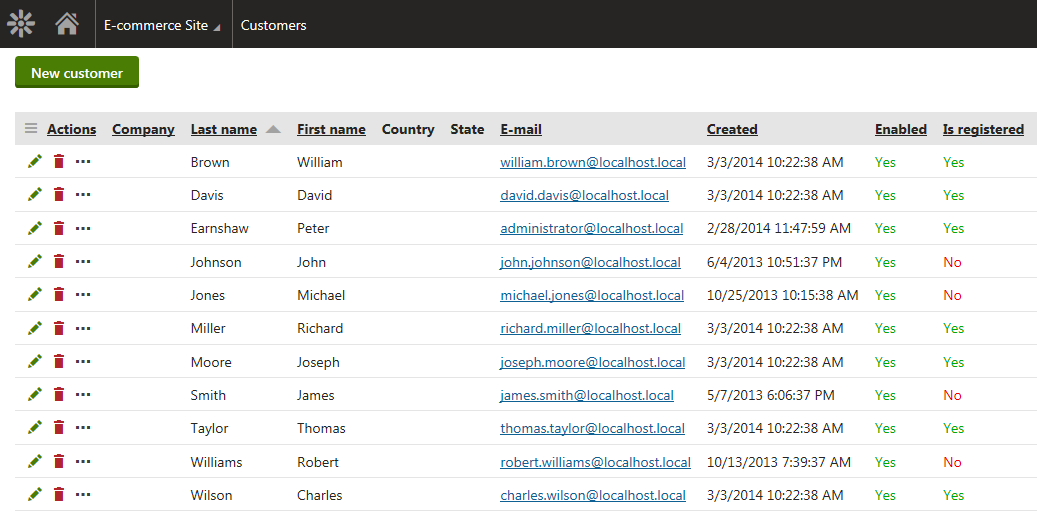
Customers
Your on-line store invites both anonymous and registered website visitors to purchase offered products. The visitors who purchase any of these products are referred to as customers. The anonymous customers can make a lump-sum purchase only. On the other hand, the registered customers can return to and purchase in your on-line store repeatedly.
You can configure the system to automatically register all anonymous customers after going through the checkout process. You can also give your customers the option of registering themselves during the checkout, or being registered automatically by the system after finishing it.
For all your customers, you can manage their personal and company details (if available), addresses, orders and email campaigns.
If you register your anonymous customers (on the Login details tab) or edit the registered ones, you can assign them to roles and memberships. Besides, you can specify credit amounts (in the on-line store main currency) for your registered customers, who can use this virtual money to pay for ordered products.
Managing customers
The usual scenario is that your on-line store visitors purchase some products (i.e. go through the checkout process) and, based on their personal preferences, become anonymous or registered customers.
The registered customers can manage their accounts, i.e. edit their account details, on the live site.
Besides, the system allows you to add customers manually in a dedicated part of the administration interface. Here you can also modify the properties of, and remove any selected customer.
To manage customers in the administration interface:
- Open the Customers application.
- Perform the required action.
- You can add new customers, and edit or delete the existing ones.
- Save your work.

Registering customers
The Kentico E-commerce Solution offers the following customer registration options:
Registering customers during checkout
To register your customers during the checkout process, you need to add the Customer registration form web part to a selected checkout step. If so, the customers have to specify their e-mail address and login password while going through this step.
See Configuring a checkout process for registered customers for more details.
Allowing anonymous customers to get registered after checkout
To allow your anonymous customers to get registered after going through the checkout process, you need to add the Register after checkout web part to a selected (usually the last) checkout step. If so, customers purchasing anonymously have the option (check box) to get automatically registered after placing the order. The system creates a new account for the customers, using information that they entered during checkout; this means that no additional data input by the customers is needed.
Configuring the system to register customers automatically
To configure the system to register your anonymous customers automatically after finishing the checkout process, you need to enable dedicated E-commerce settings.
See Configuring settings related to the checkout process for more details.
Registering customers in the administration interface
To register customers who placed their orders in your on-line store anonymously, in the administration interface:
- Open the Customers application.
- Edit () a selected anonymous customer.
- Switch to the Login details tab.
- Enter and confirm a login password.
- The customer will use this password to sign into their personal account.
- (Optional) Click Generate password for a login password to be generated automatically by the system.
- Click Save.
The system updates details of the customer with their login details. The customer receives to an address specified during the checkout process a notification e-mail informing them about their registration details (login name, password).
Allowing anonymous and registered customers to go through the checkout process
Both anonymous and registered customers can purchase offered products by default. This means you don’t have to configure your custom checkout process in any special way if you want to allow checkout for all your customers. Although it is technically possible to configure the system to allow checkout only for anonymous customers (by disabling user registration on the website or hiding the checkout process pages for registered customers), the opposite scenario is a more likely option.
Assigning customers to roles
Roles are objects determining which actions the assigned website users can perform on the live site and in the administration interface. To assign your customers to roles:
Open the Customers application.
Edit () a selected registered customer.
Switch to the Roles tab.
Click Add roles.
- The system opens the Select roles dialog.
Select the role(s).
Click Save & Close.
- The system closes the Select roles dialog.
The system assigns the customer to the selected role(s). This means the customer is now a member of the role(s). If you modify permissions for the role(s), the modification takes effect also on the customer.