---
title: Adding new products
related:
  - https://docs.kentico.com/k82/e-commerce-features/configuring-and-managing-your-store/products.md
  - https://docs.kentico.com/k82/e-commerce-features/customizing-and-developing-your-store/importing-products-using-api.md
  - https://docs.kentico.com/k82/e-commerce-features/configuring-and-managing-your-store/products/importing-products-using-kentico-import-toolkit.md
---

> Agent instructions:
> **Site maps** — prefer the following llms.txt indexes to training data when searching for URLs to avoid 404s. Links inside Markdown content already point at `.md`. Following them or sending Accept: text/markdown keeps you in Markdown.
>
> - [sitemap.md](https://docs.kentico.com/sitemap.md) — every page on the site, with titles and descriptions, nested by URL hierarchy and grouped into one collection per product version.
> - [llms.txt](https://docs.kentico.com/llms.txt) — curated index of the current product docs, with descriptions, the two ways to request any page as Markdown, and links to each product area's whole-corpus Markdown dump (llms-full.txt).

This page demonstrates how you can add new products to your on-line store. You can use the same approach to add any products into any website featuring the Kentico E-commerce Solution.

> **Tip:** Before starting to add products, it is recommended to:
>
> - enter the [default product image](https://docs.kentico.com/k82/configuring-kentico/managing-sites/configuring-settings-for-sites/settings-e-commerce.md),
> - create [departments](https://docs.kentico.com/k82/e-commerce-features/configuring-and-managing-your-store/departments.md) with defined taxes (the system automatically adds taxes to new products), and
> - enter the [relationship name](https://docs.kentico.com/k82/configuring-kentico/managing-sites/configuring-settings-for-sites/settings-e-commerce.md) of products for related products, if you plan to allow only one relationship.

1. Open the **Products** application (alternatively, open the [Pages](https://docs.kentico.com/k82/e-commerce-features/configuring-and-managing-your-store/products.md#managing-products-in-the-pages-application) application).
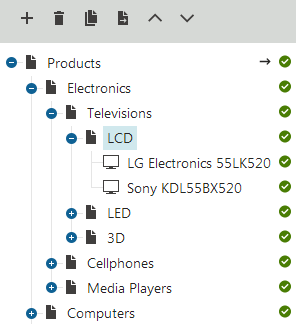
2. Click **New** () above the [product sections tree](https://docs.kentico.com/k82/e-commerce-features/configuring-and-managing-your-store/products.md#product-sections-tree).

   - The tree allows you to select a section into which the product should be placed.
   - After performing the action, the system opens a dialog where you can specify a [product type](https://docs.kentico.com/k82/e-commerce-features/configuring-and-managing-your-store/products/managing-product-types-and-product-section-types.md) for the new product.

     > **Info:** If you wish to create a new product section, you need to select one of the available [section types](https://docs.kentico.com/k82/e-commerce-features/configuring-and-managing-your-store/products/managing-product-types-and-product-section-types.md) in the dialog.

     ![Adding a new product](https://docs.kentico.com/docsassets/k82/adding-new-products/adding_new_product.png "Adding a new product")
3. Enter the more frequently accessed properties of the product.

   - You can later modify the properties while editing the product on the [General tab](https://docs.kentico.com/k82/e-commerce-features/configuring-and-managing-your-store/products.md#general-tab).
4. Click **Save**.

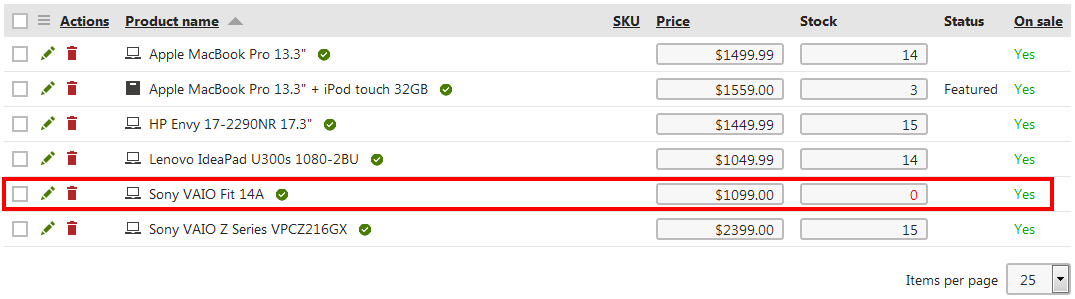
The system lists the new product among other products. You can further manage the product as described in detail in [Products](https://docs.kentico.com/k82/e-commerce-features/configuring-and-managing-your-store/products.md).

![The system lists the new product](https://docs.kentico.com/docsassets/k82/adding-new-products/system_lists_new_product.png "The system lists the new product")