
Preparing the cloud environment
Before you start installing a Kentico project for Microsoft Azure, it can be convenient to configure the cloud environment using the Microsoft Azure Management Portal and create parts of the system you will need. It is not necessary to create all the parts in advance, but doing so all at once can save you time later.
To run a Kentico project on Microsoft Azure, you will need to create:
An Azure project can use either a standard hosted SQL Server or a cloud server. If you want to use the database service on Microsoft Azure platform, create also:
Service location and affinity groups
We recommend that you configure an affinity group and use it for all data and cloud services you create. An affinity group ensures that the services assigned to it will be located in one datacenter and even close together within the particular datacenter.
To create an affinity group:
Click Settings in the left toolbar.
Select the Affinity groups tab.
Click Add.
Type the Name and Description for the affinity group.
Select the ideal Region.
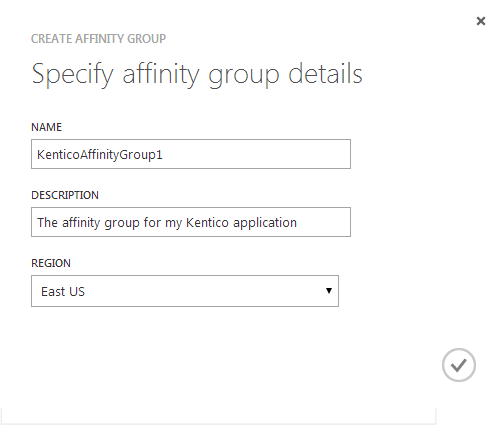
Finish the creation.
When creating new services, you can now assign them to the same affinity group to ensure their best performance.
Alternatively, you can also select the same location (for example, East US) for all created services.
Creating a Microsoft Azure Storage
The Microsoft Azure Storage account will serve as a file system for your cloud based project. It provides access to the blob, queue and table services.
Click New -> Data services -> Storage -> Quick create.
Type a URL (name) of your new Azure storage, which is not currently in use.
Select the location for your storage. Use an affinity group or the same location for all created services.
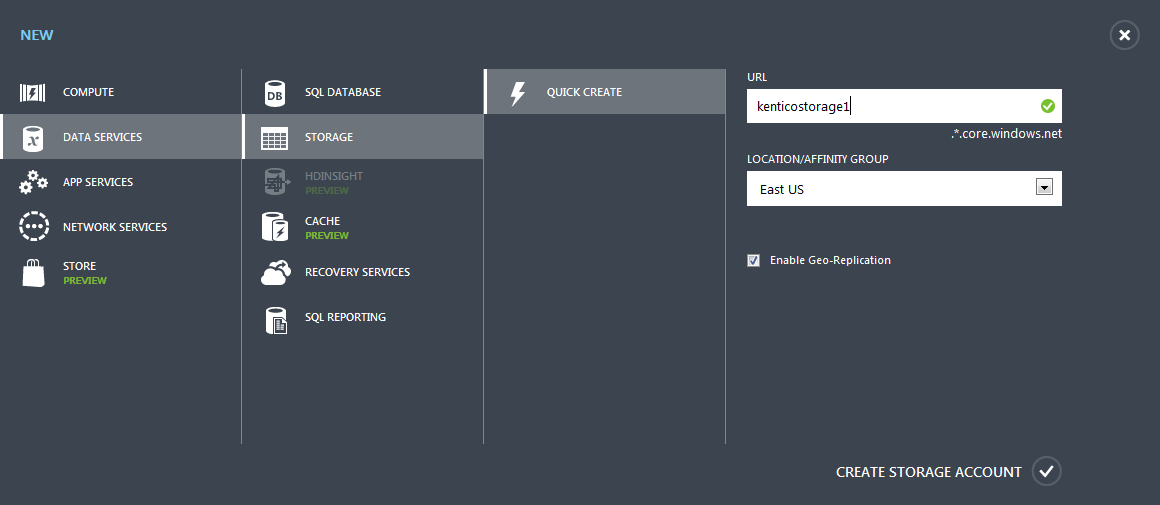
Click Create storage account.
The portal creates the storage and you can see it in the list of storages.
Creating a Microsoft Azure Cloud service
The Microsoft Azure Cloud Service provides an infrastructure for the code and configuration of your project.
Click New -> Compute -> Cloud service -> Quick create.
Type a URL (name) of your new Azure cloud service, which is not currently in use.
Select the location for your storage. Use an affinity group or the same location for all created services.
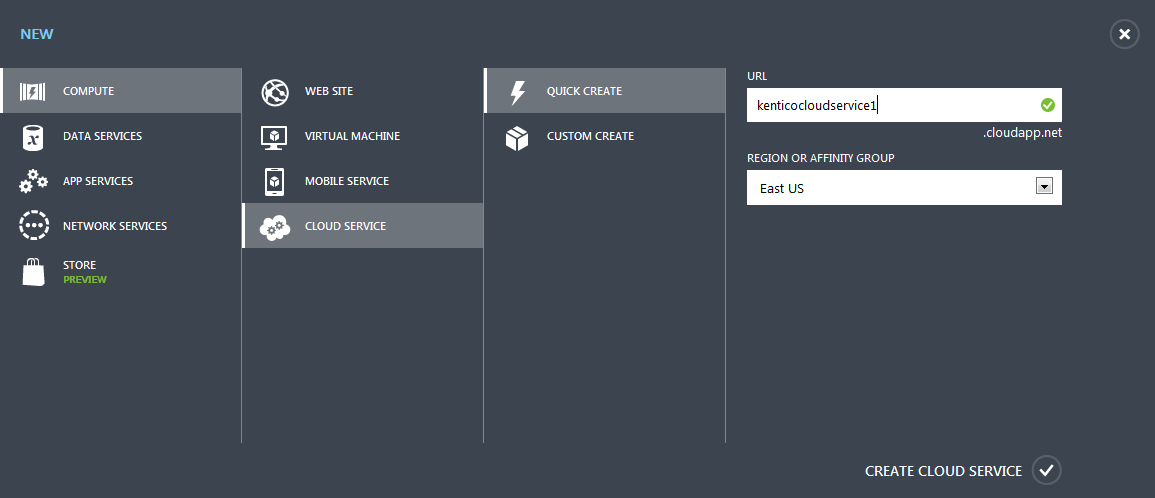
Click Create cloud service.
The portal creates the cloud service.
Creating a Microsoft Azure SQL Server
The Azure SQL Server is a virtual server you can create in the cloud. You will need the server to create databases in it.
- Select SQL Databases in the panel on the left.
- Click Servers.
- Click Add.
- Specify a login name and password for the server.
- Choose a region for the server’s location. Use an affinity group or the same location for all created services..
- Ensure, that the option Allow Windows Azure services to access the server is selected.
- This option adds special firewall rules to allow your deployed Kentico project to access the server and its databases.
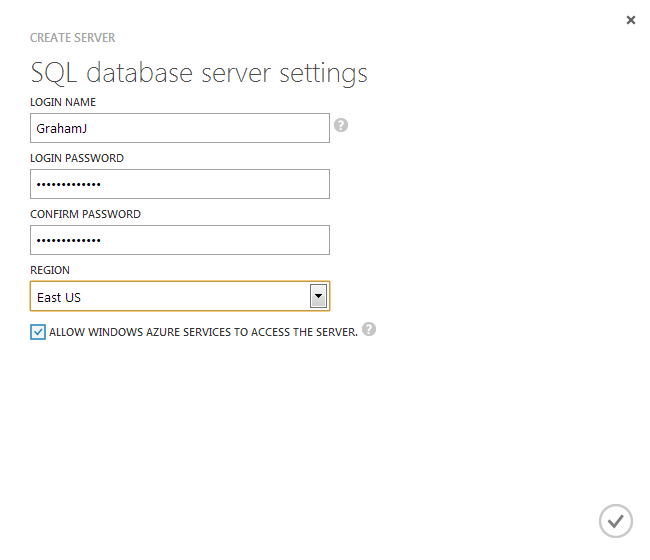
- This option adds special firewall rules to allow your deployed Kentico project to access the server and its databases.
- Confirm the creation of the server.
The portal creates a new server. If you want to manage this server locally or use a local emulator, add firewall rules for IP ranges of your development and administration machines:
Adding firewall rules for a server
- Select the server.
- Switch to the Configure tab.
- Click the Add to the allowed IP addresses link or type the name of the rule and the IP address range of your development and administration machines.
- Click Save in the bottom panel.
You have configured the server to be locally accessible.
Creating a Microsoft Azure SQL Database
Create a new database on the virtual server, so that you can use it for Kentico database installation:
Click New -> Data services -> SQL database -> Quick create.
Type the name of the database.
Choose the Azure SQL database server you have already created.
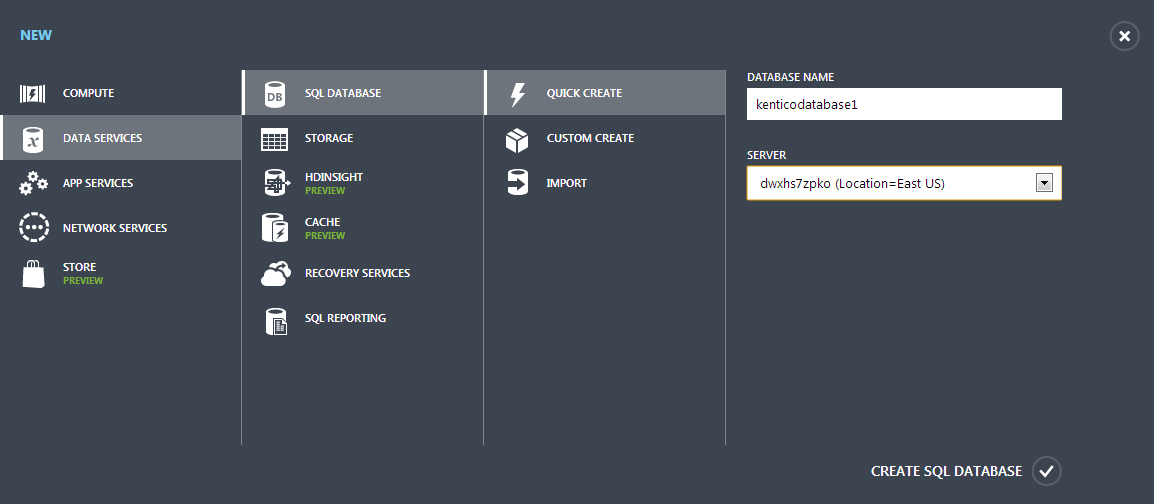
Click Create SQL database.
The portal creates your SQL database and you can now use it to install the Kentico database in it.