Importing products using Kentico Import Toolkit
Kentico Import Toolkit is a utility that allows you to import data from external sources into the system. As a source of data, you can use:
- XML file
- MS Excel files, such as CSV or XLSX files
- MS SQL database
The following examples demonstrate how you can:
- Import products from an external source of data into a Kentico website.
- Change product properties using an external source of data.
In these examples, you will be importing products, i.e. creating product objects, together with associated product pages, using an XLSX file.
You can use this procedure to import products into any Kentico website from any of the listed sources of data.
Importing products from an external source of data
Taking preparatory steps
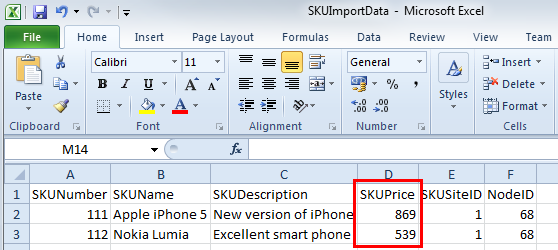
Prepare your external source of data, for example an XLSX file. Make sure that all product properties required for import into the Kentico database are included.
- SKUNumber - contains product designation (product number) used in your external warehouse. The property allows you to bind product data in your on-line store with product data outside Kentico; an optional field.
- SKUSiteID - specifies a unique identifier of the website where you want to import the products. You can get this value from the CMS_Site database table.
- NodeID - specifies a unique identifier of the node, i.e. an item in the website structure under which you want to place the imported products. You can get this value (Node ID) from Pages -> Edit -> Properties -> General after selecting the node from the content tree.
Launch the Kentico Import Toolkit in Start -> All programs -> Kentico <version> -> Utilities (Windows).
This opens the initial screen of the Kentico Import Toolkit wizard.
Using the Kentico Import Toolkit wizard
In each (except for the initial) wizard step, you can click Save profile and save the configuration done until that point. The system saves the configuration as an .iprofilefile in a destination of your choice.
Start a new import session.
- Alternatively, load an import profile that you created during a previous product import.
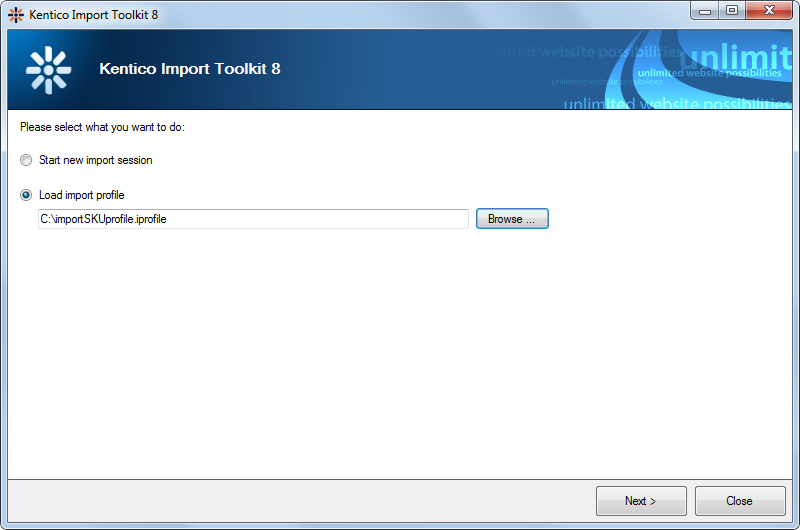
- Alternatively, load an import profile that you created during a previous product import.
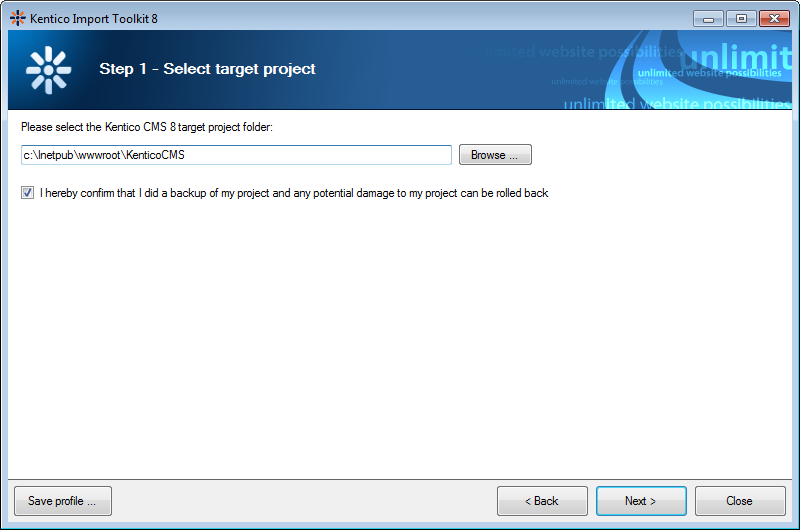
Specify the root folder of the project into which you want to import the products.
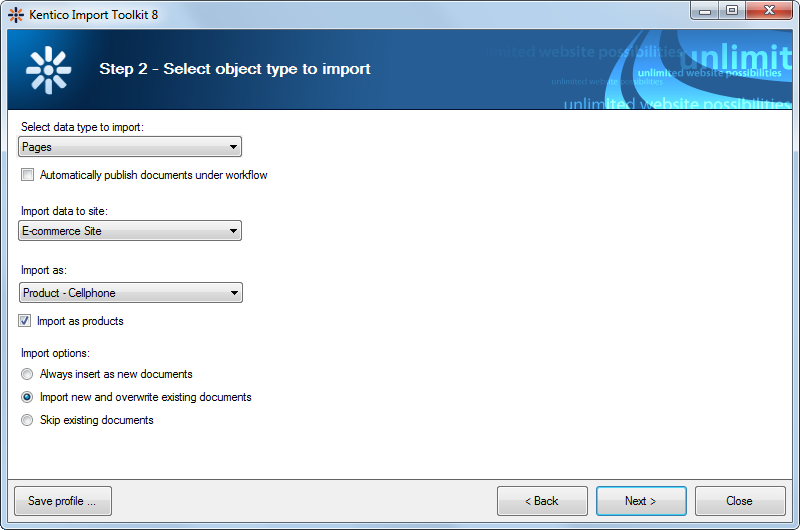
Select the object type that the system will use to store the imported data.
- Select data type to import - Pages.
- Import as - select the product type that the system will use to store the imported products.
- Import as products - confirm that the data is imported as products.
- Import options - select that you want to import new pages and overwrite the existing ones.
Specify the source of the imported data.
If you specify a source of data different from an XLSX or CSV file, the Kentico Import Toolkit wizard displays the following step accordingly.
Specify the row and column of the source file that the system will take as the beginning of the heading row of the imported data.
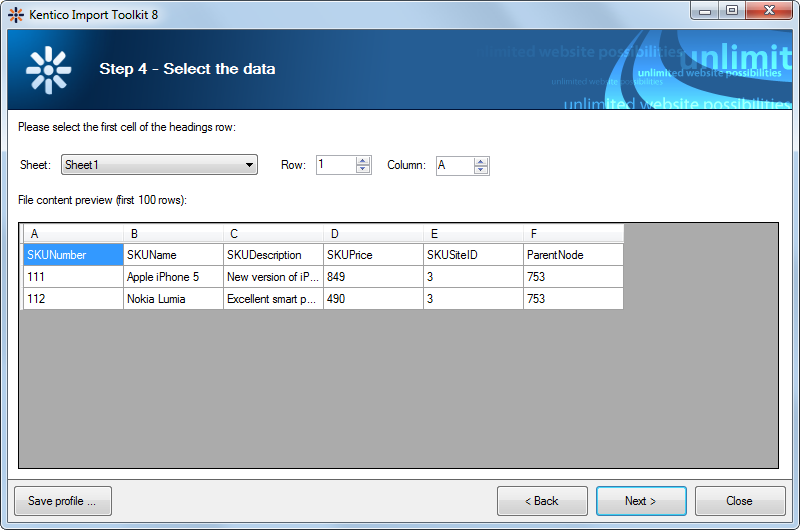
Preview the source of data.
Check and configure the field mappings.
- Import the pages under following parent path or parent node ID - specifies the path (for example, /Products/Electronics/Cellphones) or node identifier of the parent page under which you want to place the imported products. In this example, the value corresponds to the value of the ParentNode field in your source XLSX file.
If you insert the ={%ParentNodeID%} macro expression, the system automatically places the imported products under different parent pages as specified in your source of data. - WHERE condition to find existing pages based on source data - determines which of the existing products the system skips or overwrites. Hidden if you configured the Kentico Import Toolkit to always insert the imported products as new pages (in the Import options section while selecting the object type).
- Save the old ID to new ID mappings to file - saves mappings of source identification fields to target identification fields into an .fkmap file. You can use this file when configuring field mappings during your later import sessions.
You are importing products, i.e. creating product objects, together with associated product pages.
That’s why the DocumentName, DocumentSKUName and SKUName target fields must map to the same source field.
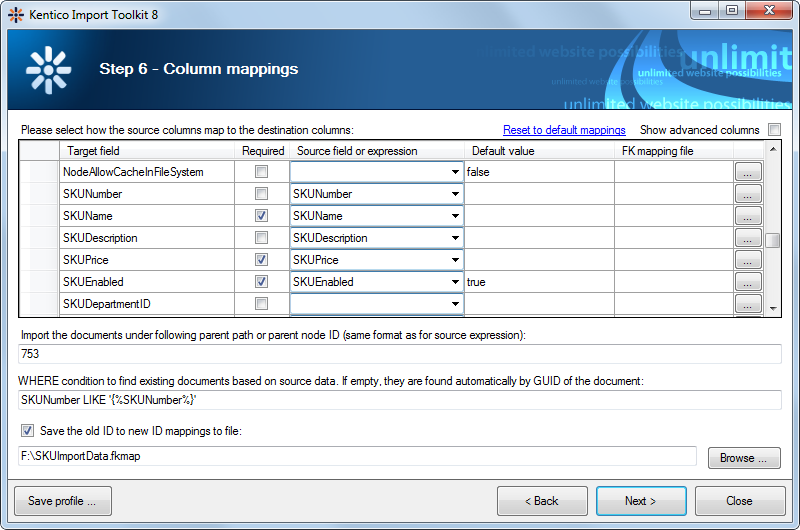
- Import the pages under following parent path or parent node ID - specifies the path (for example, /Products/Electronics/Cellphones) or node identifier of the parent page under which you want to place the imported products. In this example, the value corresponds to the value of the ParentNode field in your source XLSX file.
Preview the target data.
Perform the import of product data from the source to your on-line store.
The Kentico Import Toolkit informs you about the result of the import.
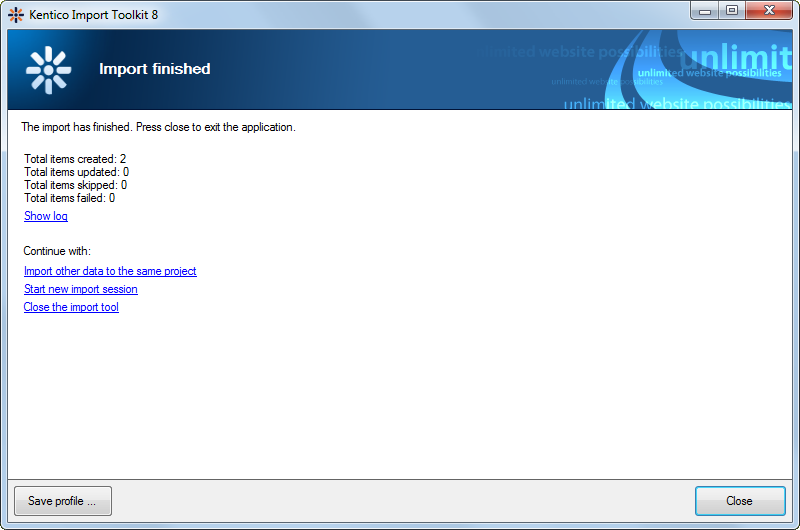
Close the wizard.
- Alternatively, continue with one of the available scenarios (the Continue with section).
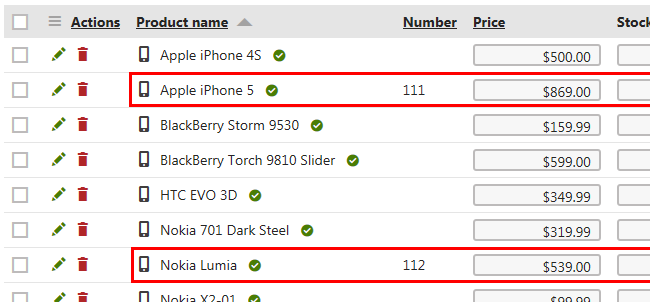
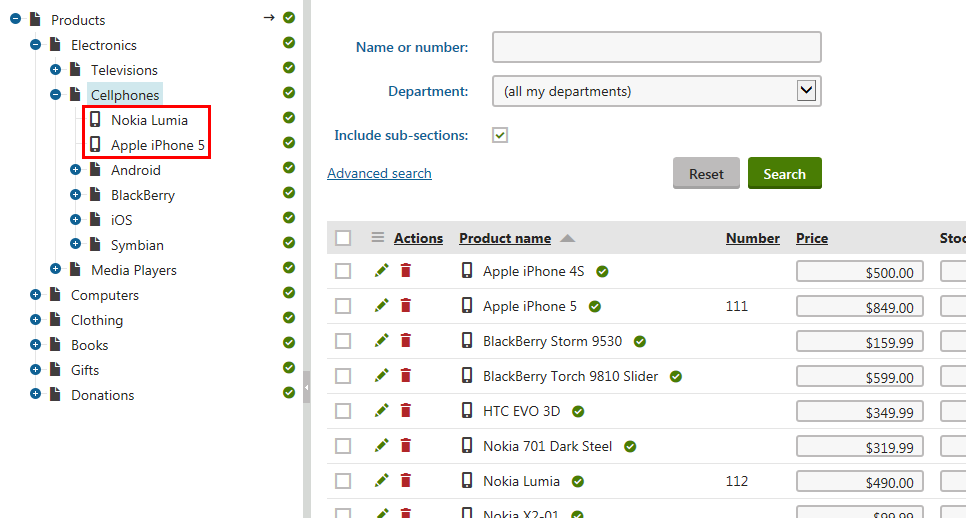
If you open the Products application, you can see that the imported products are listed under Electronics -> Cellphones.
Changing product properties using an external source of data
Update your external source of data.
For example, change the price of the products. This means that you need to update the values in the respective field of your source file.
Launch the Kentico Import Toolkit in Start -> All programs -> Kentico <version> -> Utilities (Windows).
Repeat the steps that you went through while importing the products (Kentico Import Toolkit wizard).
In Step 2 - Select object type to import -> Import options, make sure the Import new and overwrite existing pages option is selected.
If you now open the Products application and go to Electronics -> Cellphones, you can see the updated price.