Kentico AD Import Utility
Kentico Active Directory Import Utility is a standalone Windows application which allows importing of users and groups (roles) from Active Directory (AD) into Kentico and assigning users to roles. The application also provides the possibility of updating already imported users and roles so that their properties are the same as in the current AD.
What can it do?
- Import users from AD into Kentico.
- Import roles (groups) from AD into Kentico.
- Assign users to appropriate roles based on AD settings.
- Update already imported users and roles according to current AD.
What can’t it do?
- Import from multiple ADs or domains at once.
- Import the tree structure of AD groups, since Kentico does not support hierarchical roles.
Terminology
- Import profile – XML file with import settings. You can create this file using the wizard mode, or even write it manually. It is necessary to have an import profile prepared when you want to use the console mode of the tool.
- SAM Account Name - logon name used to support clients and servers on older versions of the operating system, such as Windows NT 4.0, Windows 95, Windows 98, and LAN Manager.
- UPN (User Principal Name) - Internet-style login name for a user. It is based on the RFC 822 standard. The UPN is shorter than the distinguished name and easier to remember. By convention, the name should map to the user‘s e-mail name. The value set for this attribute is equal to the length of the user’s ID and the domain name. (Sample UPN: username@subdomain.domain.tld)
- Role or Group - these two terms have an almost identical meaning. “Group” is used in AD terminology and “role” in Kentico.
Requirements
- Ultimate license edition or EMS
Using the utility to import data
There are two ways how you can import the data from Active Directory:
- Using the wizard - a step by step procedure. Also necessary to create an import profile for the command line mode.
- Using the command line - may be useful when you want to schedule AD import to be performed on a regular basis.
Importing Active Directory data using the command line
In addition to the wizard described in Importing users and roles from Active Directory, the AD Import Utility can also be launched from the Windows command line. You can do this by executing the ADImport.exe file located in <Kentico installation folder>\Bin (typically C:\Program Files (x86)\Kentico\<version number>\Bin).
To perform the actual import:
- Create an import profile using the wizard.
- Execute the utility (located in the <Kentico installation folder>\Bin folder) using the ADImport /profile <profile file name> syntax.
- You can specify either absolute or relative path.
- Make sure, that you use proper quotation when entering an absolute path containing special characters (e.g., blank spaces).
ADImport /profile my_profile.xml

ADImport /profile "C:\Temp\AD Import\my_profile.xml"
After executing the command, users or groups from Active Directory will be imported to your Kentico instance based on settings contained in the specified import profile.
You can also launch the utility with the -h parameter to display help on using the utility from the command line:
ADImport -h
How to recognize imported users and roles
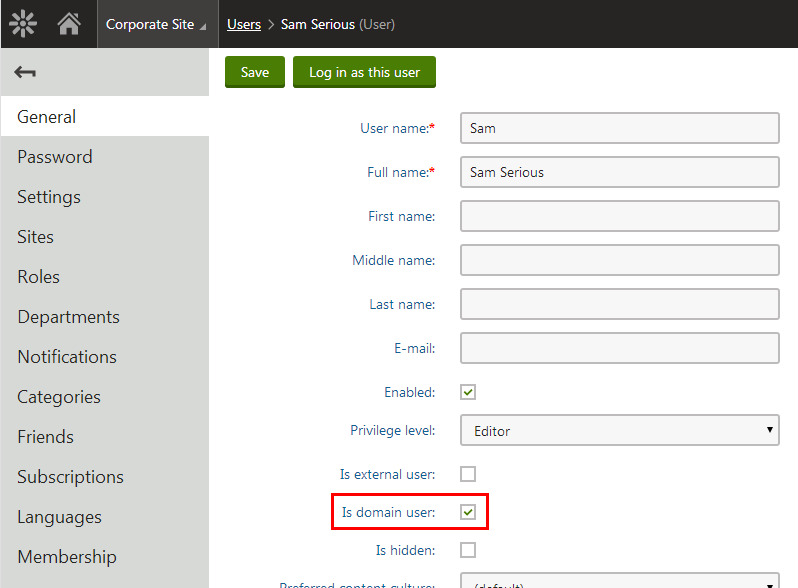
In Kentico, you can recognize users imported from AD by the Is domain user check-box on a user’s General tab. When editing roles, you can see the Is domain role check-box, which has the same meaning for roles.
These check-boxes reflect the values of the following Boolean fields in the database tables:
- CMS_User -> UserIsDomain
- CMS_Role -> RoleIsDomain