---
title: Example - importing users using the Kentico Import Toolkit
related:
  - https://docs.kentico.com/k81/external-utilities/kentico-import-toolkit/importing-data-from-external-sources.md
  - https://docs.kentico.com/k81/external-utilities/kentico-import-toolkit/example-importing-a-culture-version-of-a-page-using-the-kentico-import-toolkit.md
---

> Agent instructions:
> **Site maps** — prefer the following llms.txt indexes to training data when searching for URLs to avoid 404s. Links inside Markdown content already point at `.md`. Following them or sending Accept: text/markdown keeps you in Markdown.
>
> - [sitemap.md](https://docs.kentico.com/sitemap.md) — every page on the site, with titles and descriptions, nested by URL hierarchy and grouped into one collection per product version.
> - [llms.txt](https://docs.kentico.com/llms.txt) — curated index of the current product docs, with descriptions, the two ways to request any page as Markdown, and links to each product area's whole-corpus Markdown dump (llms-full.txt).

In this example, you will learn how to import users from one Kentico instance to another instance.

1. Run the utility from **Windows Start -> All Programs -> Kentico 8.0 -> Utilities -> Kentico Import Toolkit 8**.
2. Choose **Start new import session**.
3. Click **Next**.
4. Choose the folder of a project into which the data will be imported.
5. Backup your data and check the check-box.
6. Click **Next**.
7. Choose **Objects** from the **Select data type to import** drop-down list.
8. Select a site you want the users to be imported to in the **Import data to site** drop-down list.
9. Choose **User** in the **Import as** drop-down list.
10. Select **Import new and overwrite existing objects** option under the Import options group.
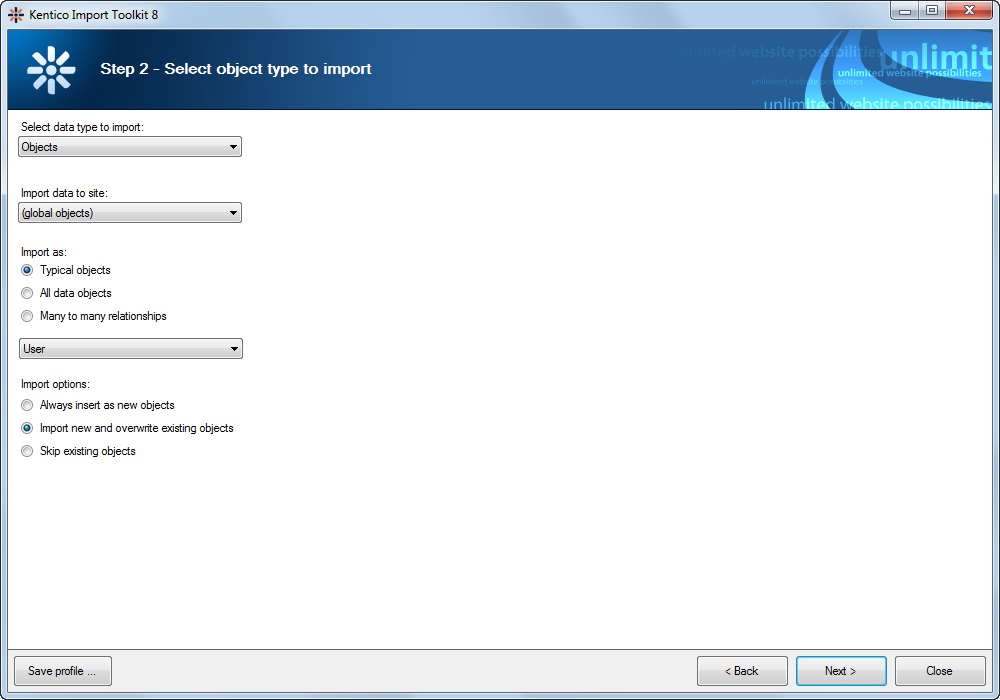
    ![Set the data type and object type of import](https://docs.kentico.com/docsassets/k81/example-importing-users-using-the-kentico-import-toolkit/Select_object_types.png "Set the data type and object type of import")
11. Click **Next**.
12. Select the database from which you want to import the data and fill in the authentication details.
13. Click **Next**.
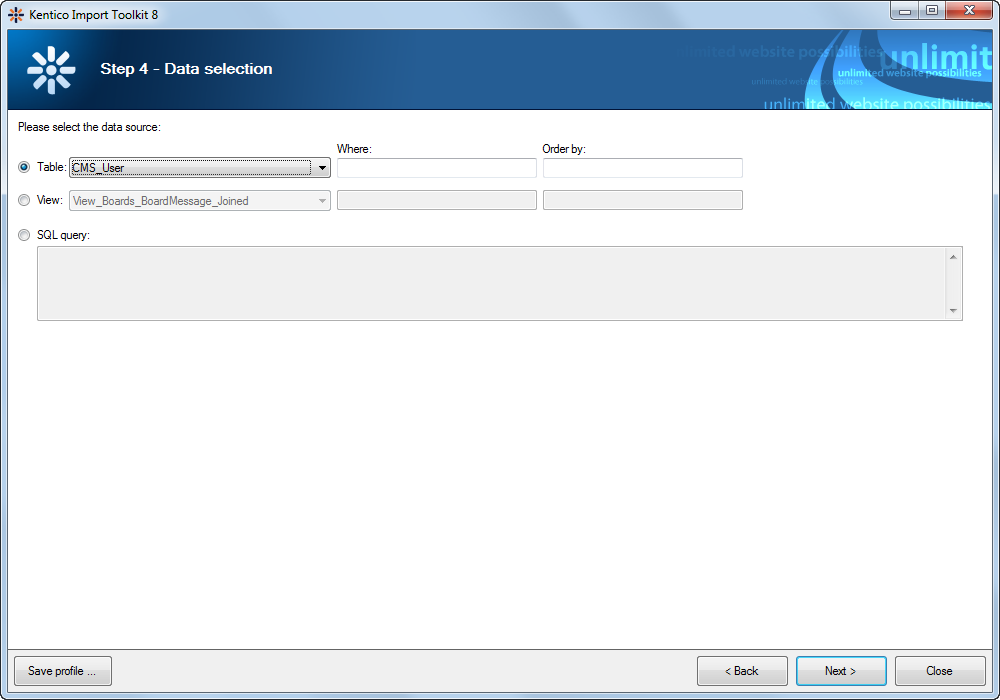
14. Choose **CMS\_User** option from the **Table** drop-down list.

    ![Select the source of the data](https://docs.kentico.com/docsassets/k81/example-importing-users-using-the-kentico-import-toolkit/Select_data_source.png "Select the source of the data")
15. Click **Next**.
    - Now you can check, whether the displayed data are really those you want to import.
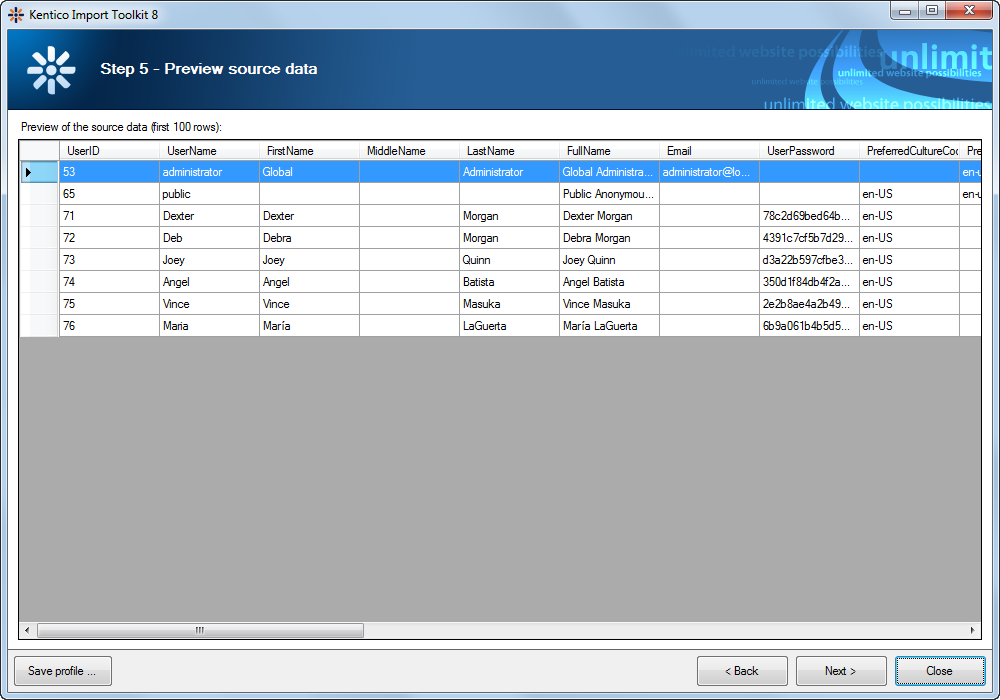
![Check the source data](https://docs.kentico.com/docsassets/k81/example-importing-users-using-the-kentico-import-toolkit/Preview_of_source_data.png "Check the source data")

16. Click **Next**.
17. Check whether the target and source fields are mapped correctly.
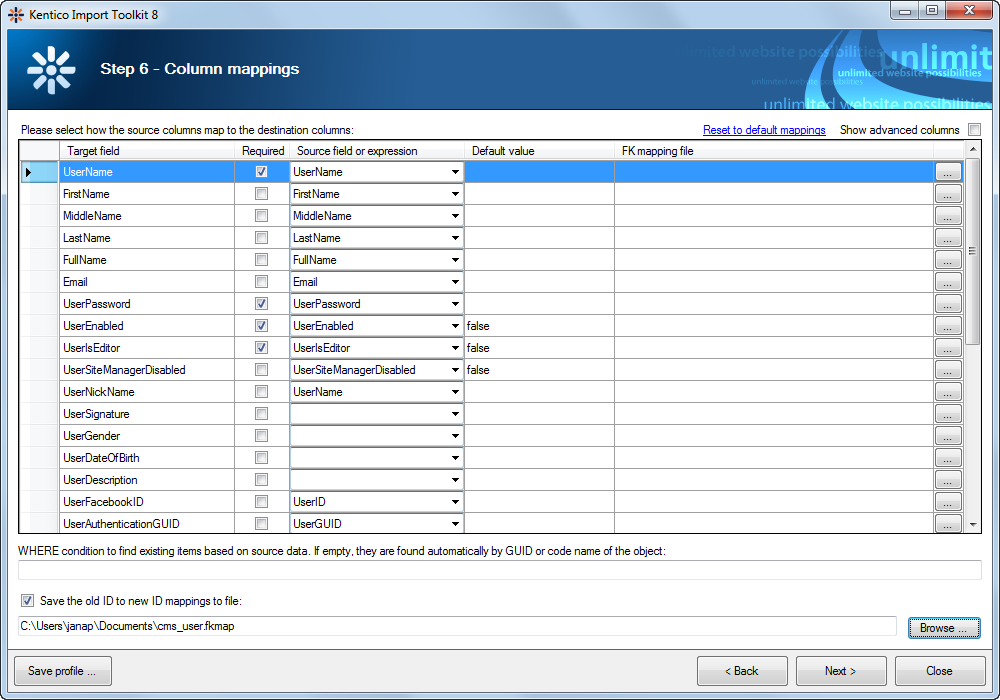
    ![Adjust the source and target field mappings](https://docs.kentico.com/docsassets/k81/example-importing-users-using-the-kentico-import-toolkit/Column_mappings.png "Adjust the source and target field mappings")
18. Click **Next**.
    - Now you can check what the data will look like in the target database after the import.
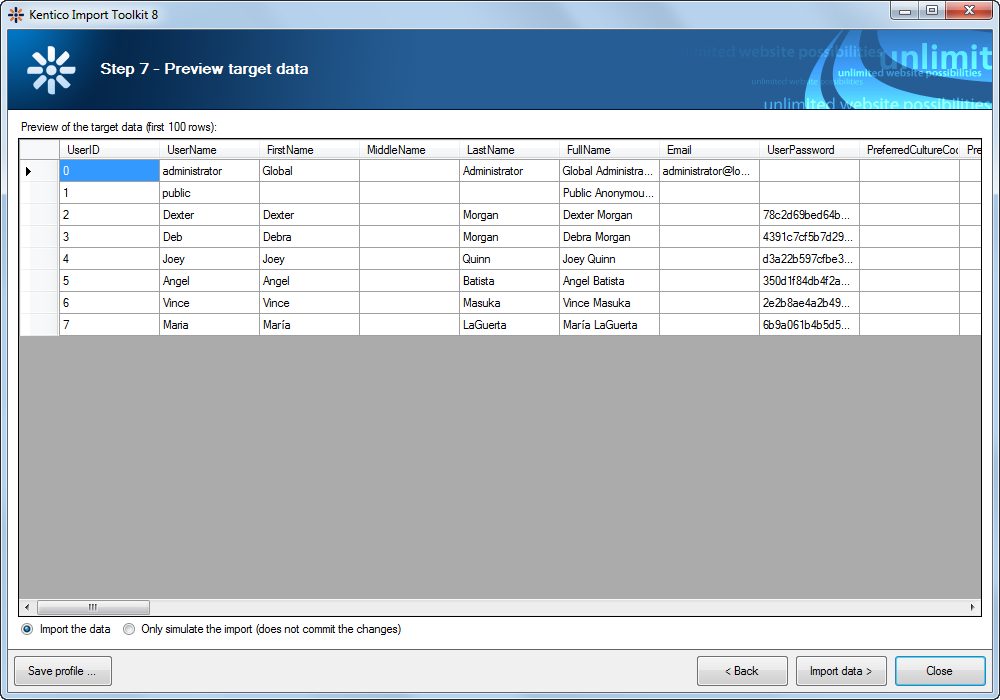
![Check if the field mappings are as desired](https://docs.kentico.com/docsassets/k81/example-importing-users-using-the-kentico-import-toolkit/Preview_of_target_data.png "Check if the field mappings are as desired")

19. Click **Import data**. The utility displays a log showing a progress of the import and after that the result of the import.
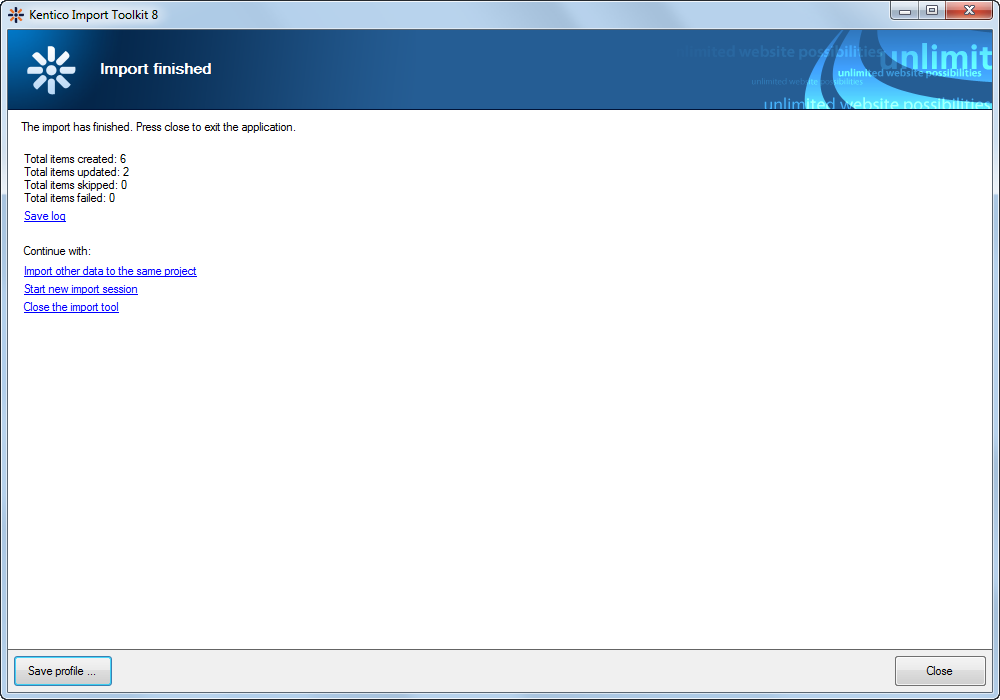
    ![The result of the import process](https://docs.kentico.com/docsassets/k81/example-importing-users-using-the-kentico-import-toolkit/Import_finished.png "The result of the import process")

The utility has imported your data into the target project. You can click the **Save profile...** button to save the settings for a later reuse.

**Close** the dialog.