
Registering your application to use Microsoft accounts
To enable Microsoft account sign-in for your website, you need to register a Microsoft application:
- Sign in to the Microsoft Application Registration Portal (https://apps.dev.microsoft.com/) using your Microsoft account.
- Click Add an app in the Live SDK applications section.
- Enter an appropriate Name for your authentication application.
- Click Create application.
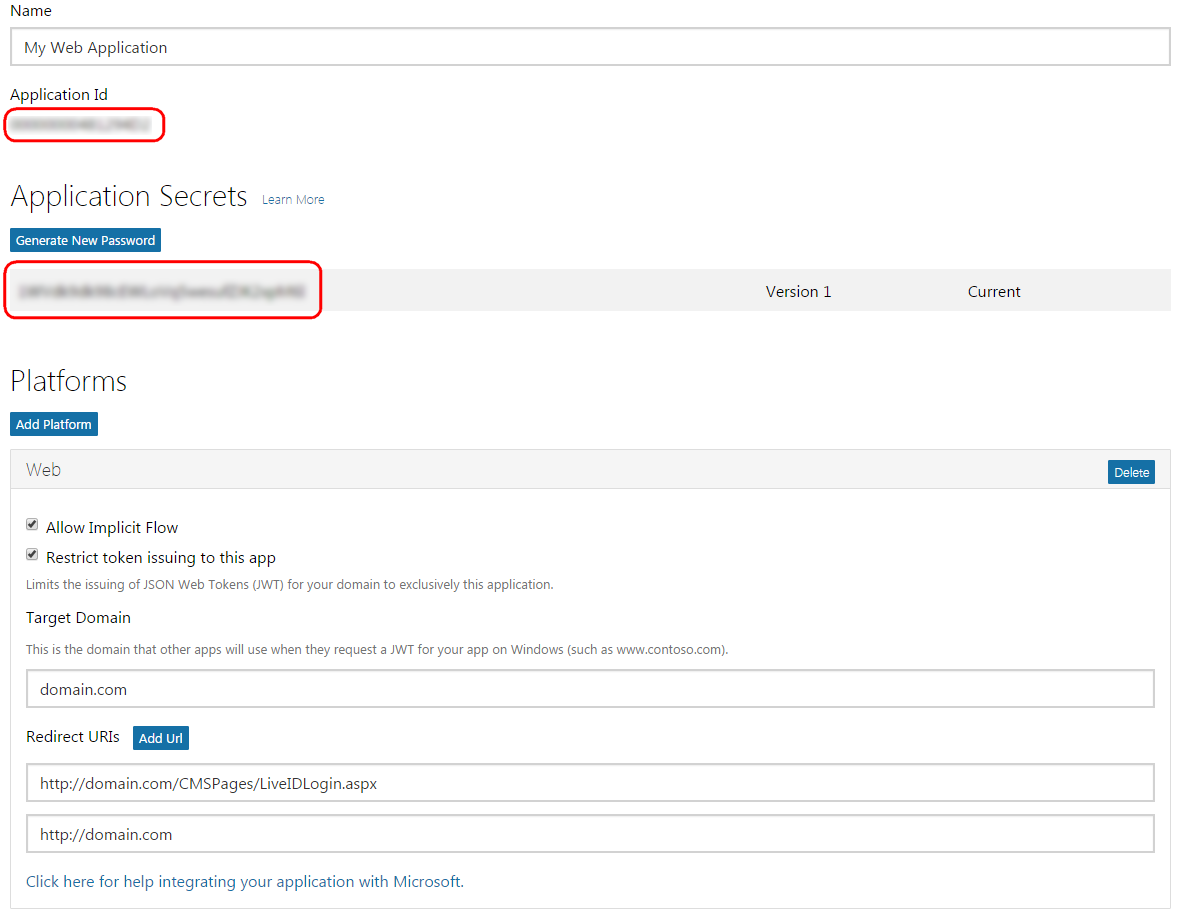
- In the Platforms section, configure a Web platform for your Kentico website (either use the default Web platform or create a new one):
- Type your website’s domain name into the Target Domain field.
- Add the URL of your website’s CMSPages/LiveIDLogin.aspx system page to the Redirect URIs.
- Use the fully qualified domain name (including the protocol and virtual directory, if applicable).
- For example: http://kenticositedomain.com/CMSPages/LiveIDLogin.aspx
- Click Add Url to create another Redirect URI and enter the full URL of your website’s default page (Home page).
- The site’s default URL depends on the Content -> Default alias path and URLs and SEO -> Default page settings.
- Include the default URL extension used by your website.
- Click Save.
- Copy the Application Id and Application Secret values. You need to enter the values into the corresponding settings in Kentico.
You can also specify additional details for your application in the Profile section, such as a logo or links to your website’s Terms of Service and Privacy Statement.