
Walk through the upgrade step-by-step
This walkthrough demonstrates upgrading from Kentico Xperience 13 (KX13) to Xperience by Kentico (XbyK) hands-on using the Kentico Migration Tool and our Dancing Goat sample site. You’ll see how to get website pages from KX13 up and running in XbyK without redesign or frontend development costs—just run the data migration and adjust how the data is handled on the backend.
This series is for you if you…
- Are a developer, solution architect, technical team leader, or other technical role.
- Prefer learning by doing.
- Are considering upgrading a KX13 solution to XbyK.
- Want hands-on experience with the basic upgrade process.
- Would like to go through a guided upgrade before applying it to your own KX13 solution.
What this series covers
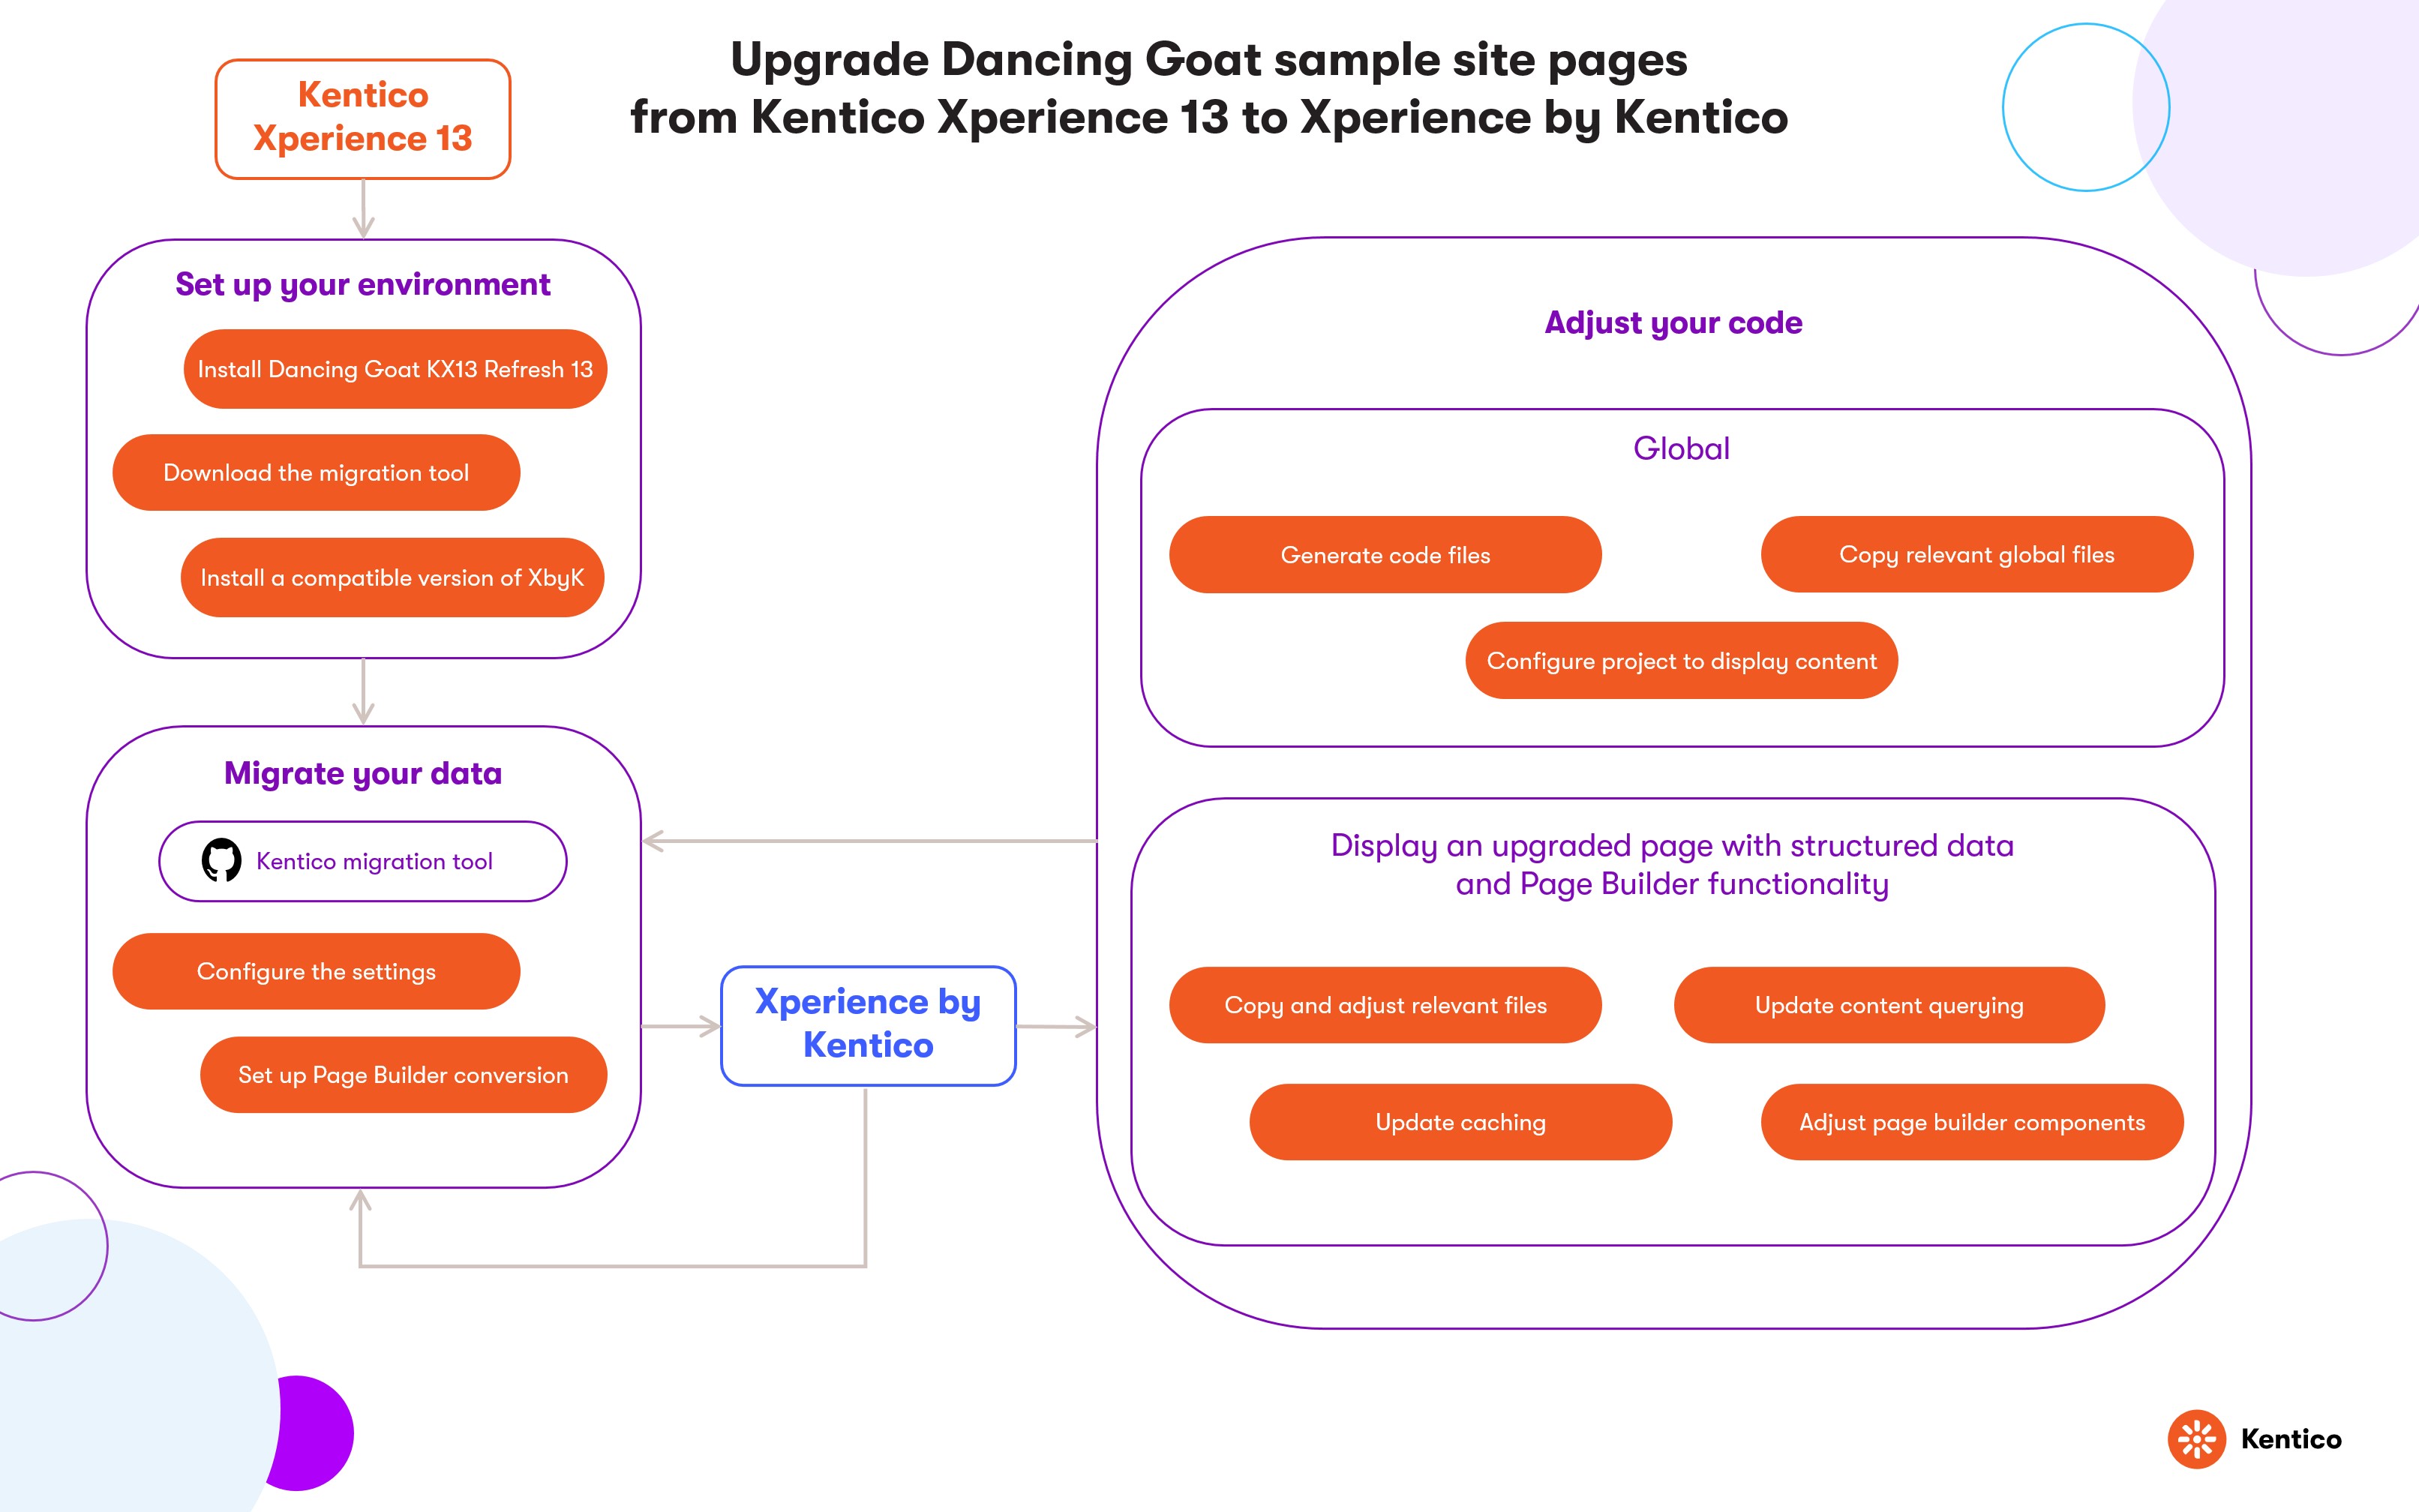
The following pages will guide you through the upgrade of the Dancing Goat demo site. We’ll cover everything from the environment and migration tool setup, through iterative data migration and code adjustments, to displaying an example webpage in XbyK identically to its KX13 counterpart:
- Set up your environment
- Migrate data and binary files
- Adjust global code on the backend
- Display an upgraded page with structured data and Page Builder functionality
- Next steps
This walkthrough showcases the minimal-effort path to get you started on your upgrade journey. It does NOT aim to cover the complete migration of all the pages and features used in the Dancing Goat sample site.
Let’s dive in
Start with Setting up your environment.