Implement navigation
With the navigation content types in place, let’s use a view component to render the Navigation menu that exists in the Content hub.
Create view models
Start by creating view models that correspond to the Navigation item and Navigation menu classes.
Add a new Navigation folder under Kickstart.Web/Features, to hold all the navigation-related files.
Inside, create the NavigationItemViewModel. It only needs two properties - Title and Url.
namespace Kickstart.Web.Features.Navigation;
public class NavigationItemViewModel
{
    public string Title { get; set; }

    public string Url { get; set; }
}
You might remember that in the page template step, you defined a method that created a LandingPageViewModel based on a LandingPage object.
We need a similar method here to create a NavigationItemViewModel from a NavigationItem.
You can retrieve the page’s URL simply by calling the GetUrl extension method of IWebPageFieldsSource, which every web page implements. Return null if the provided item is null or missing its target.
using System.Linq;
using CMS.Websites;
using Microsoft.IdentityModel.Tokens;

namespace Kickstart.Web.Features.Navigation;

public class NavigationItemViewModel
{
    public string Title { get; set; }

    public string Url { get; set; }

    // new method
    public static NavigationItemViewModel GetViewModel(NavigationItem navigationItem)
    {
        if (navigationItem?.NavigationItemTarget?.IsNullOrEmpty() ?? true)
        {
            return null;
        }

        var targetUrl = navigationItem.NavigationItemTarget.FirstOrDefault().GetUrl();

        return new NavigationItemViewModel
        {
            Title = navigationItem.NavigationItemTitle,
            Url = targetUrl.RelativePath
        };
    }
}
The NavigationMenuViewModel class also needs two properties: one to represent its Name and another to represent its Items.
Add a static method that returns a menu view model for the provided NavigationMenu object, calling NavigationItemViewModel.GetViewModel from above for each menu item.
using System.Collections.Generic;
using System.Linq;

using Microsoft.IdentityModel.Tokens;

namespace Kickstart.Web.Features.Navigation;

public class NavigationMenuViewModel
{
    public string Name { get; set; }

    public IEnumerable<NavigationItemViewModel> Items { get; set; }

    public static NavigationMenuViewModel GetViewModel(NavigationMenu navigationMenu)
    {
        if (navigationMenu?.NavigationMenuItems?.IsNullOrEmpty() ?? true)
        {
            return null;
        }

        var menuItems = navigationMenu.NavigationMenuItems
            .Select(NavigationItemViewModel.GetViewModel)
            .Where(x => x != null);

        return new NavigationMenuViewModel
        {
            Name = navigationMenu.NavigationMenuDisplayName,
            Items = menuItems
        };
    }
}
Define a view component
Websites often have multiple navigation menus. Let’s make a view component that renders the menu. You can reuse the view component across the site.
Define an asynchronous view component with a string parameter to indicate which menu item to retrieve.
using System.Threading.Tasks;
using Microsoft.AspNetCore.Mvc;

namespace Kickstart.Web.Features.Navigation;

public class NavigationMenuViewComponent : ViewComponent
{
    public async Task<IViewComponentResult> InvokeAsync(string navigationMenuCodeName)
    {
        // A placeholder representing the logic that retrieves the `NavigationMenu` item from the database.
        var menu = await RetrieveMenu(navigationMenuCodeName);

        if (menu == null)
        {
            return View("~/Features/Navigation/NavigationMenuViewComponent.cshtml", new NavigationMenuViewModel());
        }

        var model = NavigationMenuViewModel.GetViewModel(menu);

        // We will define this view in the next step.
        return View("~/Features/Navigation/NavigationMenuViewComponent.cshtml", model);
    }
}
If you copy-paste the code above, you will see a couple of issues:
- The
RetrieveMenumethod does not exist - for now, we are using a placeholder to represent the logic that retrieves the menu item from the database. - The
~/Features/Navigation/NavigationMenuViewComponent.cshtmlview does not exist yet.
We will fix both of these shortly.
Add a private method to retrieve the menu.
To query the content items, we will use the ContentRetriever, as we did in the earlier step. This time we’ll use it’s RetrieveContent method to get the whole menu structure, including it’s items, based on a provided menu codename.
using System.Linq;
using System.Threading.Tasks;
using Kentico.Content.Web.Mvc;
using Microsoft.AspNetCore.Mvc;

namespace Kickstart.Web.Features.Navigation;

public class NavigationMenuViewComponent : ViewComponent
{
    private readonly IContentRetriever contentRetriever;
    // inject the Xperience by Kentico Content retriever service
    public NavigationMenuViewComponent(IContentRetriever contentRetriever) => this.contentRetriever = contentRetriever;

    public async Task<IViewComponentResult> InvokeAsync(string navigationMenuCodeName)
    {
        var menu = await RetrieveMenu(navigationMenuCodeName);

        if (menu == null)
        {
            return View("~/Features/Navigation/NavigationMenuViewComponent.cshtml", new NavigationMenuViewModel());
        }

        var model = NavigationMenuViewModel.GetViewModel(menu);

        return View("~/Features/Navigation/NavigationMenuViewComponent.cshtml", model);
    }

    // new private method
    private async Task<NavigationMenu> RetrieveMenu(string navigationMenuCodeName)
    {
        // specify the depth of the content item tree we want to get (we need the menu and it's children items)
        var parameters = new RetrieveContentParameters
        {
            LinkedItemsMaxLevel = 2
        };
        // retrieve the navigation menu object
        var menus = await contentRetriever.RetrieveContent<NavigationMenu>(
            parameters,
            query => query
                .Where(where => where.WhereEquals(nameof(NavigationMenu.NavigationMenuCodeName), navigationMenuCodeName)),
            RetrievalCacheSettings.CacheDisabled
            );

        return menus.FirstOrDefault();
    }
}
Design the component’s view
Now, we just need a view to render the model provided by NavigationMenuViewComponent.
Add a file called NavigationMenuViewComponent.cshtml that renders a nav element containing a list of links from the model’s Items.
Spice up the design of the menu with some Bootstrap CSS classes.
@using Kickstart.Web.Features.Navigation

@model NavigationMenuViewModel

@if (Model?.Items?.Any() ?? false)
{
    <nav>
        <ul class="navbar-nav nav-underline">
            @foreach (var item in Model.Items)
            {
                <li class="nav-item">
                    <a href="@item.Url" class="nav-link link-light">@item.Title</a>
                </li>
            }
        </ul>
    </nav>
}
Finally, add the view component to the _Layout.cshtml view beneath the site heading, specifying MainNavigation as the codename of the menu to retrieve. Adjust the Bootstrap CSS classes as necessary.
...
<div class="navbar navbar-primary navbar-expand-sm navbar-dark bg-primary p-3">
    <div class="navbar-brand">
        <h2>Xperience Kickstart</h2>
    </div>
    <vc:navigation-menu navigation-menu-code-name="MainNavigation" />
</div>
...
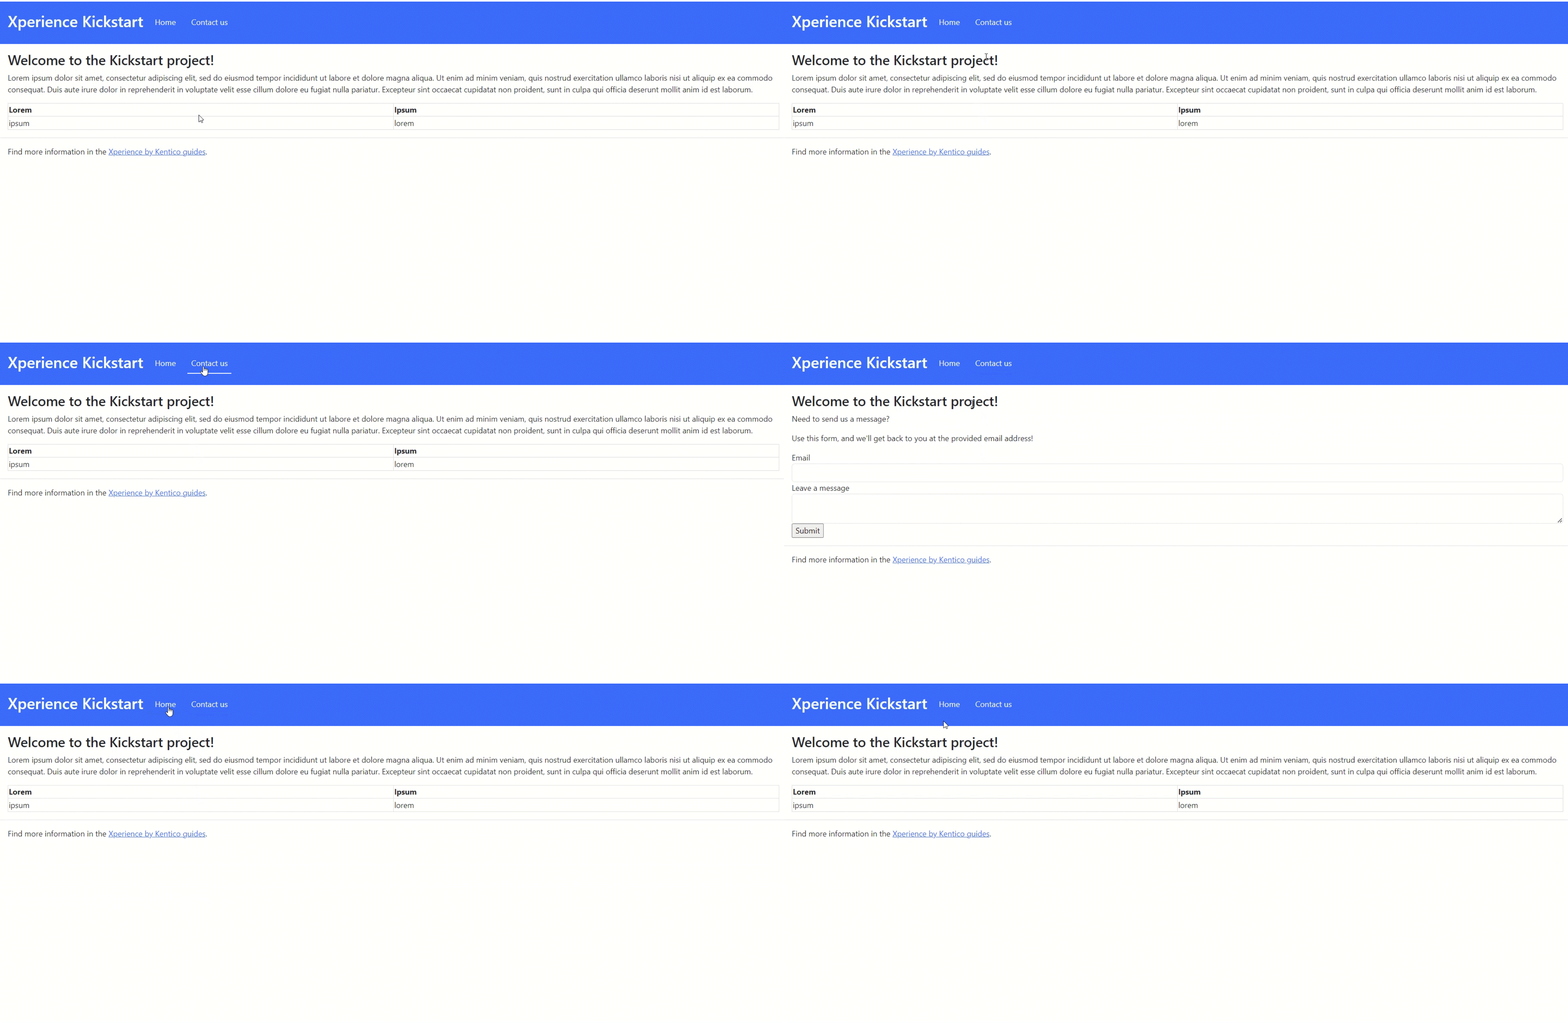
With all these elements in place, you should have a working navigation menu that looks something like this:

If you haven’t already, check out our Kickstart repository to see the complete implementation of the website we created together in this series. To run the project, follow the README instructions.
Continue to the next step for additional exercises and resources.
Continue learning
When you’re ready, move on to the next page: Next steps