
Work with image variants and focal point
Images bring your content to life, but they don’t always fit neatly into every space across your website, emails, and other marketing channels. A photo that looks great in a wide hero banner might not work as well in a square thumbnail or a social media preview. Instead of uploading multiple versions of the same image yourself, Xperience by Kentico can generate image variants for you and even detect the best focal point.
Let’s explore how to make the most of these features in Xperience so that your images are always sharp, relevant, and well-framed, no matter where they appear.
What we’ll cover
- What image variants and focal points are.
- How Xperience automatically optimizes and crops your images.
- How to adjust the focal point to direct attention to the important part of your image.
- When and how to use manual cropping for more control.
- How to share image variants outside of Xperience.
By the end, you’ll know how to prepare professional and consistent images, no matter where your audience sees them.
Understanding image variants
An image variant is a resized and cropped version of your original image that follows your company’s graphic design guidelines. Your developers ensure that the image stays responsive and on brand across different marketing channels or in your marketing campaigns.
For example:
- A wide hero banner might use a landscape variant.
- A thumbnail might use a square variant.
- A social media card might need yet another size and ratio.
You don’t need to create these versions yourself. Once configured, Xperience automatically generates them from the primary optimized image you upload into Content hub.
Each project can have its own set of image variants, depending on the design and channel requirements. Your project’s UX and graphic designers work with developers to decide which aspect ratios and sizes are needed, and they set up the rules in advance.
That means you don’t need to create multiple sizes of your images manually, or worry about compression settings under time pressure – you can leave the basic optimization to AIRA. If you ever find a particular variant that isn’t currently available, you can ask your administrator or developer to create one for you. You’re not restricted in how many variants your project can support.
Why image variants matter, and what they do
Image variants are more than just a matter of convenience. When you upload your image assets into Content hub, AIRA automatically transforms them, giving you several image variants to choose from. But what do you do with these variants once they’re ready?
Image variants, in short, help you:
- Keep your images looking great across different contexts.
- Avoid stretched, cut-off, or pixelated visuals.
- Ensure a consistent look across pages, devices, and channels.
- Save time by letting the system handle most of the resizing and cropping for you.
Currently, image variants are natively supported in the Kentico API only for the website channel.
How cropping and focal points work
When you upload an image to the Content hub, Xperience automatically optimizes it. This means a file variant is compressed to reduce its size, which helps your pages load faster while still keeping the image sharp and clear.
At the same time, Xperience generates the predefined image variants. To decide how to crop them, the system uses an automatic focal point:
- By default, AIRA places the focal point in the center of the image, but if it recognizes some important area, it moves the focal point accordingly.
- The focal point tells the system which part of the image should remain visible when cropping.
- If the subject doesn’t look right in a particular variant, you can move the focal point yourself.
- All automatically generated variants update instantly when you adjust the focal point (except for those you’ve cropped manually).
Behind the scenes, AIRA helps detect the most crucial area of the image when you upload it. This usually means people’s faces or central objects, so you won’t often need to change anything. But when you do, it only takes a few clicks.
Adjusting the focal point
You’ll want to change the focal point if:
- AIRA’s automatic detection doesn’t focus on the main subject.
- Certain image variants cut off a person or object you want to feature.
- The specific part of the image that AIRA selected as a focal point does not match your intentions.
Think of the focal point as telling the system, “This is the part of the image that must stay visible.”
As an example, imagine that you’re working on an ad for a Kbank-sponsored sports club, where the most important person will be the player who scored several goals in a row.
Some images you received include the whole team, but the star player is always standing at the far end of the group photo. Because AIRA automatically chooses the middle of the Primary image as the focal point, the star player is always cropped out in most image variants.
What can you do about it? Since you can easily manually shift the focal point until you’re sure that the star player’s face is visible in all the cropped variants, AIRA’s automatic focal point detection still saves you time while giving you the flexibility to adjust the images to your needs.
Manual cropping
Sometimes, adjusting the focal point isn’t enough. You may want more control over how a variant looks, for example, when a product needs to be perfectly centered in a thumbnail, or when you want to emphasize a specific detail – like our featured star player waving at the camera. In those cases, you can manually crop a specific variant.
When cropping manually, keep in mind:
- You always keep the aspect ratio and dimensions set for the variant.
- You can drag or resize the crop box to fine-tune what’s visible and what isn’t.
- Once generated, manually cropped variants don’t change even if you adjust the global focal point later.
- They’re marked with a crop icon so you can tell them apart from the automatically optimized variants.
You may have noticed that each of the variants in our example is named in a way that relates to how the variant behaves. A “wide” variant retains “wide” dimensions, and a “vertical” always remains “vertical”, no matter where you move the crop box. The developers set these dimensions and the variant names during the project implementation.
While your project setting might look different from ours – your variants may have other dimensions and different names – one thing will always remain the same. An image variant will stay within the predefined limits of its dimensions.
Exercise: Upload and adjust an image
Let’s put the practices mentioned in the first section to the test by working with an image in the Content hub.
Imagine you’re a content editor, working on an ad push for Kbank’s sponsorship of a celebrated English football club. The club’s marketing team wants to commemorate the occasion by holding a flash sale of the club’s jersey dresses, and they have provided you with a batch of images to work on.
After selecting an image for the promo banners, you have to ensure that it will display correctly on all users’ devices and channels.
To follow along, download zipped sample images from the exercise resources.
The exercise we’re showing uses our Kbank demo website that lets you try out what it’s like working with Xperience by Kentico in a safe, sandbox environment.
If you don’t have your demo site yet, request it through the form at Kentico website and request the Xperience by Kentico – Business Tutorial Kbank demo site. Once you approve the request, we will automatically send you a link to the demo site.
1. Upload images to Content hub
- Open Content hub.
- Upload the sample image assets. Xperience automatically optimizes the files when uploading, and variants are generated based on your project’s predefined sizes.
- Select the image you want to update, in our case, it’s player-in-red-jersey.jpeg.
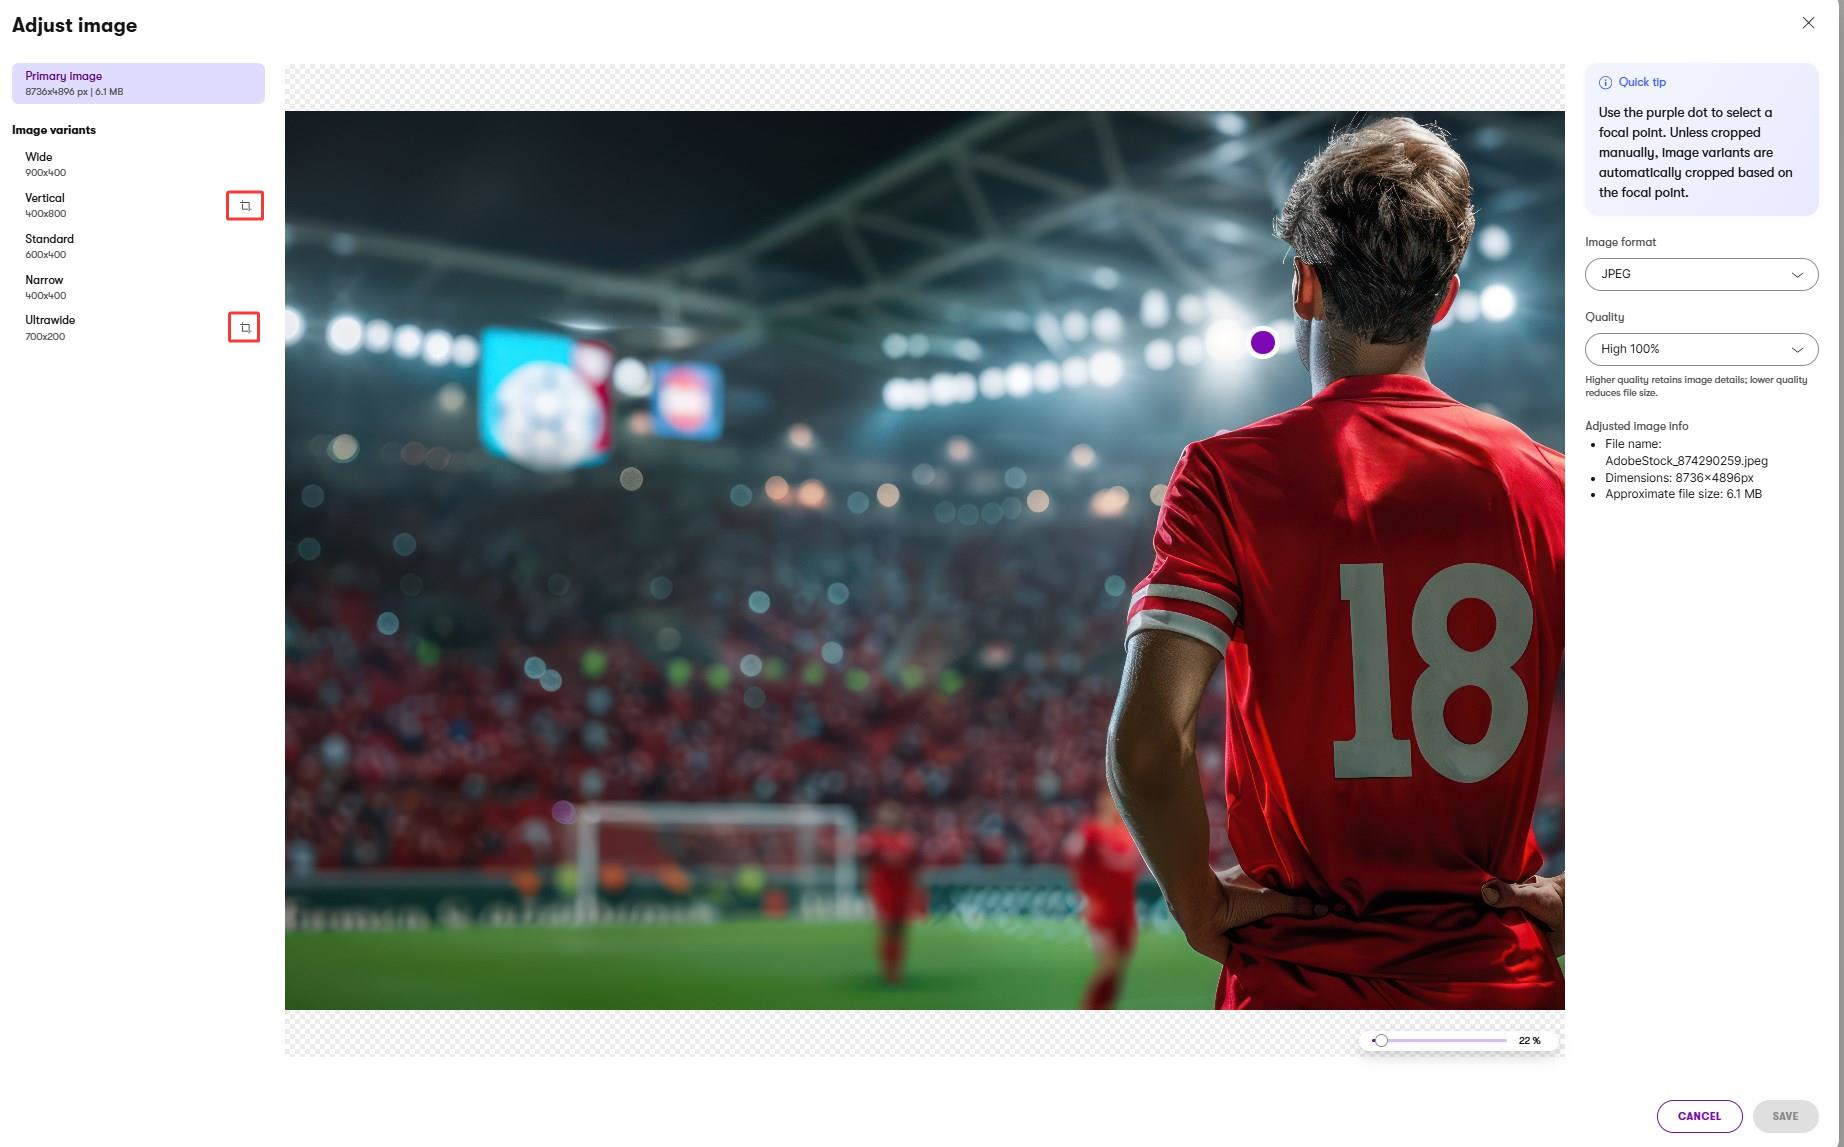
2. Check image optimization
The Primary image is already resized and compressed by the system. This keeps your pages fast to load without making images look blurry.
- Click the Adjust image icon to update the image variant.
- Now you can manually adjust:
- Format (for example, to WEBP or AVIF) – check the project documentation or check with your administrator to see which formats your project supports. In our case, we’ll change the .jpeg format to .jpg.
- Quality – to balance sharpness and file size, let’s change quality to Medium 70%. (Note that an option to adjust quality isn’t available for lossless formats like PNG.)
- Save your changes.
For more details on how to manunally adjust an image, see how to optimize image assets.
3. Preview variants
- Open the uploaded image asset in Content hub.
- Switch between its variants (e.g., wide, vertical, narrow).
- Notice how the system has cropped the image. Is the player wearing the red jersey always fully visible in all variants?
- If not, it’s time to adjust the focal point.
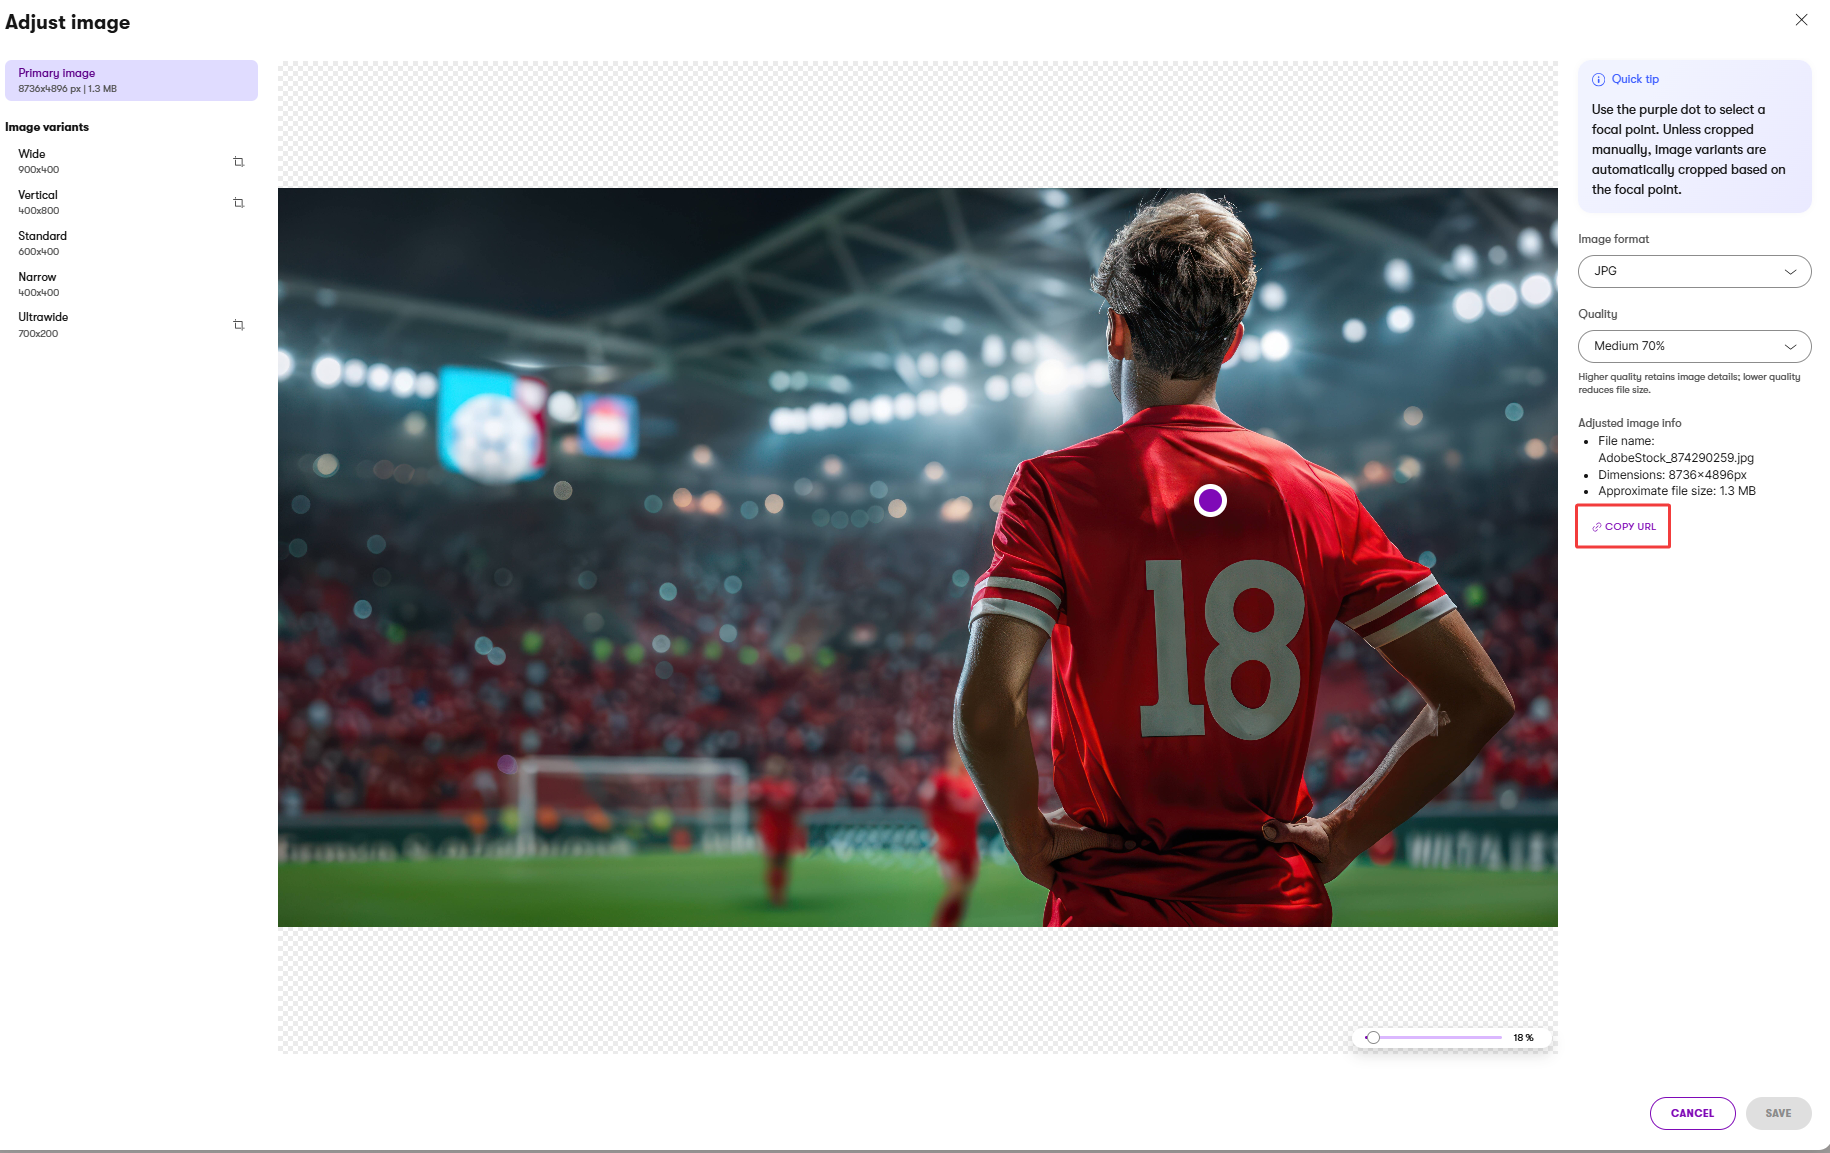
4. Adjust the focal point
- Open the Primary image in the asset.
- Move the purple dot (the focal point) to the most important part of the image – in our case, the middle of the player’s back. We want to keep the red jersey the star of your ad.
- Preview how each image variant looks with the new focal point.
- Save changes.
- All variants update automatically, except for those that you cropped manually.
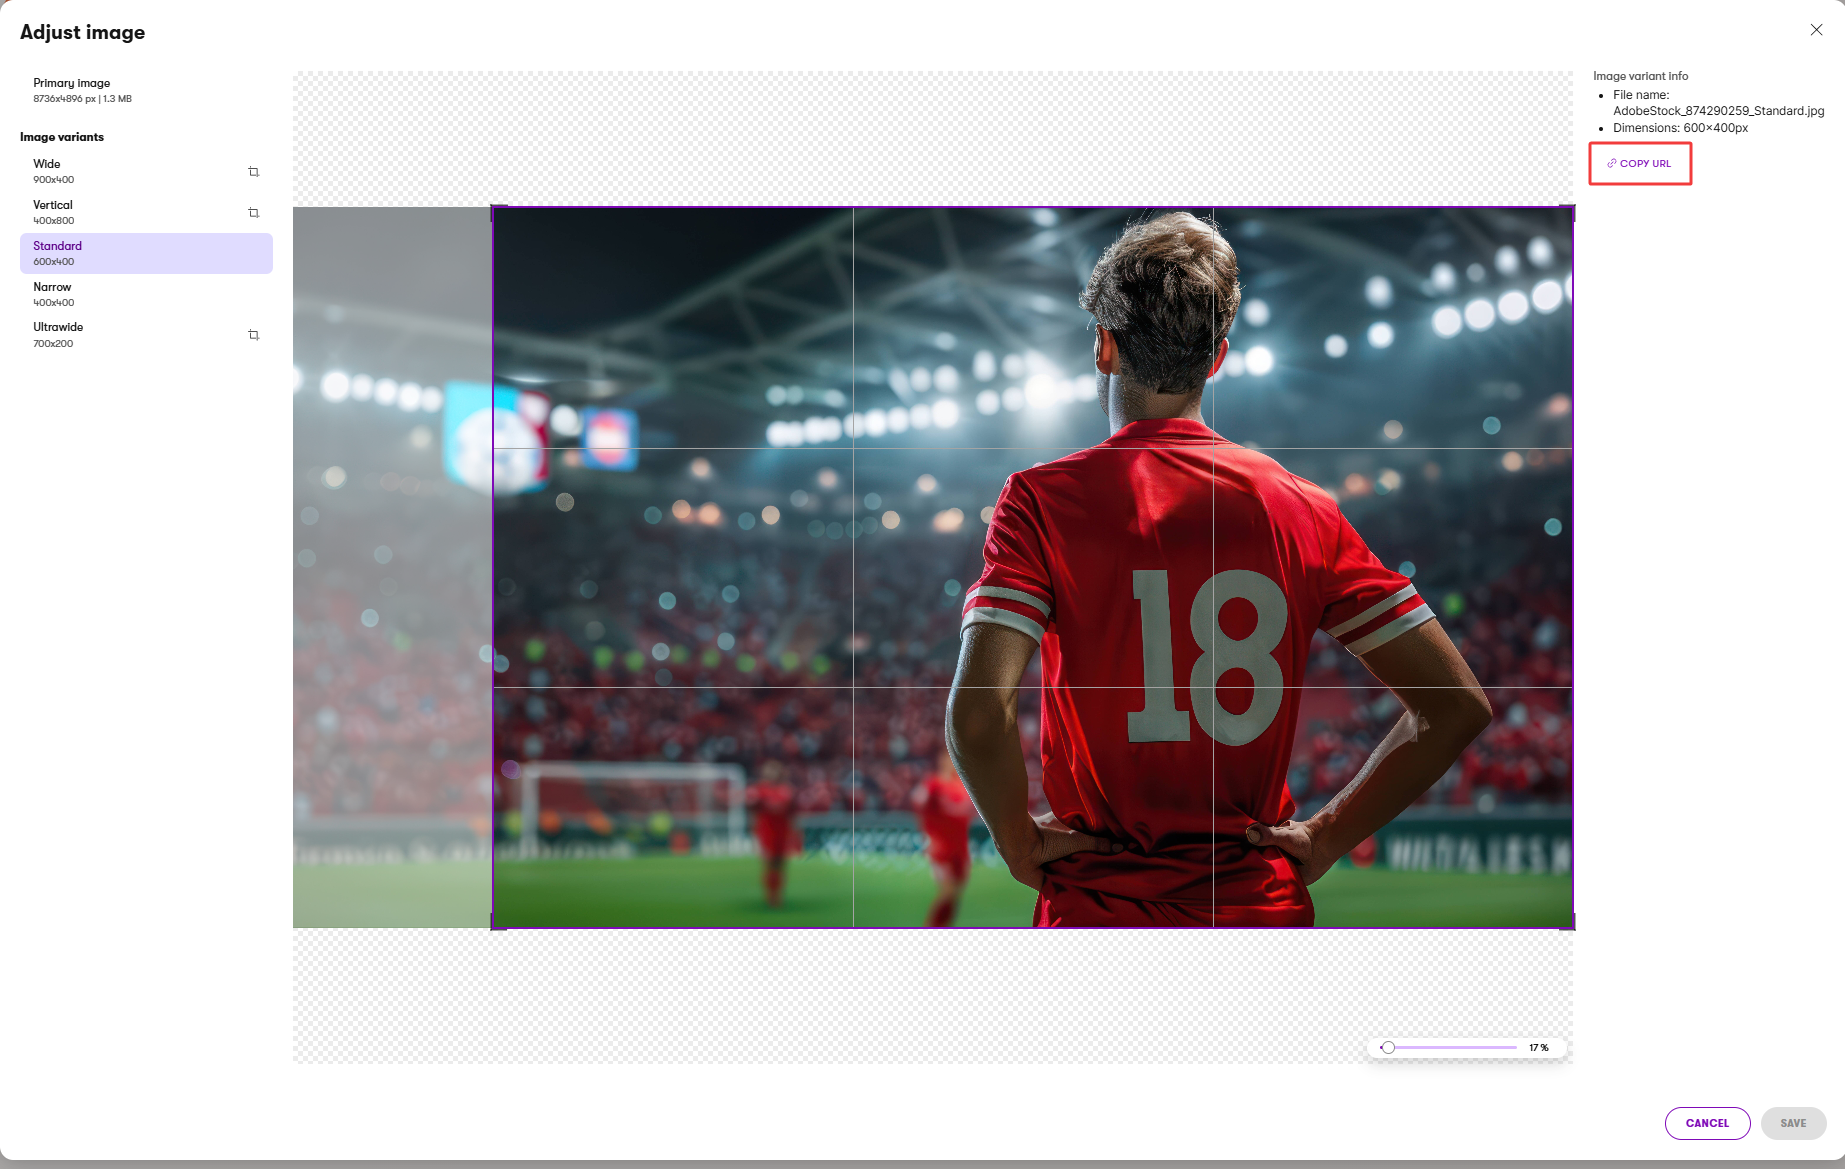
5. Manually crop a variant
- Open the image asset.
- Select the variant you want to adjust.
- Drag the corners of the crop box to reposition it – make sure that the important part of the image is not cropped out.
- Save your changes. The variant is now fixed in place and won’t change if you adjust the focal point later.
- Publish the adjusted content item.
You cannot share the image variant via URL without publishing it, so always publish it when you’ve finished working on the asset and are ready to share it with the world.
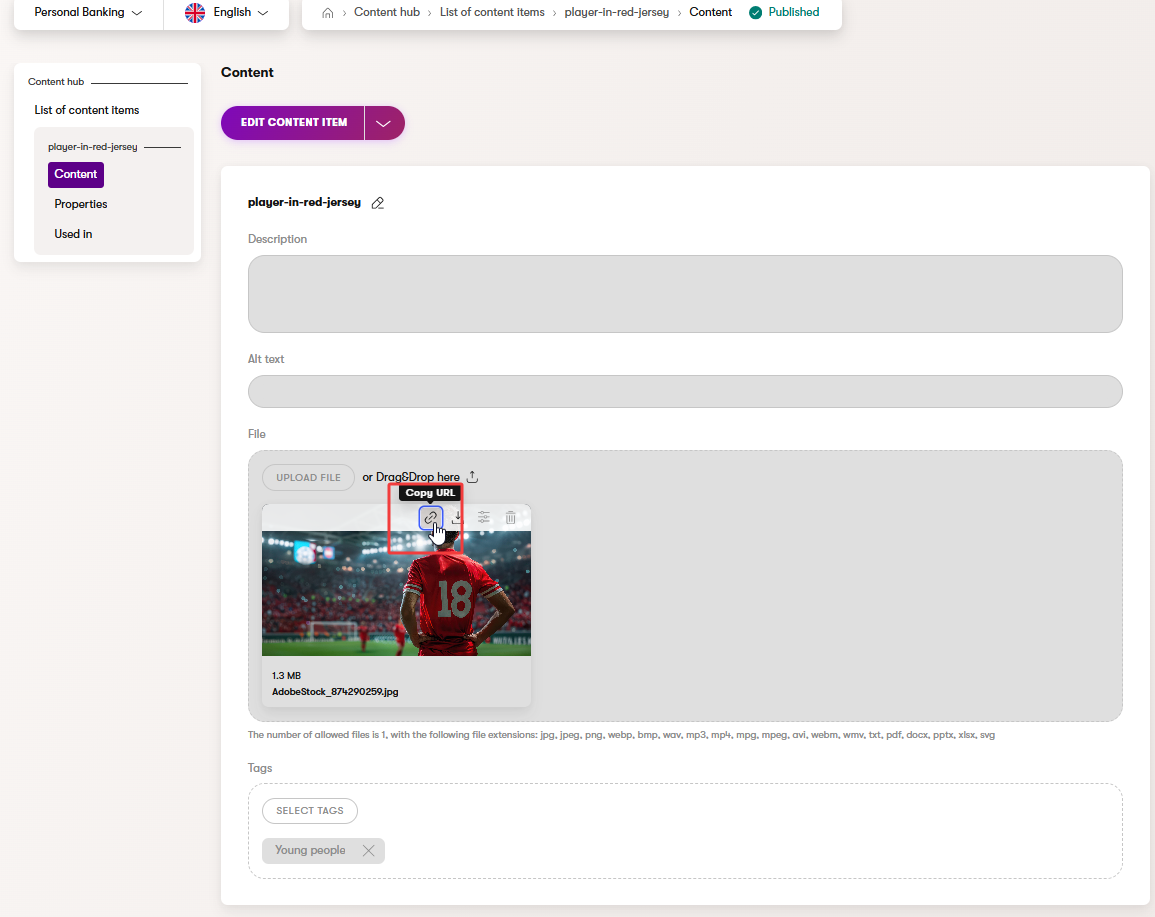
6. Share an image variant via URL
You updated the focal point and manually adjusted the image variants to your liking. Satisfied with your work, you want to share the asset outside Xperience, for example, on social media.
You can:
Copy the URL of the primary image, which is already optimized for online use.
Copy the URL of a specific variant, if you need a certain size or crop.
Or copy the URL of the whole asset.
Downloading the original uploaded image asset isn’t available yet, but watch our roadmap to stay updated on the latest refreshes.
Best practices for using image variants
Here are a few best practices to keep in mind when working with image variants and focal points:
- Work with your administrators to ensure the right variant dimensions are in place before you begin your project.
- If there are any team/company-wide requirements, stick to them.
- Make use of AIRA’s automated focal point detection to keep the image cropping consistent and automated.
- Rely on manual cropping only when you need precise control.
- Always preview your image variants before publishing.
- If you need an image that cannot be in any way adjusted, cropped or focused, e.g., for legal or copyright reasons, store it as a restricted image content type.
- Share optimized images and variants via URL in just a few clicks.
Wrap-up
You’ve seen that with image variants and focal points, you don’t need to manually create multiple versions of the same image. Instead, you can rely on Xperience’s intuitive automation to guide you to better pictures with far less effort. And if you still want some control over how your images look and display? Play with finding your own sweet spot between leveraging AIRA’s automated image optimization capabilities and manually adjusting image variants where necessary.
The result? You’ll work faster, but your visuals will always look great, no matter where they appear on your website or beyond.
Next step
You’ve now learned the basics of working with image variants, focal point, and cropping. To further enhance your skills, explore additional resources on Xperience’s digital marketing capabilities in our content management guide.