
Create a new contact group
See how to create a new group of contacts and how to work with group conditions.
- Go to the Contact groups application.
- Create a New contact group.
- Add a Name of the group. We recommend using clear, concise, and descriptive names to identify the segment among other groups in the administration interface.
- Add a Code name. This serves as a unique identifier used in macros.
- Add a short Description so everybody on the team knows the group’s purpose.
- Use Add condition button to create condition rules. Xperience adds all contacts that match the conditions to the contact group.
Xperience allows you to create contact groups using complex sets of conditions. You can organize these rules into units and determine these groups’ relationships. That’s why we recommend - for more complex filtering scenarios - to specify the conditions “on paper” before you start defining them in Xperience.
You can choose between Add another condition or Add another group when creating your conditions.
- If you choose to Add another condition to existing conditions, you create a single unit of conditions where all rules are evaluated together.
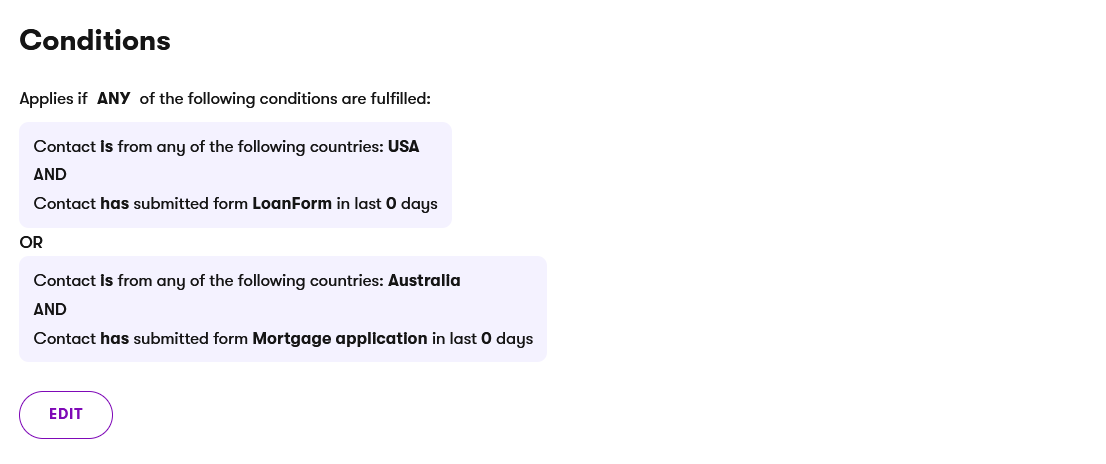
- For example (Unit 1): Contact is from country: USA AND Contact has submitted a form: Loan Form.
- If you Add another group of conditions, you create a new unit.
- For example (Unit 2): Contact is from country: Australia AND Contact has submitted a form: Mortgage application.
- Xperience allows you also to evaluate the relationship between units using logical operators AND or OR.
- For example, see the logical operator OR between unit 1 and unit 2. Thanks to the OR operator, contact will be included in the group when either of these units is evaluated as true.
Next step
In the following guide, learn how to update existing contact group.