Create a new role
Let’s create a Content editor user role with specific permissions for a user that works on managing website content, and has access to Xperience’s administration UI.
Before you create a new user role in Kentico, put together a list of activities users with this role should be able to perform. Consider the applications they need and the actions they must perform in each application.
Go to the Role management application.
Add a New role and fill in the following information:
- Display name: e.g., Content Editor,
- Code name: e.g., ContentEditor,
- Description: e.g., “A role with access to website channels (e.g. Business Banking channel) and Content hub. Responsible for creating, managing, updating, and curating the website’s content.”.
Save to create the user role.
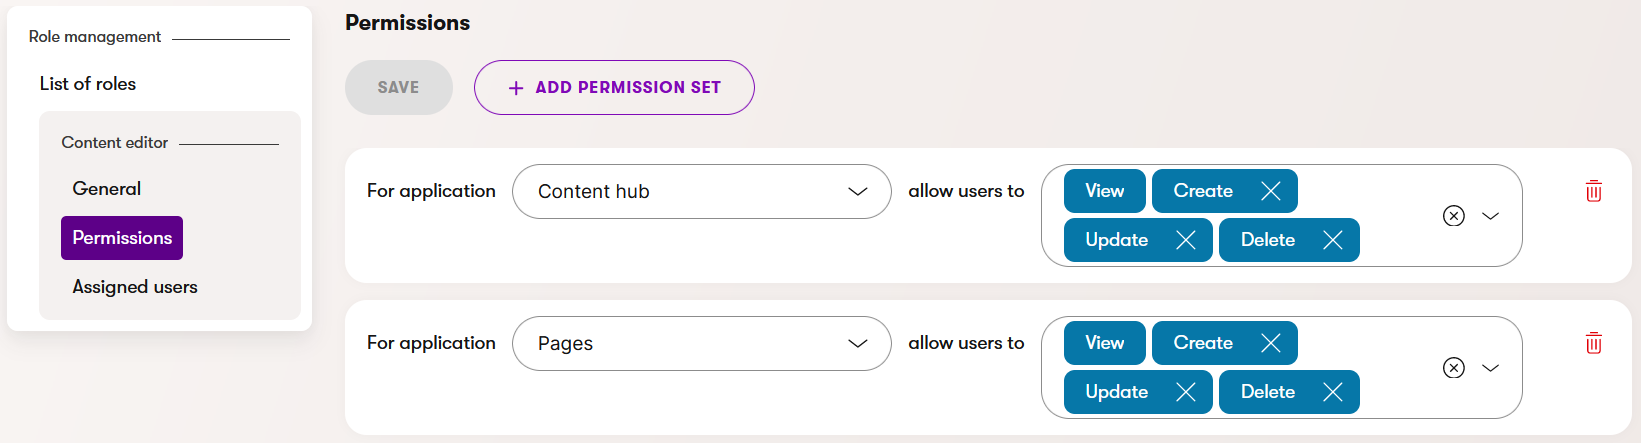
On the left, switch to the Permissions tab.
For each application that the user needs to work with, select Add permission set and choose the rights for the application and wokspace. For example:
- Content hub:
- View, Create, Update, Delete,
- In worskpace: Business Banking
- Business Banking channel: Access channel
- Content hub:
Save your changes.
Go to the Assigned users tab and select the existing users you want to add to this user role. If you need to add a new user, use the Users application.
Save the changes.
In this example, the Content Editor user role should look like the following: