Adjust global code on the backend
Now that you have successfully migrated the data and media files from the source instance of Dancing Goat, let’s work toward displaying them. First, we’ll look into tasks and code that are global for the whole solution.
Generate new code files for system objects
There are a several differences between code files generated for system objects by KX13 and XbyK. Therefore we need to generate them fresh, rather than transfer the code files from the source instance.
Add a new project to hold generated files
For separation of concerns, we recommend storing the generated files in a special project. Let’s create a new DancingGoat.Entities project for this purpose.
Add a new Class library project to your DancingGoat solution, called DancingGoat.Entities.
Ensure it targets your desired version of .NET framework and includes the Kentico.Xperience.Core NuGet package compatible with the version in DancingGoat.Web.
Our code samples are targeting .NET 8.
Then, add an AssemblyAttribute to DancingGoat.Entities.csproj to enable class discovery.
<Project Sdk="Microsoft.NET.Sdk">
  <PropertyGroup>
    <TargetFramework>net8.0</TargetFramework>
    ...
  </PropertyGroup>

  <ItemGroup>
    <AssemblyAttribute Include="CMS.AssemblyDiscoverableAttribute">
    </AssemblyAttribute>
  </ItemGroup>

  <ItemGroup>
    <PackageReference Include="Kentico.Xperience.Core" Version="<your_XbyK_version>" />
  </ItemGroup>

</Project>
Finally, reference the DancingGoat.Entities in your DancingGoat.Web project.
<Project Sdk="Microsoft.NET.Sdk.Web">
  ...

  <ItemGroup>
    <ProjectReference Include="..\DancingGoat.Entities\DancingGoat.Entities.csproj" />
  </ItemGroup>
</Project>
Rebuild your solution.
If you have trouble building, double-check that the .NET and Kentico NuGet packages versions in your two projects are matching.
Generate code files
Xperience by Kentico allows you to generate code files using .NET CLI and the dotnet run command.
For this upgrade walk-through, we need to generate PageContentTypes and ReusableContentTypes.
Run the following command from your ./src/DancingGoat.Web folder:
dotnet run --no-build -- --kxp-codegen --type "PageContentTypes" --location "../DancingGoat.Entities/{type}/{name}"
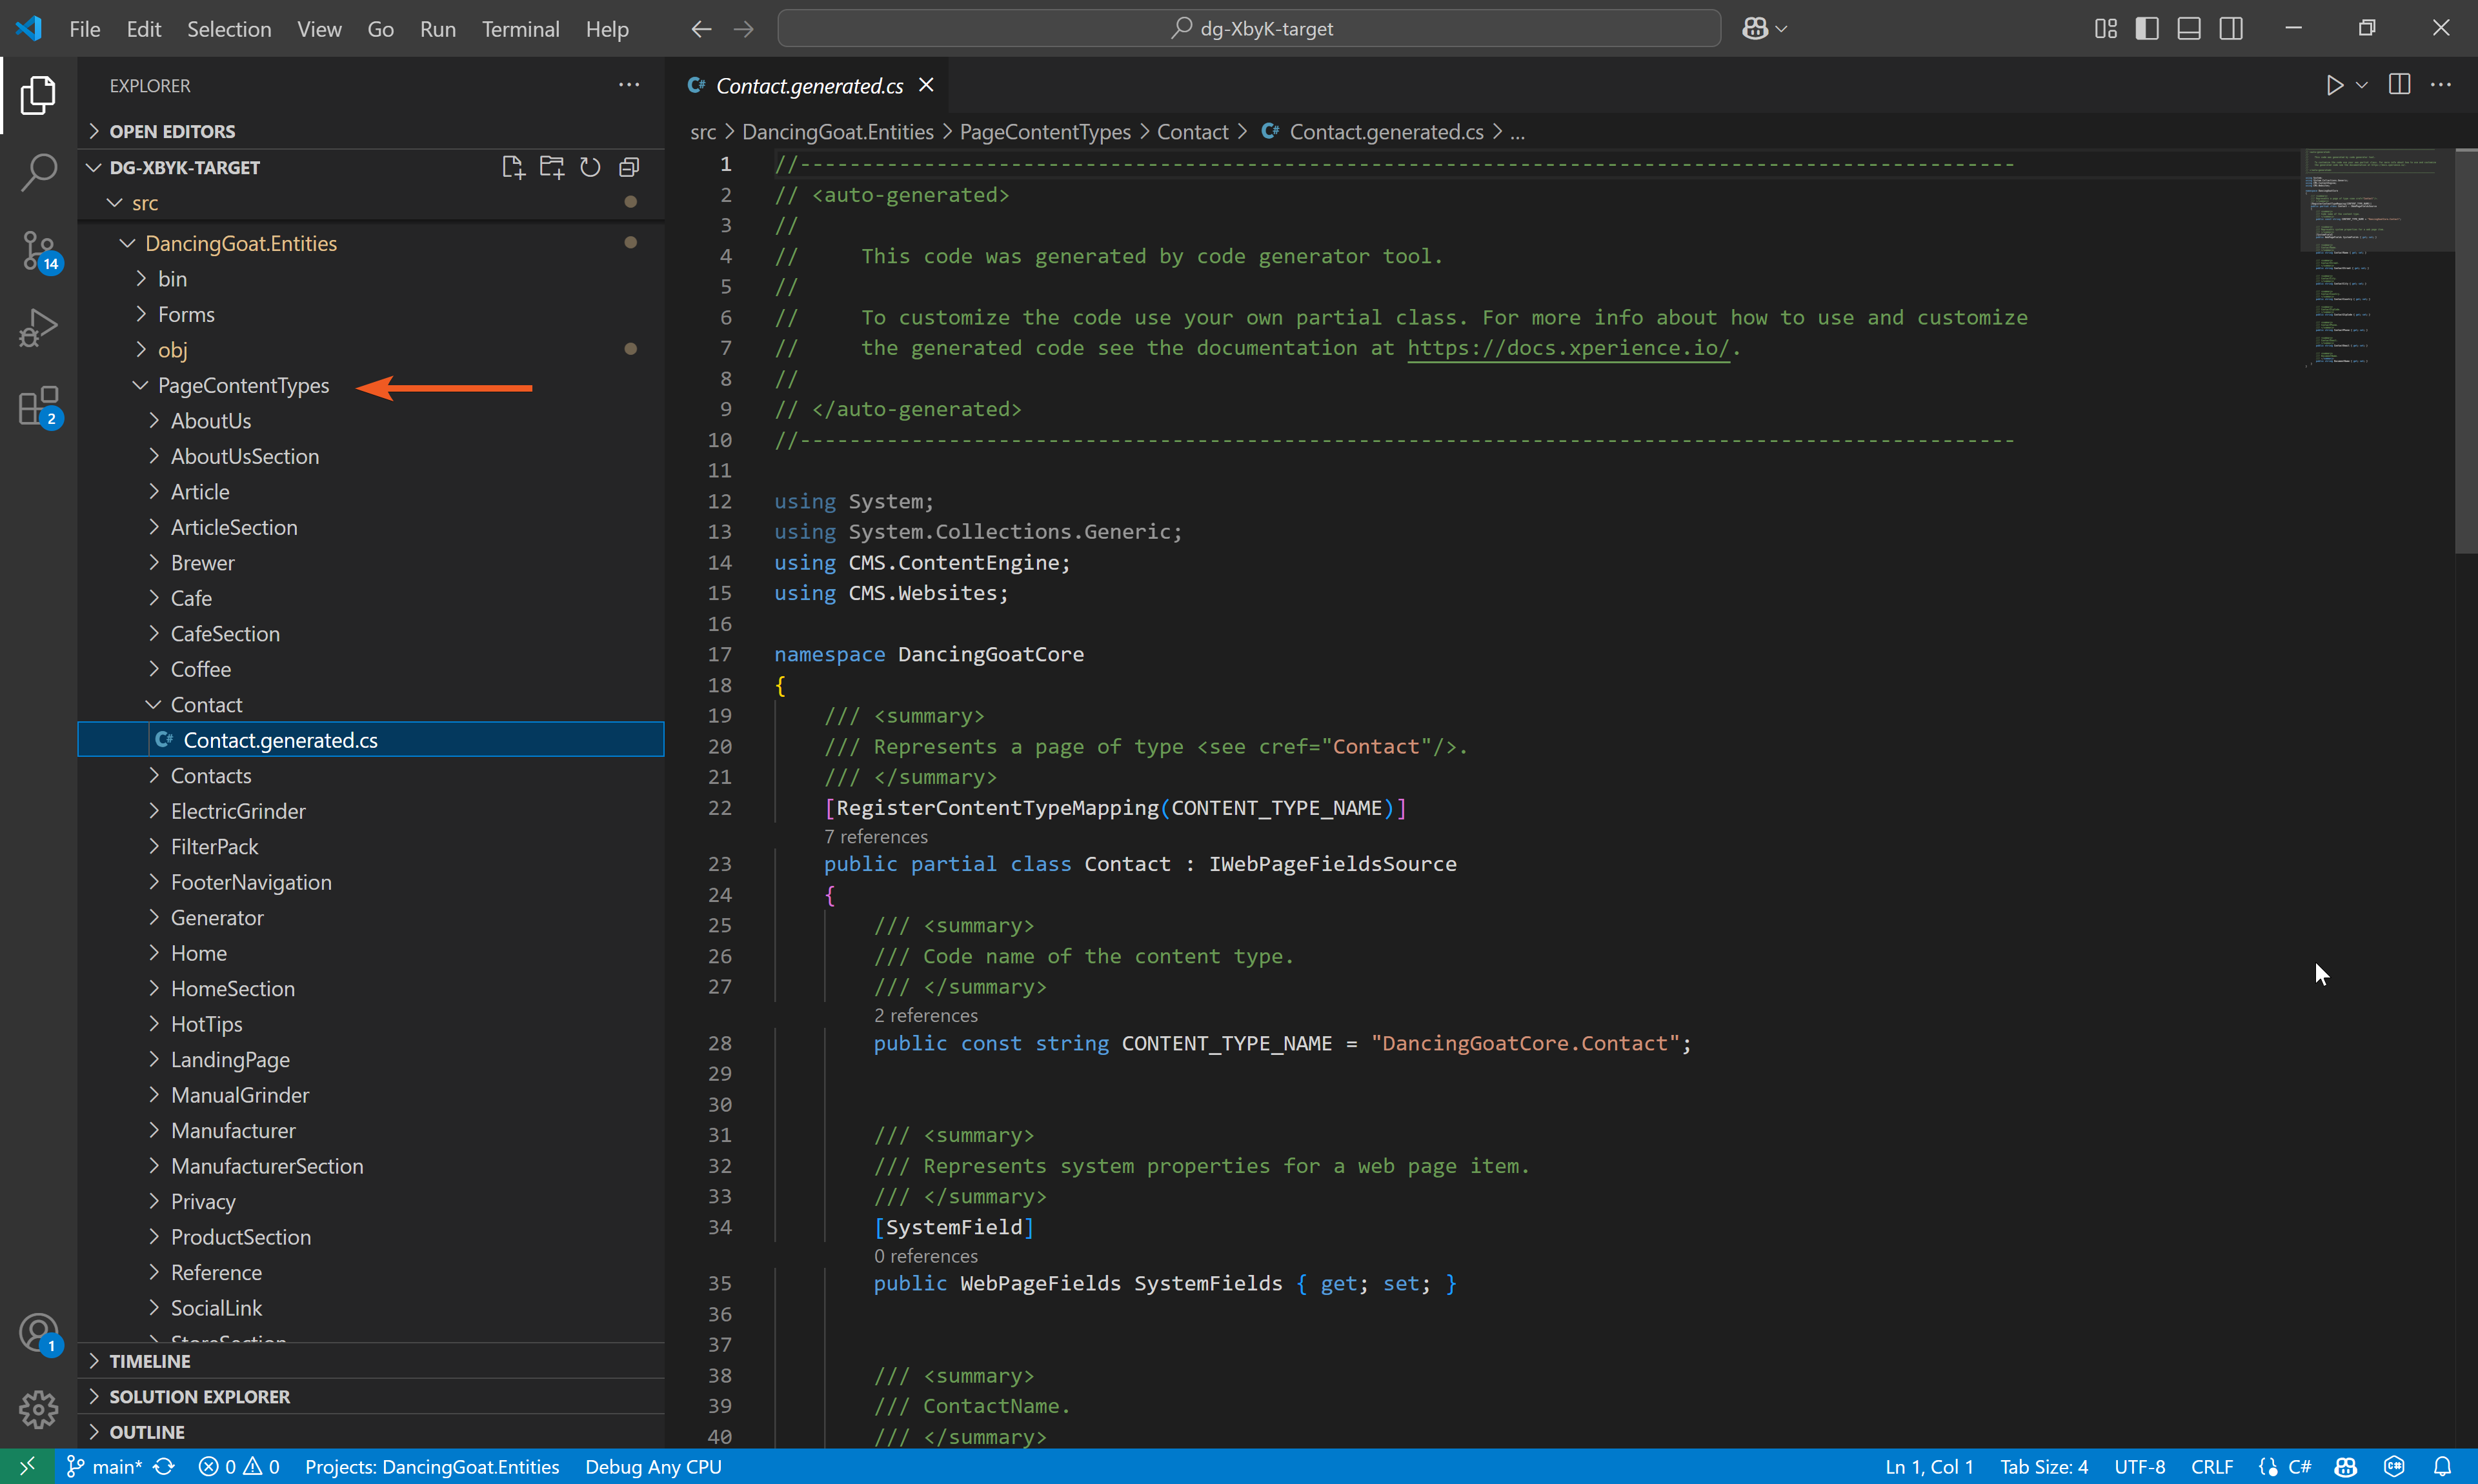
After a successful run, you should see a new PageContentTypes folder in DancingGoat.Entities with generated files.

Similarly, run the command to generate files for ReusableContentTypes. It will create a ReusableContentTypes folder with files for Attachment and MediaFile content types.
dotnet run --no-build -- --kxp-codegen --type "ReusableContentTypes" --location "../DancingGoat.Entities/{type}/{name}"
In your own project, consider what other types of objects you need to regenerate files for. See details about the command parameters in our documentation.
Configure the projects
In the .csproj files for DancingGoat.Web and DancingGoat.Entities, configure each project to use implicit using directives and enable nullables.
<Project Sdk="Microsoft.NET.Sdk">

  <PropertyGroup>
    ...

    <ImplicitUsings>enable</ImplicitUsings>
    <Nullable>enable</Nullable>
    ...
Copy relevant global code from source
Copy-paste the following files from the source instance’s DancingGoatCore folder into the target instance’s DancingGoat.Web project:
Localization
- ./Resources - copy the entire folder with the
SharedResourcesclass and string translations
Shared views
- ./Views/_ViewImports.cshtml
- Copy the file into the DancingGoat.Web root.
- Copy the file into the DancingGoat.Web root.
- ./Views/_ViewStart.cshtml
- Copy the file into the DancingGoat.Web root.
- ./Views/Shared/_Layout.cshtml
- Copy the file into the matching location within the DancingGoat.Web project.
- Comment out the line that injects an IHtmlLocalizer. You can rely on the service from the _ViewImports file.
- Comment out any code that causes compiler errors.
In real-world upgrades, make sure to more carefully comb through the layout view and differentiate which code relates to functionality you haven’t migrated.
Styles and scripts
- ./wwwroot/Content and ./wwwroot/Scripts folders
Identifiers
- ./ContentItemIdentifiers.cs
- ./Components/ComponentIdentifiers.cs
For now, feel free to comment out all the actual identifiers in the classes to be able to build. We will uncomment the relevant ones in later steps.
Services registration
- Helpers/IServiceCollectionExtensions.cs
Rename the class to ServiceCollectionExtensions and comment out the lines referencing non-existent services for now. We will uncomment the relevant ones and add on to this class in later steps.
using Microsoft.Extensions.DependencyInjection;

namespace DancingGoat
{
    public static class ServiceCollectionExtensions
    {
        public static void AddDancingGoatServices(this IServiceCollection services)
        {
            AddViewComponentServices(services);

            AddRepositories(services);

            // services.AddSingleton<TypedProductViewModelFactory>();
            // services.AddSingleton<TypedSearchItemViewModelFactory>();
            // services.AddSingleton<ICalculationService, CalculationService>();
            // services.AddSingleton<ICheckoutService, CheckoutService>();
            // services.AddSingleton<RepositoryCacheHelper>();
        }

        private static void AddRepositories(IServiceCollection services)
        {
            ...
            // services.AddSingleton<CafeRepository>();
            ...
        }

        private static void AddViewComponentServices(IServiceCollection services)
        {
            // services.AddSingleton<ArticleWithSidebarPageTemplateService>();
            // services.AddSingleton<ArticlePageTemplateService>();
        }
    }
}
Configure the project to display content
Enable Content tree-based routing and Page Builder
Open your Program.cs file.
Remove the following line of code:
app.MapGet("/", () => "The DancingGoat.Web site has not been configured yet.");
Next, enable the Page Builder and Content tree-based routing in your middleware pipeline.
Un-comment the lines calling UsePageBuilder and UseWebPageRouting from the features collection passed to builder.Services.AddKentico, and add the necessary using directives.
using Kentico.Content.Web.Mvc.Routing;
using Kentico.PageBuilder.Web.Mvc;
...
// Enable desired Kentico Xperience features
builder.Services.AddKentico(features =>
{
    features.UsePageBuilder();
    // features.UseActivityTracking();
    features.UseWebPageRouting();
    // features.UseEmailStatisticsLogging();
    // features.UseEmailMarketing();
});
...
Add future custom service registrations and localization
Add using DancingGoat directive and call the AddDancingGoatServices method from ServiceCollectionExtensions.cs above, along with AddLocalization in the Program.cs.
using DancingGoat;

...
builder.Services.AddAuthentication();
// builder.Services.AddAuthorization();

builder.Services.AddDancingGoatServices();
builder.Services.AddLocalization();

builder.Services.AddControllersWithViews();

var app = builder.Build();
app.InitKentico();
...
Build and run your solution. You will still see an error when the site runs because we have not fixed the home page yet. However, if you navigate to /admin you should be able to sign in to the administration interface normally.
If you are unable to build your solution, make sure you have commented out all the code that references any non-existent classes and services.
Adjust system URL
If you are running your site locally, notice that it is running on a certain port. In our example, it’s localhost:56305.
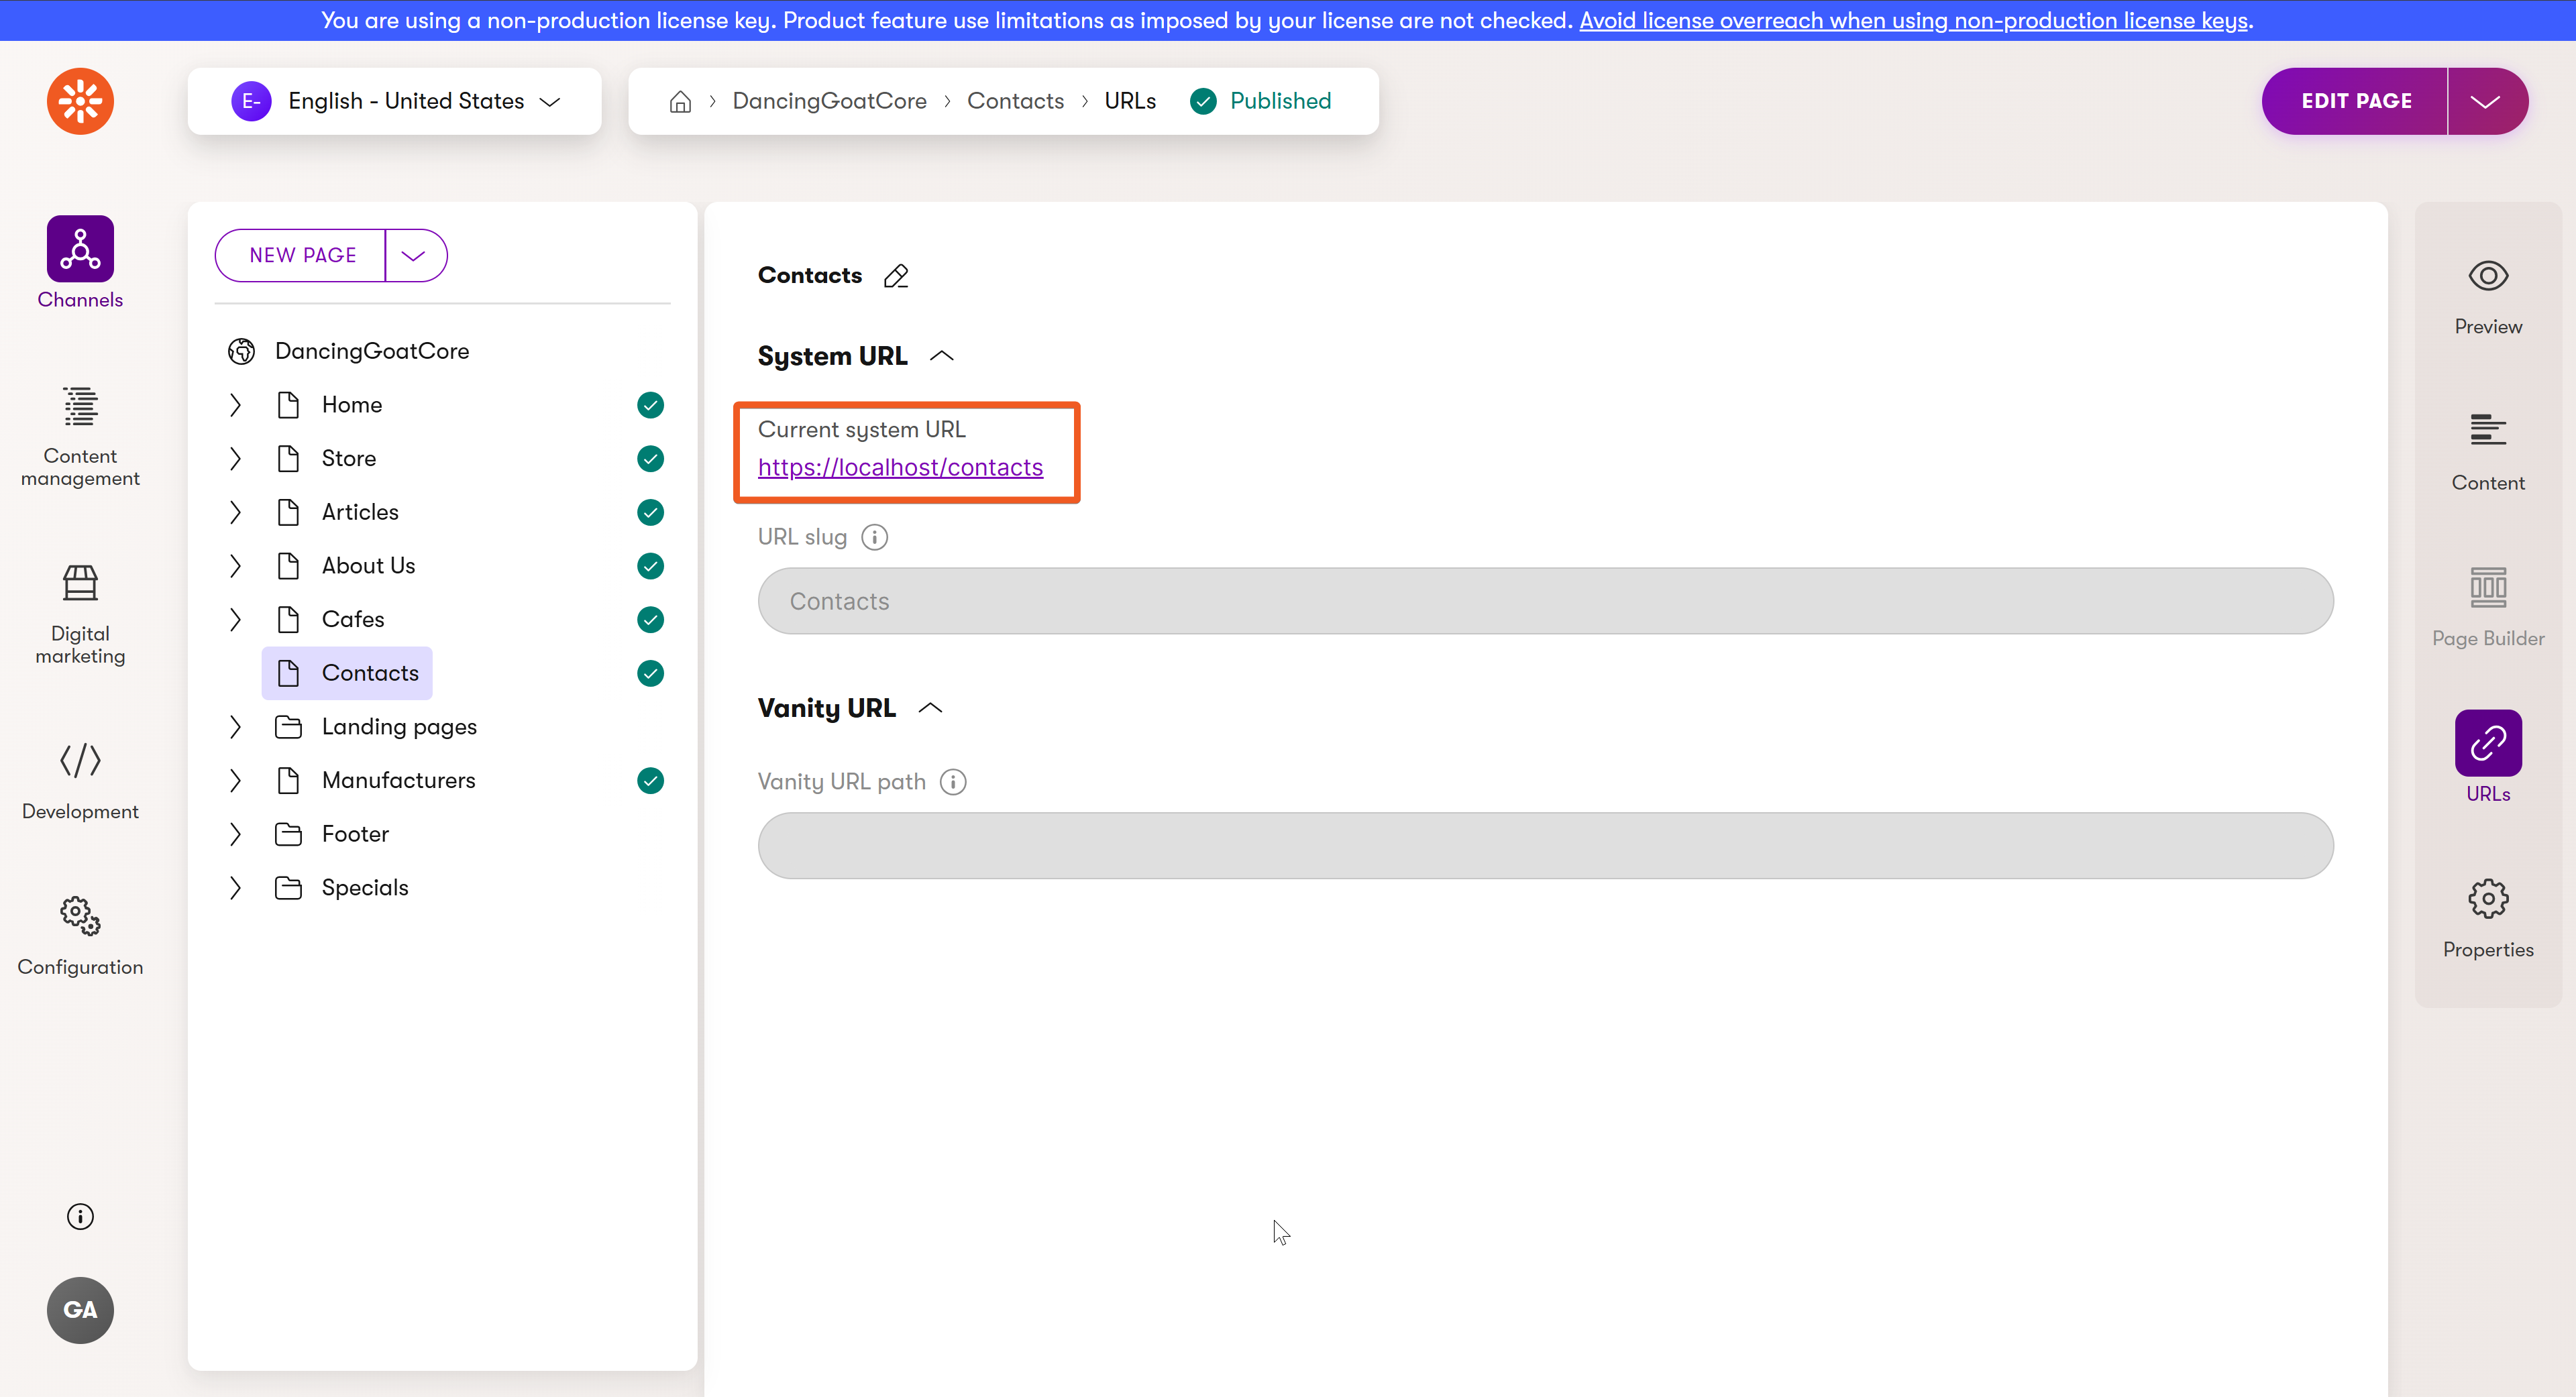
However, if you look at any of your migrated DancingGoatCore pages in your content tree, e.g., Contacts, you’ll see the port is not included in the URL. This is because we didn’t create the page directly in Xperience but migrated it over.

To avoid errors when navigating to pages in the future, let’s fix it in the Channel management → DancingGoatCore → General.
Add the port into the Website domain field and hit Save. Now the page URLs include the port and we are all set to continue with the next step.
Walkthrough progress
Learn how you can display an upgraded page that contains both Page Builder and structured data.