Set up your environment
Let’s dive into the upgrade of the Dancing Goat sample site. If you follow along, at the end of this walk-through you will be able to display the Contacts page from Kentico Xperience 13 (KX13) in a new target Xperience by Kentico (XbyK) instance.
The first step of upgrading is to prepare your environment. You need to have your source solution running, download the migration tool, and set up the target instance.
Prepare the source instance
- Install the KX13 Dancing Goat sample site, Refresh 13. You can also find the installer download in the Client portal.
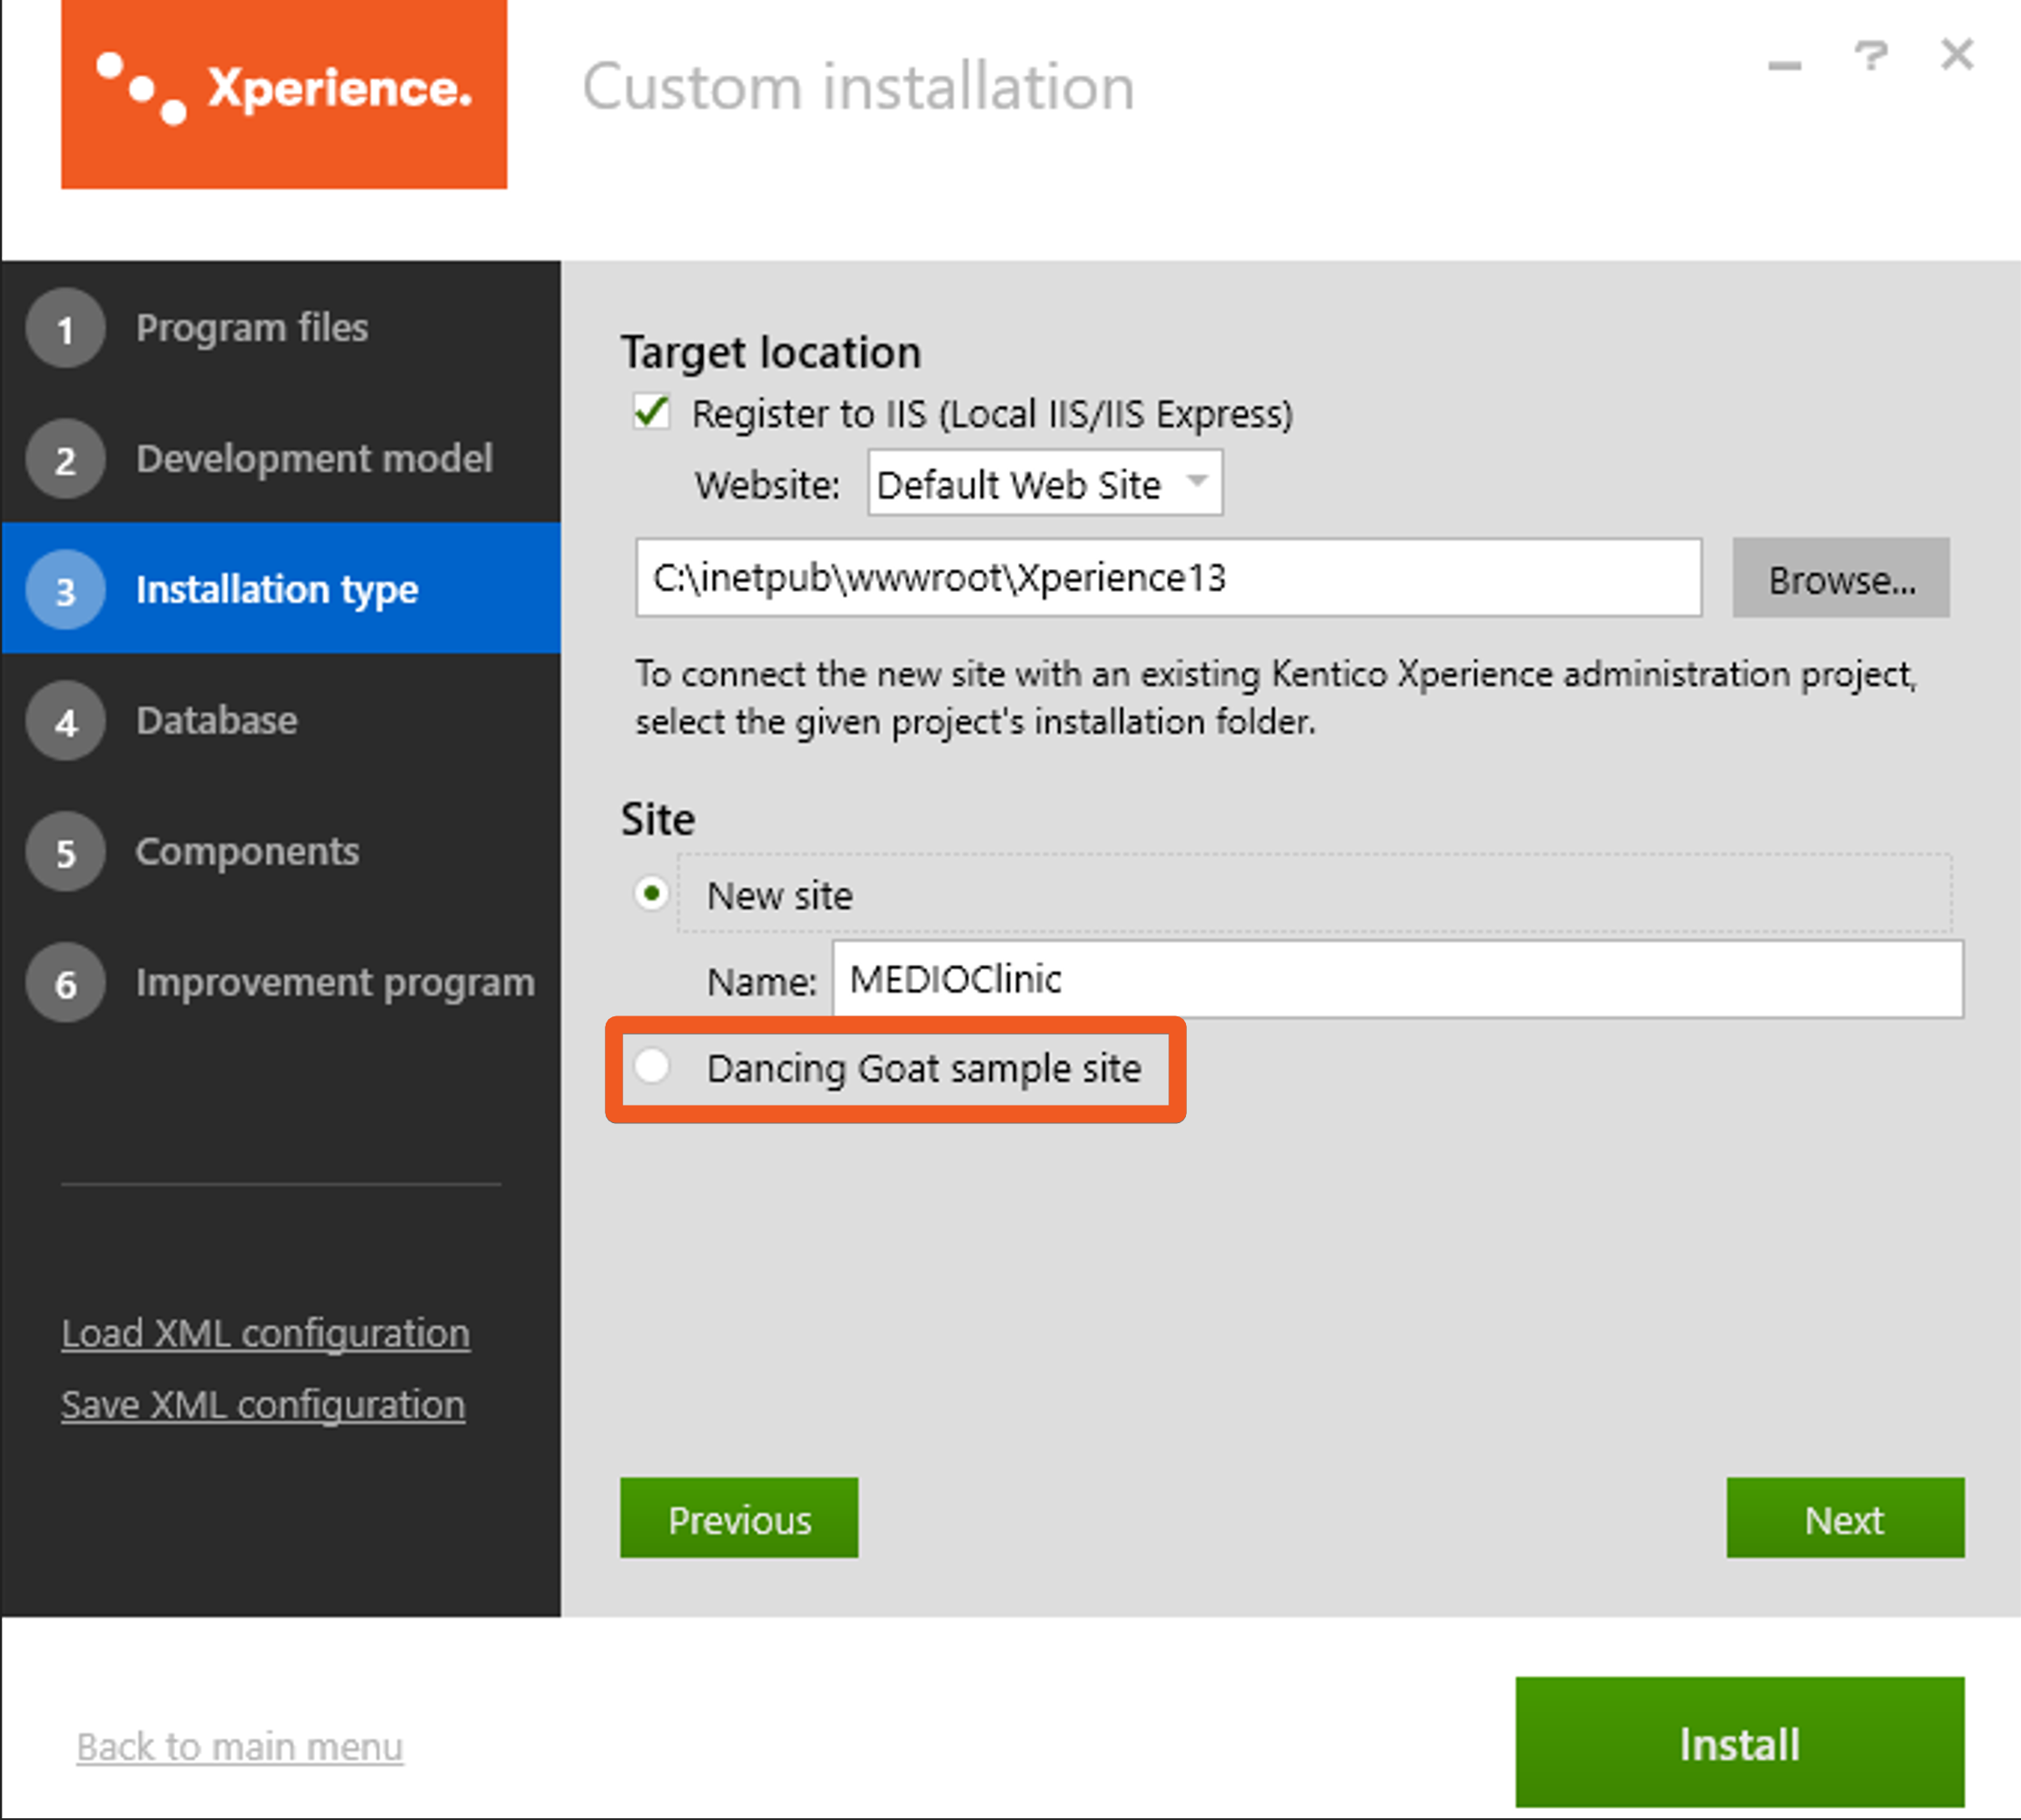
If this is your first time installing the KX13 Dancing Goat sample site, follow these steps through the installation wizard, but make sure to pick Dancing Goat sample site under Installation type → Site.

To run the KX13 Dancing Goat locally, you will need to add a localhost license.
If you currently don’t have access to a valid one, you can download it from our our Client portal. - Run the source instance.
- Double-check that you can view the live site and the administration. Make sure that you can view the Contacts page, especially.
Get the migration tool
Make sure to have ASP.NET Core 8.0 installed on the machine where the migration will run.
Pull the master branch of the Xperience by Kentico: Kentico Migration Tool to your environment.
Review the Library Version Matrix to determine the compatible version of XbyK.
E.g., Kentico Migration Tool version 3.0.0 is compatible with Xperience by Kentico version 30.2.0. See the changelog for more compatibility info.
Install the target instance
- Install a migration tool-compatible version of Xperience by Kentico, using the kentico-xperience-mvc template.
- Install your main project in a folder named DancingGoat.Web, which has at least one parent folder specific to this migration. We recommend a structure like YOUR_REPOSITORIES/DancingGoatMigration/src/DancingGoat.Web.
- Name the project DancingGoat.Web:
CMDinstallation
dotnet new kentico-xperience-mvc -n DancingGoat.Web - Remember to install the database using the
kentico-xperience-dbmanagertool from the .NET CLI.
- Run your new target instance.
- Make sure you can view the live site and sign in to the administration.
Watch a video overview
Check out this video overview of the initial setup to verify your environment is correctly configured:
Walkthrough progress
Follow to the next article and learn about migrating data and binary files.