
Setting up an Xperience Core project
This page is a part of a tutorial, which you should follow sequentially from beginning to end. Go to the first page: Using the Xperience interface.
You will learn about:
Before we can begin developing an Xperience website, we first need to install the application together with a project template we can use as a starting ground. The installation process creates a site within Xperience that will serve as a repository for content, and a blank ASP.NET Core application template ready for development.
Installing Xperience
Download the installer from the Client Portal. If you are not a client yet, you can start by booking a 1-on-1 demo.
Open the Xperience installer and follow these steps:
Click Next on the welcome screen of the installer.
Select your country. The installer automatically tries to pre-select the appropriate country based on your system’s locale.
Accept the license terms.
Click Next.
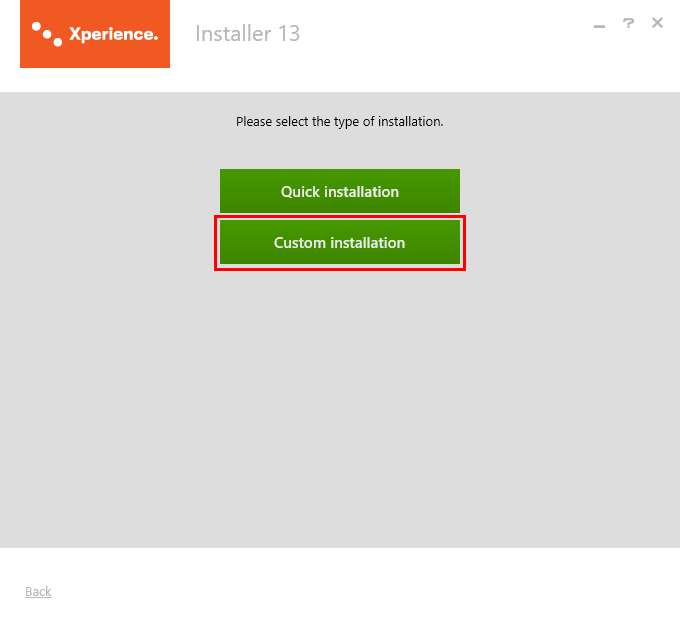
Click Custom installation. The installer displays the Custom installation wizard.
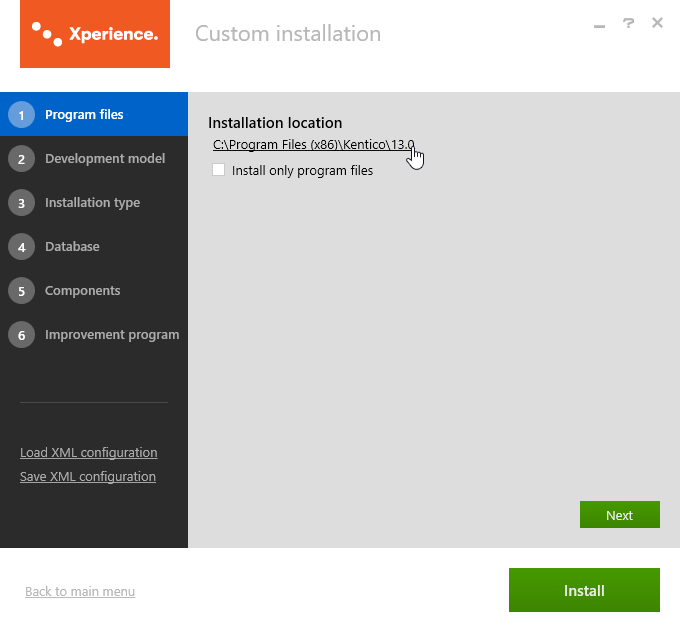
In Step 1, do not make any changes and click Next. This points the installation to the default location in the Program files folder.
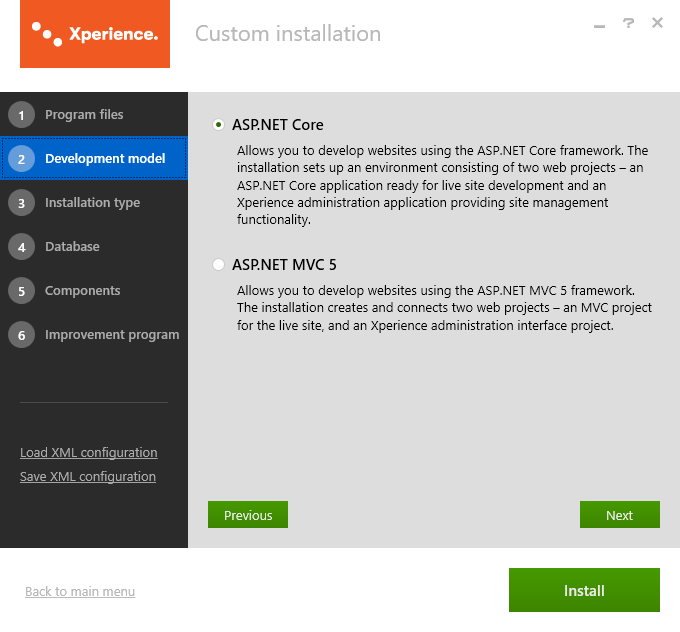
In Step 2, select ASP.NET Core as the development model and click Next.
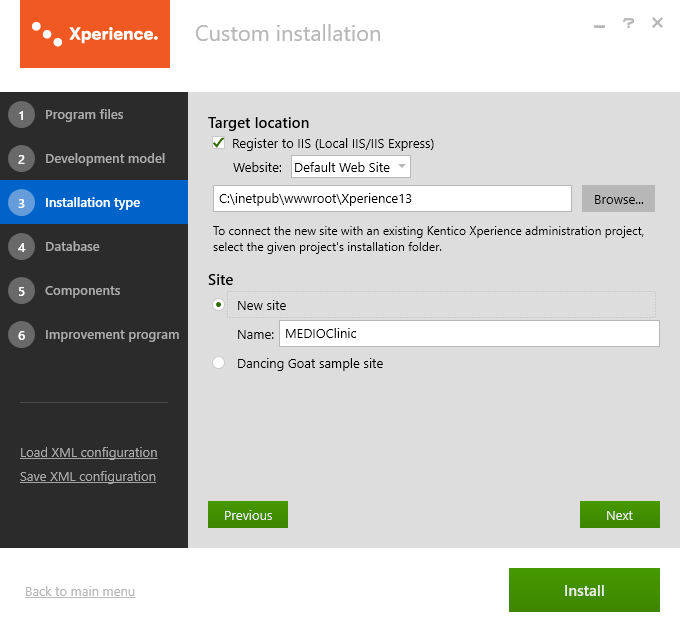
In Step 3, we need to configure the installation:
Under Target location, set the target location for the web project to C:\inetpub\wwwroot\Xperience13
This tutorial assumes and works with the default location of the inetpub folder (C:/inetpub). If you have the folder mapped on a different drive or file system path, set the Target location field accordingly!
Under Site, select New site, and enter MEDIOClinic into the Name field.
Click Next.
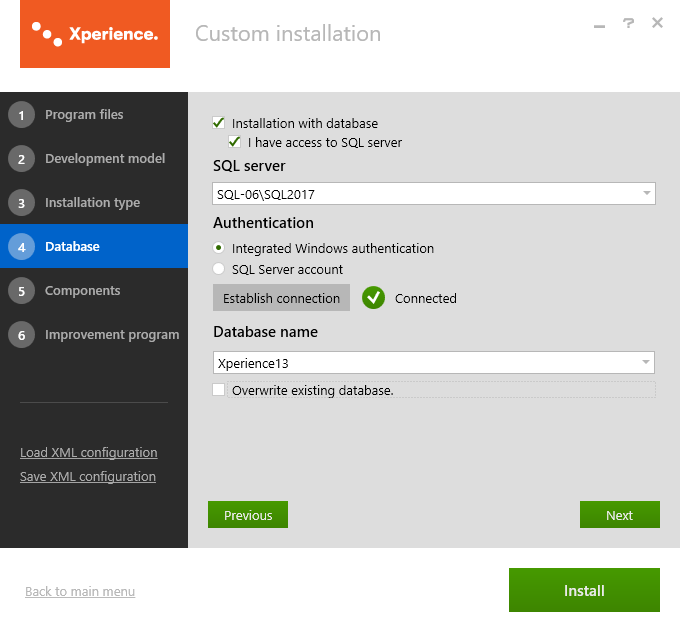
In Step 4, configure the database server for Xperience:
Since we cannot make assumptions about the configuration of your development environment, the following steps, unlike the rest of this tutorial, merely provide general guidance for the configuration of the SQL server connection instead of clearly defined step-by-step instructions.
- Select I have access to SQL server. Additional configuration options become available.
- Under SQL Server, select the server where you want to store the Xperience database.
- Under Authentication, configure access credentials depending on your mode of authentication.
- Click Establish connection to verify access to the database server is configured correctly.
- Under Database name, type: Xperience13
- Click Next.
In Step 5, leave the default settings and click Next.
In Step 6, click Install.
The installation process installs Xperience and registers the administration application in the Internet Information Services web server (IIS). The installer deploys two projects:
- The Xperience administration application – available under the https://localhost/Xperience13_Admin URL.
- An ASP.NET Core application template – currently only a blank project. We’ll need to set up a hosting environment for it and make sure Xperience knows where it is running.
Setting up the Core application
The ASP.NET Core project provided by the installer is a blank template. Before we can start using it we need to configure two things:
- Set up a hosting environment for the application. We’ll use IIS Express since it comes packaged with the Xperience installation.
- Make sure Xperience knows where the project is running by setting the Presentation URL property for the site in the administration application.
Configuring hosting under IIS Express
Before we can start developing, we need to set up a hosting environment so that we can quickly and efficiently see and test the changes we make to our project. For this tutorial, we’ll host the application under IIS Express. A lightweight web server installed together with Xperience.
- Open the solution file of the ASP.NET Core application – MEDIOClinic.sln, by default located under C:\inetpub\wwwroot\Xperience13
- Right-click the MEDIOClinic project and select Properties.
- Under Debug:
- Set Launch to IIS Express.

- Set Launch to IIS Express.
- Save the changes and run the project using the profile you configured (IIS Express in this example). You should see an error returned by the Xperience API. This is correct since we haven’t configured Xperience for the application yet. At this point, we only want to test that the hosting is configured correctly.
Connecting the Core site and the Xperience administration application
With the hosting for the Core live site application configured, we need to connect our site to the Xperience administration backend.
Every Xperience site is in the administration interface represented by a configurable object. And a key property of each site is its Presentation URL, which consists of a full domain name (including the port number and virtual directory, if present).
Both the Xperience administration application and the Xperience API in the live site project (Kentico.Xperience.* NuGet packages) use the Presentation URL to match requests to Xperience sites. Without a correctly configured Presentation URL, the Xperience API will not work correctly.
- Open the Xperience administration interface in a browser: https://localhost/Xperience13_Admin
- Use the default administrator account to sign in (no password).
- Open the application list (F2 can be a useful shortcut here) and find the Sites application under Configuration.
- In the Sites application, Edit () the MEDIOClinic site.
- On the General tab, set the Presentation URL property to the URL where IIS Express launches the Core site. http://localhost:25291/ in this example.
- Save the changes.
You are done with the basic installation and configuration of your live site environment.
Continue with the next steps of the tutorial where we’ll learn how to retrieve and display content from Xperience!
Previous page: ASP.NET Core development tutorial — Next page: Configuring the Core application
Completed pages: 2 of 10