
Get started with SaaS
Xperience Portal provides simple access to all your Xperience SaaS projects, making it easy to view their status, monitor their performance, and handle everyday management tasks. This guide will help you navigate the necessary steps to access your Xperience Portal project for the first time and enable your team to work on it. By following these instructions, you’ll ensure a smooth onboarding process.
Sign in to Xperience Portal
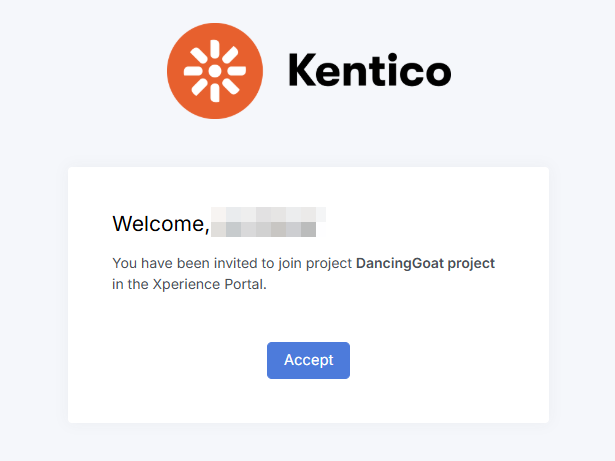
After your project is created, you’ll get an invitation email from Xperience Portal (noreply@xperience-portal.com). Xperience Portal sends this invitation to the contact specified in your purchase order.
To access your Xperience Portal project:
- Click the link in the email invitation. When you click the link, Xperience Portal will be opened in a new browser window.
- Note: For security reasons, the link in the email invitation expires after 10 days. If the link expires before you sign in to your Xperience Portal project, contact our support team to request a new invitation.
- Create your password. You’ll use your email and this password to access all the projects you’ve been invited to in Xperience portal. There’s no need to manage separate credentials, this new account gives you access to every project you were invited to.
- Set up the Multi-Factor Authentication (MFA) in Xperience Portal:
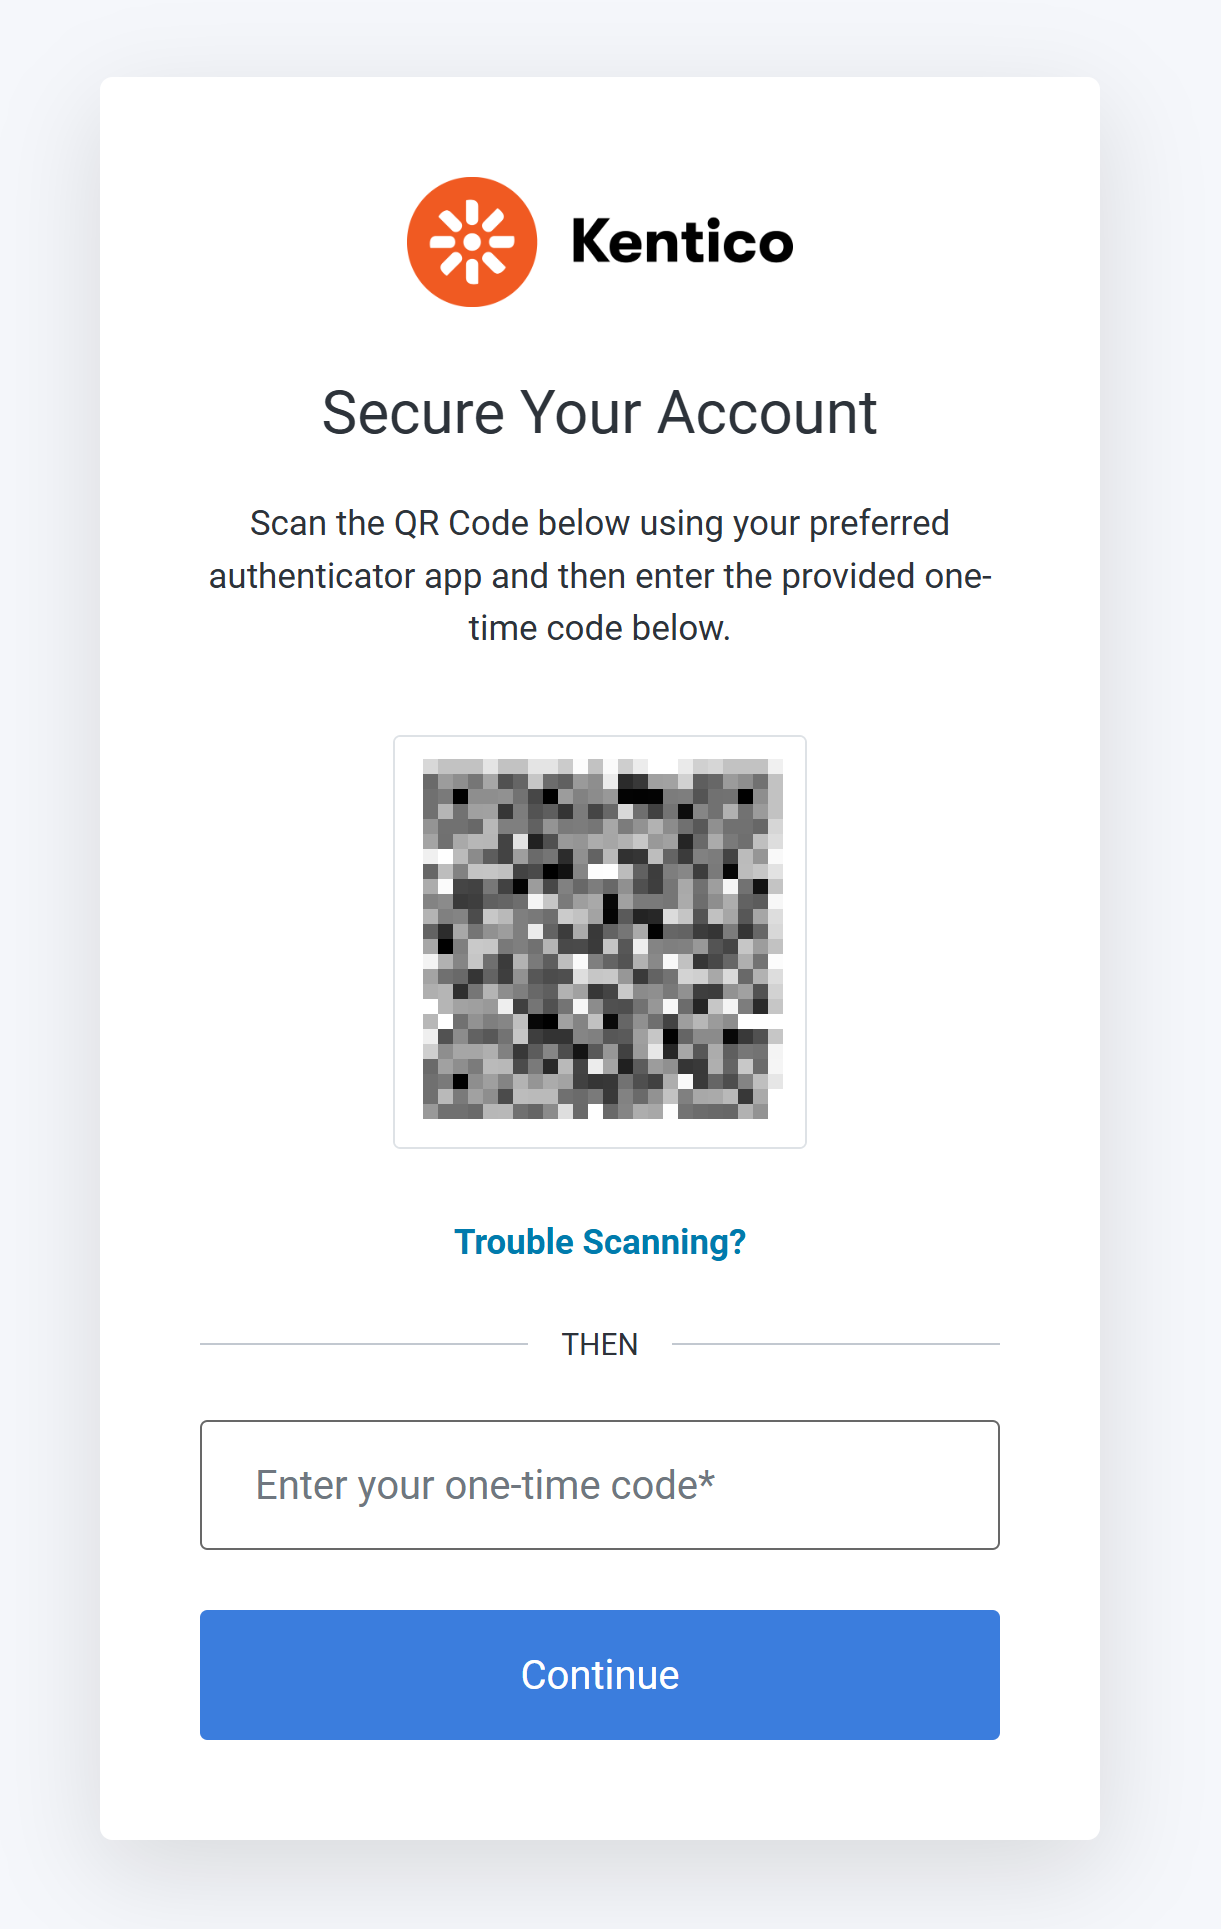
- Scan the QR code with your preferred authenticator application.
- Enter the one-time code generated by your authenticator.
- After you enter the one-time code, you’ll see a recovery code. Copy this code and save it in a safe place. You can use it to regain access to the Xperience Portal if you ever lose the device you use for two-factor authentication.
You now have access to Xperience Portal. The next step is to invite the members of your technical team into the project.
Users in Xperience Portal
Xperience Portal uses a role-based system. This means each team member gets access based on their role. It helps make sure everyone has the right permissions to do their work.
There are 3 distinct roles in Xperience Portal:
- Developer – This role has the most limited access. Developers can work in non-production environments, such as QA or UAT, and create their own personal access tokens (PATs) to connect tools or services.
- DevOps Engineer – In addition to everything a Developer can do, DevOps Engineers can also deploy changes to the live (production) environment. They can manage settings in the Channels and Domains application and adjust the Update schedule in the System application.
- Tenant Administrator – This role has full access. Tenant Administrators can do everything Developers and DevOps Engineers can do. They can also manage user access in the Users application and revoke personal access tokens (PATs) created by others.
For a full list of role privileges see Reference - Xperience Portal user roles.
Invite your technical team
To invite a team member to your project:
- Open the Users application.
- Select Invite user.
- Enter the email address of the user you want to invite.
- Assign an Xperience Portal role to the user and select Invite.
- Refer the invited user to Access Xperience Portal for the first time.
You have successfully invited a user to your project. To see all available options for managing users in Xperience Portal, check out Users.
Set up notifications
Stay informed about important updates in your Xperience Portal projects.
Xperience Portal automatically sends notifications to all users. You can choose which types of updates you want to receive, for example, deployments, errors, or environment changes, and in which environments (such as QA or PROD).
This helps you stay focused and only get alerts that are relevant to your work or responsibilities.
To customize your notifications:
- Open the Notifications application from the profile dropdown.
- Select which notifications to receive and in what environment. We recommend the DDoS attack and Failed deployment notifications. You can leave the others to your technical team.
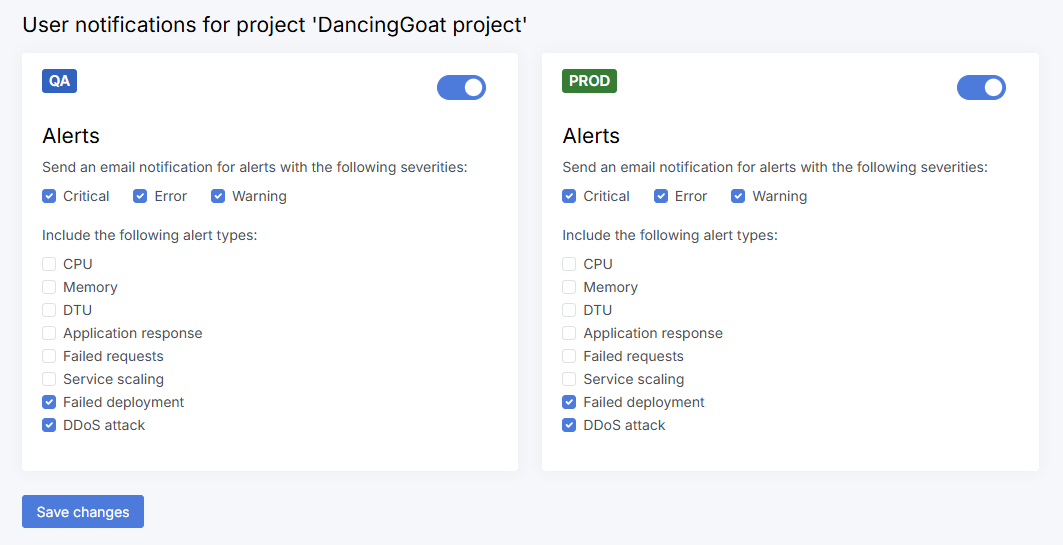
- Save your changes.
You have successfully set up your notifications.
What’s next?
Keep an eye out for future materials on additional SaaS scenarios, and let us know if there’s anything you’d like us to cover in more detail.