
Xperience Portal
This page discusses Xperience Portal administration (available at https://xperience-portal.com). To prepare your project:
- Access your Xperience Portal project
- Provide access to the project for your team members
- Set up the resources (hash string salt and personal access tokens) needed before deploying to the SaaS environment
- Select preferred timeslots for the scheduled Xperience Portal project maintenance
Use the Dashboard application to see the information about your project, including the region where your application is deployed (service region), service plan, project expiration date, project code name, and project GUID.
Access Xperience Portal projects
To access Xperience Portal, you need to receive an invitation to a specific Xperience Portal project. Kentico sends the invitation to join the project to the project’s primary contact whose contact information is provided to Kentico for the creation of the project. The primary contact can then invite other users from Xperience Portal.
Access your Xperience Portal project:
- Select the link in the email invitation.
- Create a password. You will use the email and password to access all projects you were invited to.
- Set up the Multi-Factor Authentication (MFA) in Xperience Portal:
- Scan the QR code with your preferred authenticator application.
- Enter the one-time code generated by your authenticator.
- Save your recovery code. Copy the code displayed after entering the one-time code and store it somewhere safe, as it can be used to regain access to the portal in case you lose the device used as the second factor.
You now have access to your Xperience Portal project. If you encounter issues with accessing your Xperience Portal project, contact Kentico support.
Reset Multi-Factor Authentication
To regain account access if you cannot access the device or account used for Multi-Factor Authentication (MFA), you can reset the MFA using the recovery code you received during MFA setup.
- Sign in to Xperience Portal using your recovery code.
- Expand the top-right user menu and select Profile.
- Select Reset multifactor authentication.
After resetting the MFA, you will be signed out of the project. After you sign in again, you will be asked to set up the MFA again.
Users
Xperience Portal and Xperience by Kentico projects operate on an entirely separate user base with different roles. This documentation section describes user management specific to Xperience Portal projects. For management of users within Xperience by Kentico projects, see User management.
Access to Xperience Portal is restricted to accounts associated with unique email addresses using Role-based access control (RBAC) and is managed via Auth0 by Kentico. To learn more about roles in Xperience Portal and their privileges, see Reference - Xperience Portal user roles.
Sign in as a user with the Tenant Administrator role to access the Users application where you can:
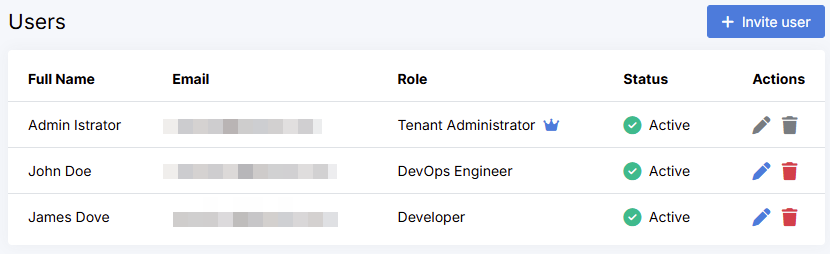
Primary contact for a project
You can identify which user is the primary contact for a project by a crown icon next to their Role in the Users listing.

Invite a new user to a project
- Open the Users application.
- Select Invite user.
- Enter the email address of the user you want to invite.
- Assign an Xperience Portal role to the user and select Invite.
- Refer the invited user to Access Xperience Portal for the first time.
The user will receive an email with an access link to join a project in Xperience Portal. If the email address is not associated with an Xperience Portal account, the user will receive an invitation to create an Xperience Portal account.
Change a role of an existing user
- In the Users Application, select the Edit () icon of a user whose role you want to change.
- Select the role from the Role drop-down menu. See Reference - Xperience portal user roles to decide which role to assign to the existing user.
- Select Save.
Remove a user from the project
- In the Users application, select the Remove () icon of a user you want to remove from the project.
- Confirm by selecting Remove.
The user is removed from the project, and the Personal access tokens associated with the account are revoked. The user does not lose access to other projects after removal from a specific project.
Hash string salt for the Xperience Portal project
Set your .NET project hash string salt to the hash string salt available in the Project info section of the Xperience Portal project Dashboard.
Wait until the project infrastructure is created for the Hash string salt to be displayed in your Xperience Portal project Dashboard.
Personal access tokens
Personal access tokens are used to authenticate API requests to Xperience Portal, for example, when you upload the deployment package to Xperience Portal.
Use the Personal access tokens application to Create, Edit, or Revoke tokens.
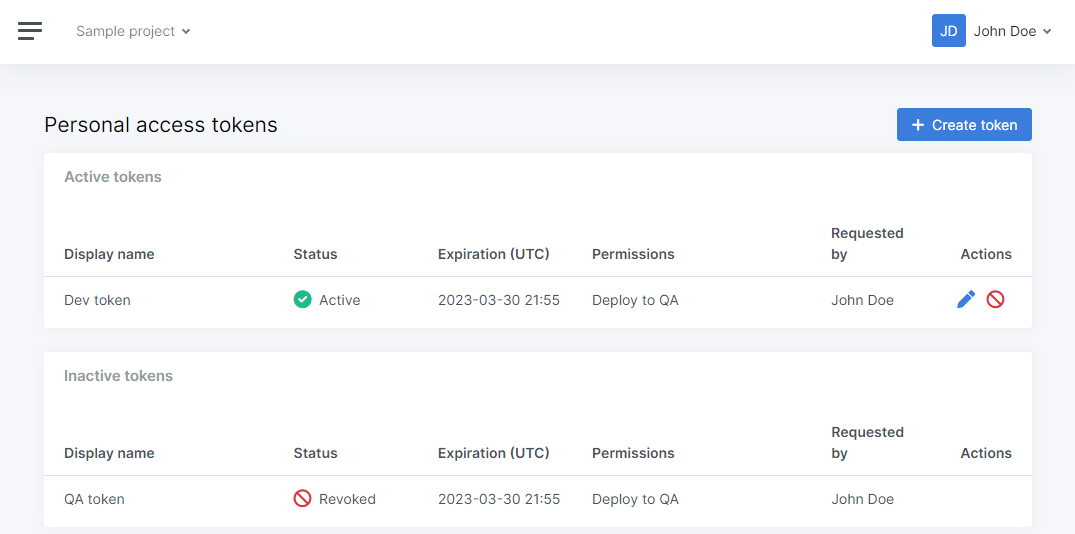
Create a new Personal access token (PAT)
In the Personal access tokens application, select Create token.
Enter the required data into the form:
Display name – is used to identify the token in the listing of tokens.
Expiration date – defines a period during which the token is valid. By default, a token is valid for one year.
Permissions – select permissions to associate with the currently created token.
- At least one permission has to be associated with a token.
- The Deploy to QA permission is suitable for most usual cases. The rest of the permissions are for emergency deployments.
Create the token.
Store the created token in a safe location before you proceed. After you close the dialog, the token string cannot be displayed again.
Lost personal access token strings cannot be recovered. You will need to revoke the lost token and create a new one.
Schedule maintenance of Xperience Portal projects
Kentico regularly provides updates to Xperience Portal, ensuring the required infrastructure for your projects is always up to date. The maintenance is split into two parts, during which certain Xperience Portal features become unavailable to ensure integrity of the update:
- Scheduled maintenance happens around once per month, usually on a Thursday. A Scheduled maintenance is always announced in advance via email, status page, and a banner in the Xperience Portal. During a Scheduled maintenance, Xperience Portal and internal infrastructure is updated and the following feature may become unavailable:
- Deployments application and deployment package upload – the deployment API will respond with 503 Service unavailable
- Channels and Domains applications
- Monitoring → Outages application
- Customer infrastructure update is carried out during the next update time slot after the Scheduled maintenance. Your preferred time slot for the update can be customized.
- Production site availability may be affected
To minimize the impact on your projects, users with Tenant administrator or DevOps engineer roles can select a preferred time slot for the scheduled maintenance of the customer infrastructure:
- Open the System -> Update schedule application.
- Edit schedule.
- Select the preferred timeslots for the scheduled maintenance.
- The timeslots are in the UTC time zone.
- Due to technical limitations, certain timeslots cannot be selected.
- Confirm the selection.
Your preferred update schedule is now set. Tenant administrators will be notified of any upcoming maintenance in advance via email. A notification bar with the date and time of the scheduled maintenance is displayed in Xperience Portal. Any user can also subscribe to updates on the status page.