
Content hub configuration
The content hub is a centralized location where you can manage and distribute your content. It provides a way for content editors to create, store, manage, and publish content across multiple channels.
This page covers content hub configuration options you can use to customize your project:
- Enable content hub folders
- Customize maximum file upload size and chunk size
- Customize supported file types
Enable content hub folders
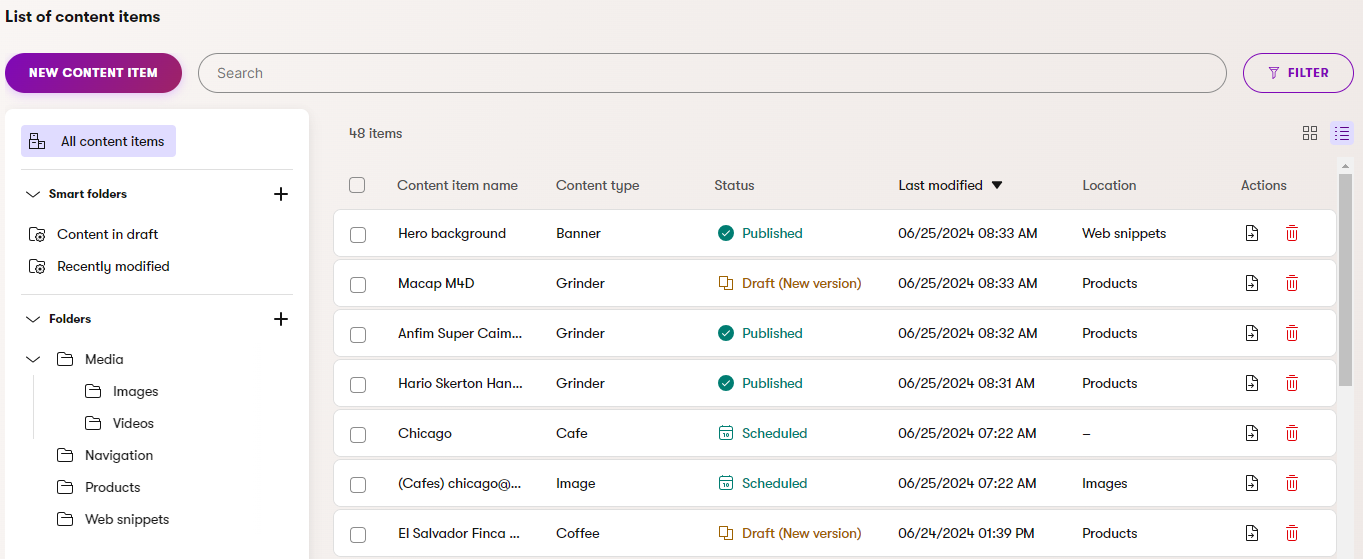
The content hub provides folders that allow editors to organize and efficiently navigate through reusable content items. The following types of folders are available:
- Smart folders – each smart folder is based on a filtering condition, such as “items modified in the last 7 days”, “items with the Acme tag”, etc. The condition is evaluated dynamically, so items move in and out of smart folders as their fields and metadata change. A single content item can belong into any number of smart folders. Smart folders can be used to organize content items in the administration interface, and also to dynamically control content delivery and filter content in your channels (e.g., on the live website). Smart folders are always enabled.
- Content folders – a folder hierarchy for cataloging content items in the administration interface. Content items are placed into folders manually, and each item can only be located in one folder. The purpose of content folders is only to help organize content items in the administration, and they cannot be used to control content delivery. Administrators choose whether content hub folders are enabled for a project.
To enable or disable content folders:
- Open the Settings application in the administration interface.
- Navigate to the Content → Content hub category.
- Select or clear the Enable content hub folders checkbox.
- Save the changes.
When content folders are enabled:
- Users can create and manage content folders in the Content hub application.
- Users select a folder location when creating new content items.
- Users can move content items between folders.
- The folder structure appears in the Content hub application and content item selectors throughout the system, and helps users navigate through the list of items.
If content folders are disabled, content items appear in a flat list. However, smart folders are always available, and can be used to filter items.
You can disable the content folders feature even if there are existing folders. In this case, content items appear in a flat list, but the system remembers the folder structure. If you re-enable the setting at a later time, the folders are fully recovered.
Customize maximum file upload size and chunk size
The system allows you to configure the maximum size of a single file that is allowed in the content hub and the size of chunks that large files are broken into during chunk upload.
The default values are:
- 100 MB maximum file size
- 10 MB chunk size
The maximum supported size for a single file is 2 GB (2147483648L).
To customize the values:
Open your Xperience project in Visual Studio and edit the Program.cs file.
Call the
Configure<FileUploadOptions>method of theIServiceColletionand specify theFileUploadOptionsproperties.C#using CMS.Base.Configuration; var builder = WebApplication.CreateBuilder(args); builder.Services.Configure<FileUploadOptions>(options => { // Sets the maximum file size to 500 MB options.MaxFileSize = 524288000L; // Sets the chunk size to 20 MB options.ChunkSize = 20971520; });
Chunk upload
Chunk upload is a process of uploading large files to a server in smaller pieces, or chunks, rather than all at once. This is a useful technique for uploading very large files, such as high-resolution videos or large software packages, where the file size may exceed the user’s available bandwidth.
Chunk upload works by breaking a large file into smaller pieces and uploading them one at a time. Once all the chunks have been uploaded, the server can reassemble them into the original file.
Customize supported file types
The content hub supports the following types of images by default: bmp, gif, png, jpg, jpeg, tiff, tif, webp, avif. The system supports images only up to 16,000 pixels in either dimension. For image optimization and image variants, only the following subset of image types is supported: png, jpg, jpeg, webp, avif.
Support for svg images can be enabled after considering the potential security impacts.
The system detects audio and video files based on their MIME type (audio types starting with the audio/ prefix and video types starting with the video/ prefix). For successfully detecting audio and video file types, the system renders appropriate HTML5 markup. The types of files that can be previewed or played depend on the web browser (modern HTML5 web browsers typically support one or more of the ogg, mp4, or webm video codecs, and mp3, wav, or ogg audio codecs).
All other file types (e.g., docx, pdf, odt, vector graphic formats) are recognized as documents. You can still store them in the content hub and link them to content items.
If you want to configure the system to allow the upload of a custom file type into the content hub, you need to:
- Enable the custom extensions to be uploaded to the content hub.
- (Optional) If you want to use the custom extension as an image file, you need to configure the system to recognize the extension as an image file.
Customize allowed extensions
To customize the set of file types that can be uploaded into the content hub:
- Open the Settings application.
- Navigate to the Content → Assets category.
- Add the selected file extensions into the Asset allowed extensions setting in the Security section (separated by semicolons).
- Save the changes.
Setting shared with media libraries
The Asset allowed extensions setting is shared with media libraries. Changing the value of the setting also limits file types that can be uploaded to the media libraries.
Specify image file types
By default, the system can recognize and process any media type if you have the right player for the given file type. Custom file types can be recognized as image files via configuration keys. However, by specifying allowed file types, you disable the automatic detection and support for media file types other than those explicitly added via your configuration.
To allow media files of specified types to be recognized as image files, add the CMSImageExtensions key to your application’s configuration file (appsettings.json by default).
"CMSImageExtensions": "bmp;gif;ico;png;wmf;jpg;jpeg;tiff;tif;webp;svg;avif;jfif;jfi;jif;jpe;dib"
Files of the specified types are now recognized as image files and will be, for example, offered in the Insert image dialog of the rich text editor.
Support for SVG images
Although the SVG vector format for images is supported for content hub assets, it is not allowed by default. SVG images may host scripts or CSS and can pose a security risk. If you wish to use the SVG image format, you need to manually enable support for the extension.
The system does not perform sanitization of SVG images when they are uploaded. This means that SVG files stored in the content hub may potentially contain malicious content. The system protects against these risks by adding a CSP header to all responses that serve files through the system’s endpoints (/getContentAsset, etc.). This header prevents execution of inline scripts.
If your project uses custom endpoints or other functionality to serve images, you need to provide your own security measures.
When displaying SVG images in custom HTML, always use the <img> element and its src attribute, rather than including the SVG code directly in the HTML.
Also consider additional security measures for SVG images if you have files mapped to external storage providers, such as Azure storage or Amazon S3. If files in external storage are accessed outside of Xperience endpoints, the system cannot provide any protection, and security depends on the features of the given storage provider.
Serve files inline
By default, only image file types are served inline. To enable inline serving for other file types uploaded to the Content hub, add a custom middleware. The following example demonstrates a middleware that serves PDF files inline instead of triggering a download.
using CMS.ContentEngine;
using Microsoft.AspNetCore.Http;
using Microsoft.AspNetCore.StaticFiles;
using Microsoft.Extensions.Primitives;
using System.Net.Http.Headers;
using System.Threading.Tasks;

public class PdfInlineMiddleware
{
    private readonly RequestDelegate next;

    public PdfInlineMiddleware(RequestDelegate next)
    {
        this.next = next;
    }


    public async Task InvokeAsync(HttpContext context)
    {
        // ContentItemAssetConstants.CONTENT_ASSET_URL_PATH_PREFIX is used
        // to obtain the URL path prefix for the endpoint serving content item assets.
        if (context.Request.Path.StartsWithSegments($"/{ContentItemAssetConstants.CONTENT_ASSET_URL_PATH_PREFIX}"))
        {
            context.Response.OnStarting(() =>
            {
                var contentType = context.Response.Headers["Content-Type"];

                // Checks whether the content is a PDF file. The IsPdf method is used to detect PDFs
                // when the page is reloaded because the content type header is a part of the response only
                // the first time the page is loaded.
                if (contentType.Equals("application/pdf") || IsPdf(context.Response.Headers.ContentDisposition))
                {
                    // Sets the PDF file to be displayed inline
                    context.Response.Headers.ContentDisposition = "inline";

                }

                return Task.CompletedTask;
            });
        }

        await next?.Invoke(context);
    }


    private static bool IsPdf(StringValues contentDisposition)
    {
        var headerValue = ContentDispositionHeaderValue.Parse(contentDisposition);
        var successfullyParsed = new FileExtensionContentTypeProvider().TryGetContentType(headerValue.FileName, out var contentType);

        if (!successfullyParsed)
        {
            return false;
        }

        return contentType.Equals("application/pdf");
    }
}
Register the middleware in Program.cs. The middleware can be registered at any point in the middleware pipeline:
app.UseMiddleware<PdfInlineMiddleware>();
Override CSP when displaying content through iframe
When using the iframe tag to display content inline, it can be blocked by the external Content Security Policy directive default-src 'none', which is enforced by the system. This concerns any type of content and file formats. To override this directive, use custom middleware to change the directive to media-src 'self'. The example below shows an implementation of custom middleware that overrides this directive for videos in an mp4 format uploaded to Content hub.
using CMS.ContentEngine;
using Microsoft.AspNetCore.Http;
using Microsoft.AspNetCore.StaticFiles;
using Microsoft.Extensions.Primitives;
using System.Net.Http.Headers;
using System.Threading.Tasks;

public class CSPMiddleware
 {
     private readonly RequestDelegate next;

     public CSPMiddleware(RequestDelegate next)
     {
         this.next = next;
     }


     public async Task InvokeAsync(HttpContext context)
     {
        // ContentItemAssetConstants.CONTENT_ASSET_URL_PATH_PREFIX is used
        // to obtain the URL path prefix for the endpoint serving content item assets.
         if (context.Request.Path.StartsWithSegments($"/{ContentItemAssetConstants.CONTENT_ASSET_URL_PATH_PREFIX}"))
         {
             context.Response.OnStarting(() =>
             {
                 var contentType = context.Response.Headers["Content-Type"];

                 // Checks whether the content is an mp4 video. The IsVideo method is used to detect videos
                 // when the page is reloaded because the content type header is a part of the response only
                 // when the page is loaded for the first time.
                 if (contentType.Equals("video/mp4") || IsVideo(context.Response.Headers.ContentDisposition))
                 {
                    // Sets the video to be displayed inline
                     context.Response.Headers.ContentDisposition = "inline";

                     // Changes the directive
                     context.Response.Headers.ContentSecurityPolicy = "media-src 'self'";

                 }

                 return Task.CompletedTask;
             });
         }

         await next?.Invoke(context);
     }


    private static bool IsVideo(StringValues contentDisposition)
    {
        var headerValue = ContentDispositionHeaderValue.Parse(contentDisposition);
        var successfullyParsed = new FileExtensionContentTypeProvider().TryGetContentType(headerValue.FileName, out var contentType);

        if (!successfullyParsed)
        {
            return false;
        }

        return contentType.Equals("video/mp4");
    }
 }
Register the middleware in Program.cs. The middleware can be registered at any point in the middleware pipeline:
app.UseMiddleware<CSPMiddleware>();