
Content items
Content items provide a universal and reusable way of working with content in the Content hub application and can be reused across channels (website, email, headless). Each item belongs to a single workspace and represents a piece of structured content defined by a content type.
Examples of content items include testimonials, author details, and FAQ sections. See Content modeling for more information about the recommended information architecture of projects.
Content items are useful for numerous scenarios:
- Content reusability
- Separation of structured content from the presentation layer
- Multichannel content distribution
- Headless scenarios
Find content items
The Content hub will often contain a large number of items. The search bar allows you to find items with a name or content type matching the entered text in the current workspace.
The listing displays only items in the current workspace. If you have access to multiple workspaces, you can switch between them using the workspace switcher located at the top left of the Content hub interface.
If you select a folder in the tree, the listing only displays items located directly in the given folder. You can use the search function to find items, including subfolders.
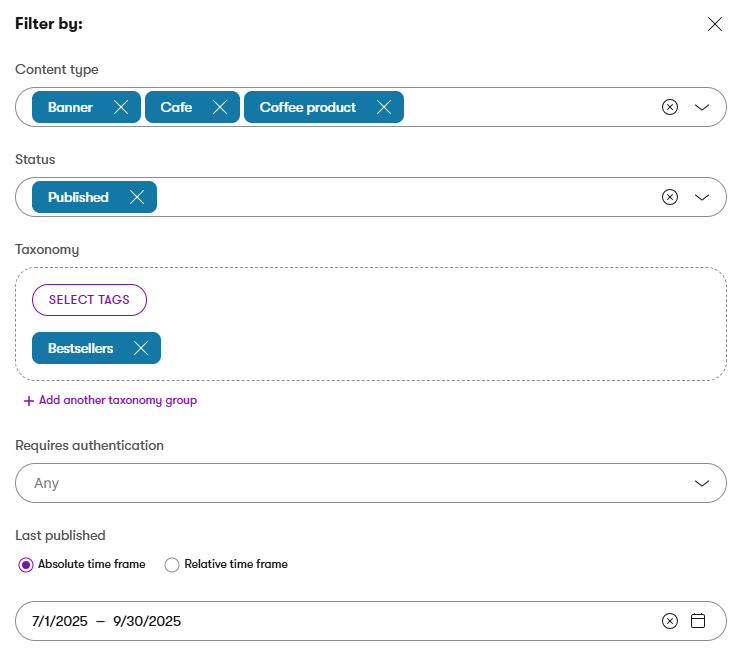
You can also Filter the list of content items to display only selected content types, items with specific statuses, items containing specific tags, or items with authentication requirements.
Create content items
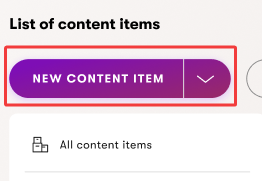
- Select New content item.
- Enter a Content item name which identifies the content item in the admin UI.
- If content folders are enabled, select the Location for the new content item.
- Choose the Content type of the new content item.
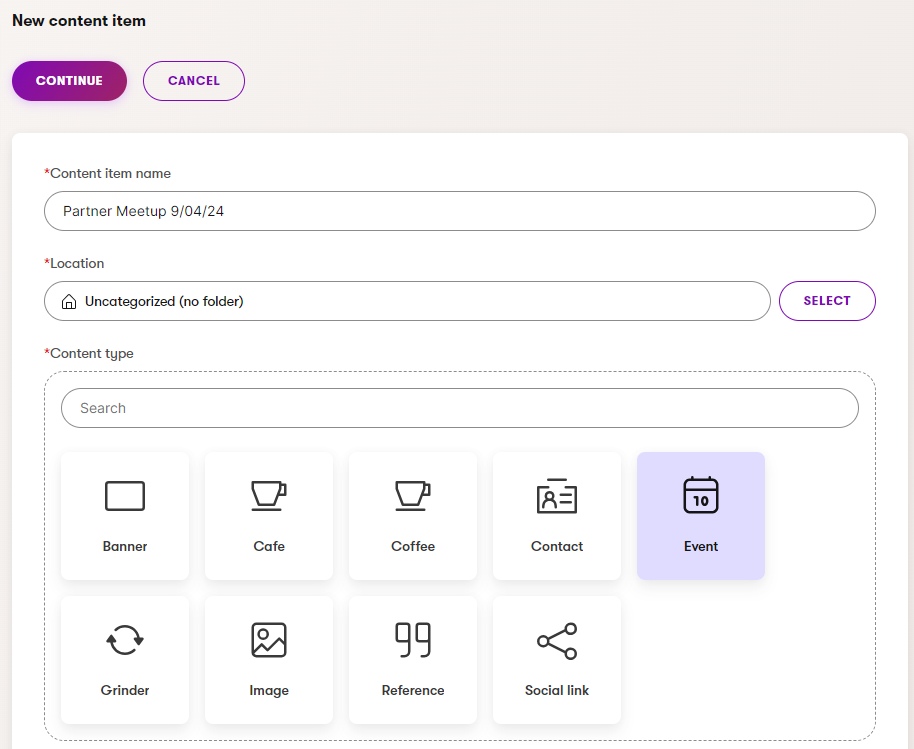
- Select Continue.
- Enter the values required by the selected content type.
- Save the new content item, which creates a draft version of the item in the current workspace.
Directly publish items
You can directly Publish new items to make them available for your audience (either immediately or at a scheduled time). See Publish content items to learn more.
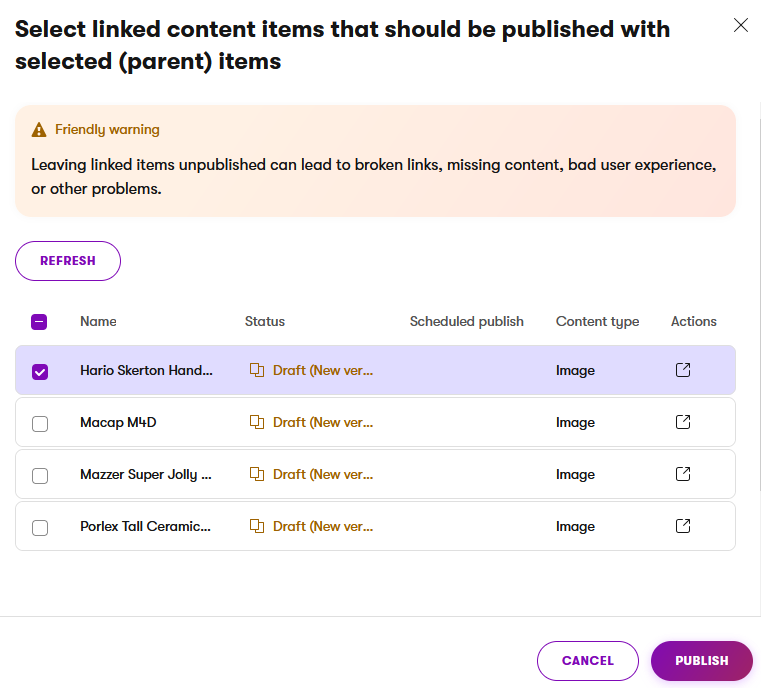
If the item has fields linking to other reusable content items, the cascade publishing dialog opens when publishing. You can view all linked content items you have access to, that are currently not published, and select them for publishing together with the main item.
The content item is now created. If content locking is enabled, the item is now locked and only you can edit it.
Clone content items
Cloning a content item allows you to create a new item with the same data. If the item has an asset (i.e., a file that is uploaded to the item), a new independent copy of the asset is created for the cloned item.
You can clone all language variants of an item or just a selected language variant.
To clone a content item:
Open the Content hub application.
Locate the content item you want to clone.
- Use the search bar, filter or folders to find content items.
Select the Clone () action.

Enter the content item name. The default name is (Clone) {original name}.
If you want to clone only the current language variant of the item, clear the Clone all language variants checkbox. Otherwise, all language variants are cloned by default.
Select Clone.
The new item is created in the Draft step, where you can edit it. The item needs to be published before it can be delivered to your audience. Cloning does not automatically lock the item. See Content locking for more information.
Each language variant needs to be published separately. Use the language switcher to access other language variants.

If you cloned an item located inside a content folder, it is placed into the default location under All content items.
Edit content items
- Select the content item you want to edit.
- Use the search bar, filter or folders to find content items.
- If you have multiple languages set up, select the language in which you want to edit the content item from the language switcher.
- Make sure the content item is in the Draft status or another custom workflow step.
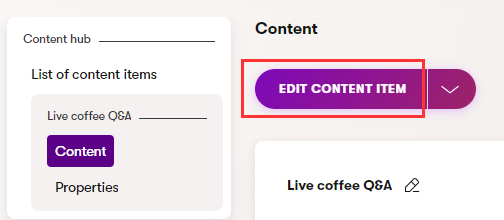
- When a content item is Published or Scheduled, select Edit content item to transition it to the Draft step and enable editing and publishing of the item.
- When a content item is Unpublished, select Create new version to move the item to the Draft step.
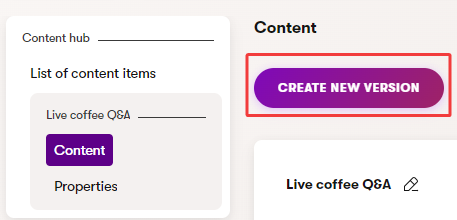
- When a content item is Published or Scheduled, select Edit content item to transition it to the Draft step and enable editing and publishing of the item.
- Edit the fields of the content item.
- If content locking is enabled, the item has been automatically locked when you started editing. Only you can edit until the lock is released.
- Save the updated content.
Overwrite protection
The system has a basic overwrite protection even when content locking is not enabled. When you and another user are both editing the same item and the other user saves their changes first, the system prevents you from saving your changes. Reopen the item in a new tab to load the latest version, apply your changes, and save.
Move content items
Possible side effects of moving content items
Moving content items may affect what you and other editors are allowed to do with them.
Consult with your administrator if you are unsure about how moving content items may affect other editors. Moving items to a workspace with different permissions could result in other editors losing access to or being unable to work with the moved items.
You can move content items into a content folder or a different workspace. The action is available both for individual items in the list, and as a mass action after selecting multiple items.
To move content items:
- Open the Content hub application.
- Select the content items you want to move.
- Use the search bar, filter or folders to find content items.
- Select the Move () action.
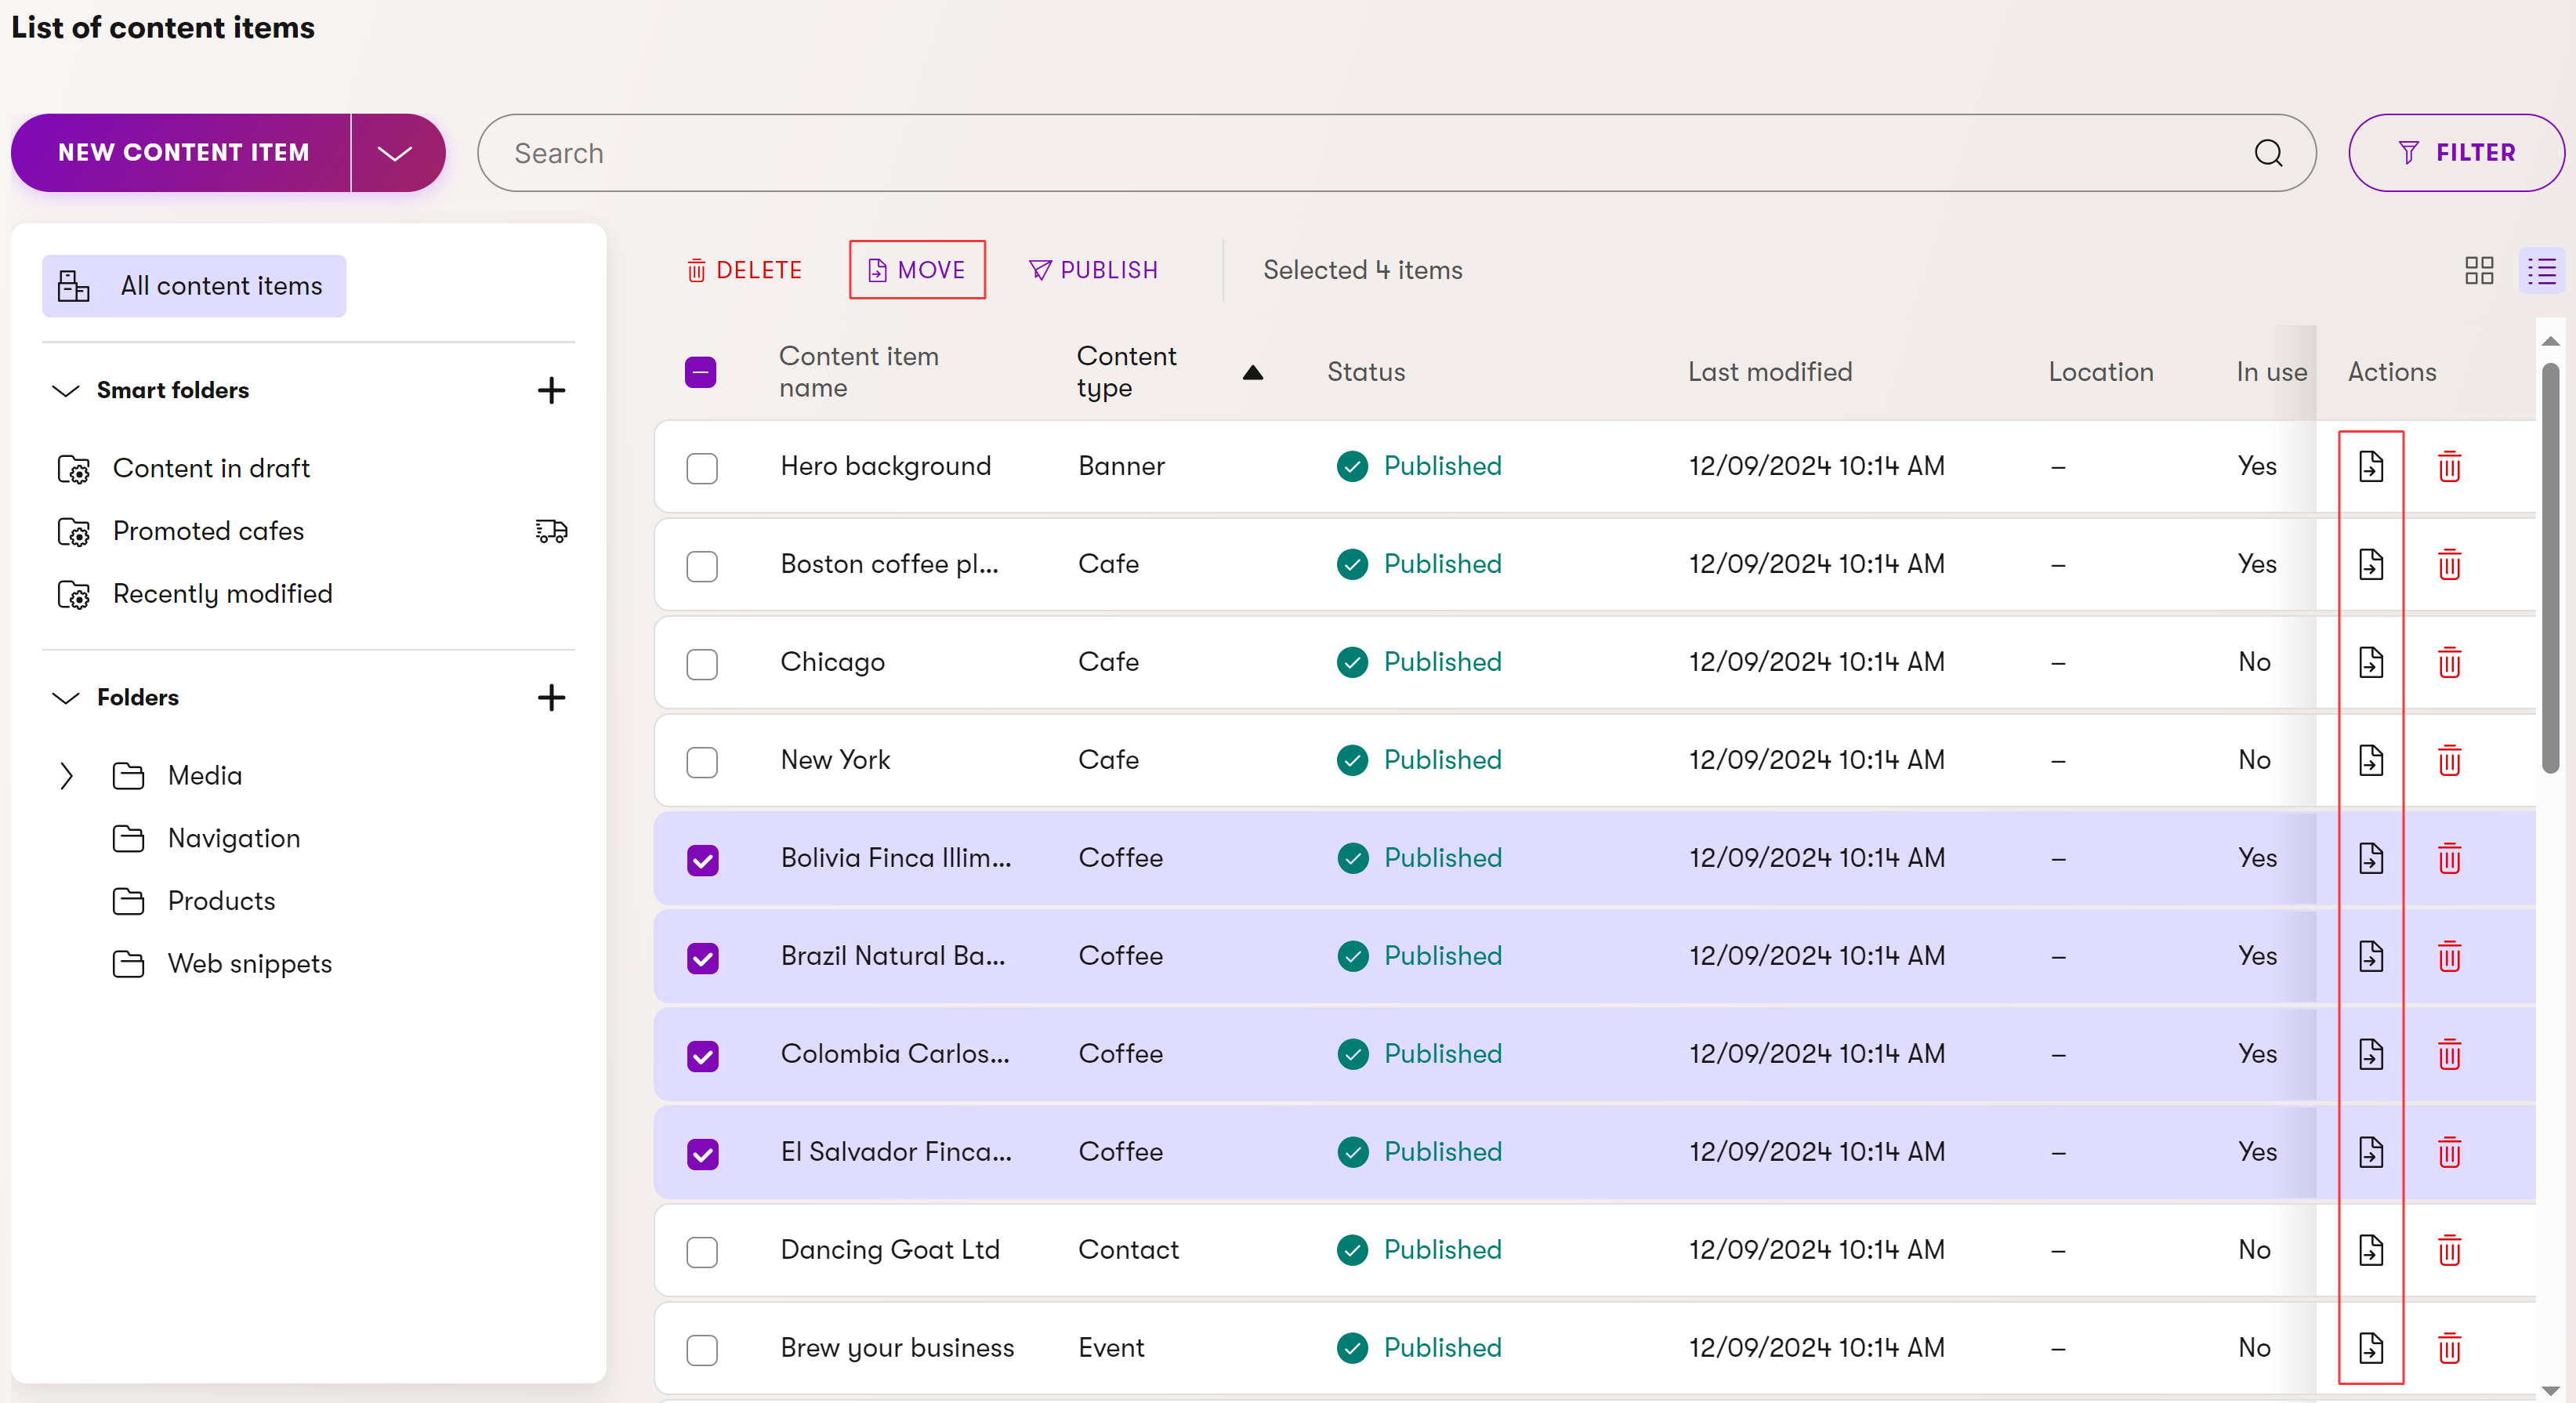
- Select the workspace or content folder where you want to move the items.
- Move the content items.
The content items are now moved to the new location.
Link content items
Content items may support linking other items to create nested hierarchies. For example, a content item representing a medical practitioners office can link to other content items representing employed doctors, patient testimonials, and so on. These relationships are determined by the content model used by your project.
- Edit a content item that supports referencing other content items.
- You can choose existing content items to link via Select existing in any workspace you have access to, or create a completely new content item using Create new.
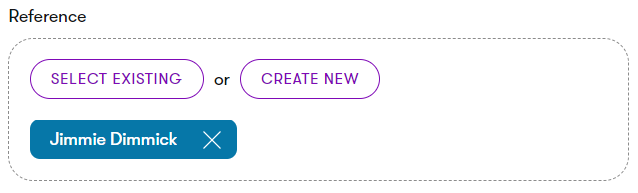
- Save the changes.
The content items are now linked to the edited item. Each linked item also respects its status – it may not be immediately active upon being linked. Linked items can be published together with the main item using Cascade publishing. To learn how the lifecycle influences linked items, see Content items lifecycle.
Add tags to content items
Depending on the configuration of your project, content items may support taxonomies and tags.
- Edit a content item that has a field with the tag selector.
- Select tags that describe the content item.
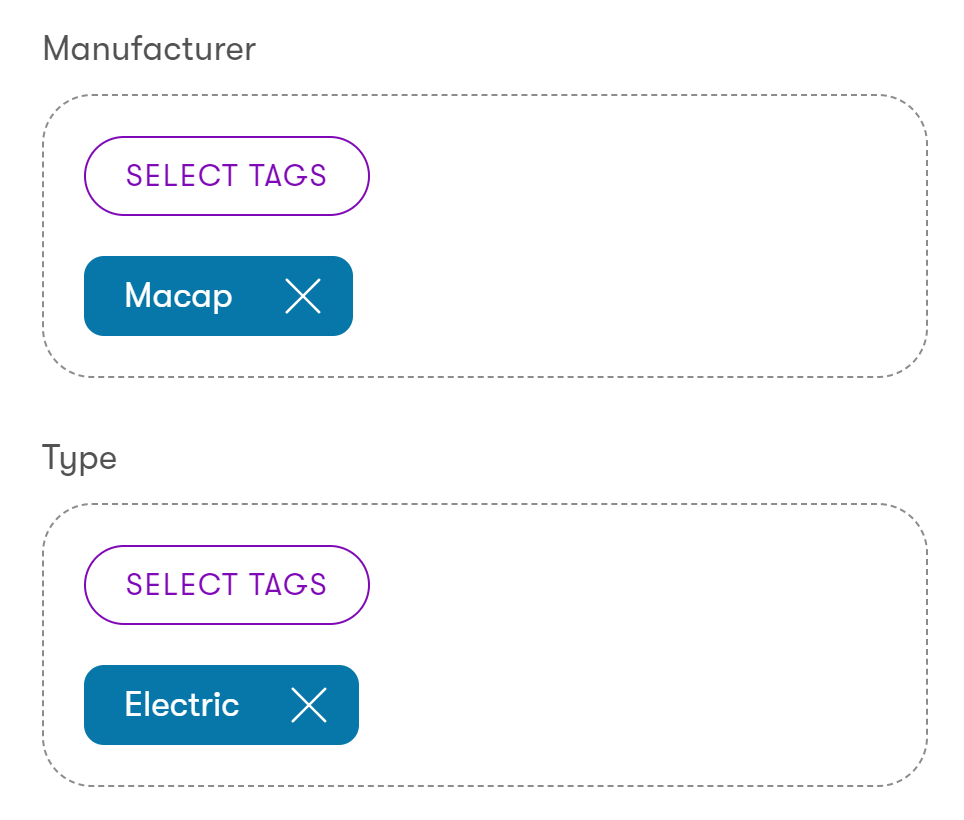
- Save the changes.
The selected tags are now stored with the content item. Developers can use the information to display content based on tags.
View content item details
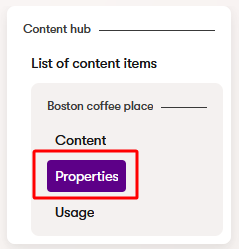
Switch to the Properties tab on the left to display various information about the selected content item, such as its name, content type, and culture.
Track usage of content items
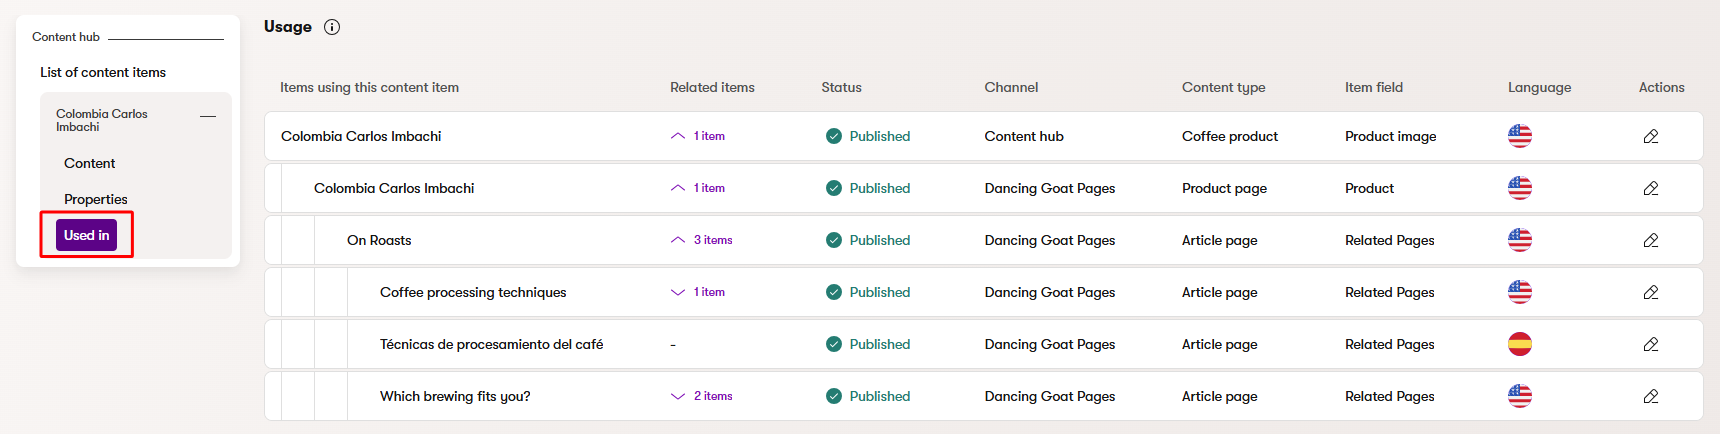
Even with thousands of content items in your project, the Content reuse locator feature helps you monitor where each item is linked and which channels display it. Understanding a content item’s usage is valuable when assessing the potential impact of edits or deletions. For instance, you can verify whether a content item you plan to delete appears in published content and whether removing it might disrupt that content.
The chain of usage starts with items that directly reference your content item. These items, in turn, may be used in other items (found under Related items), and this pattern continues. Unfolding these chains of usage creates a tree-like structure, illustrating how your content item is referenced across different levels.
- Open the Content hub application.
- Select the content item you want to track.
- Use the search bar, filter or folders to find content items.
- Navigate to the Used in tab to view where the selected content item is used.
- The tab displays usages in content items and also in website channel pages.
Tracking limitations
The system does not track or display usage of content items in:
- Smart folders
- Notifications
- Campaign assets
- Already sent emails, as changes to content items cannot affect emails that have already been delivered
- Properties of custom automation components
- Custom fields added to extendable system object types or in custom classes
If you use the features listed above, we recommend checking manually before you delete or significantly modify content items that could be related.
Publish content items
Content items must be published before they can be delivered to your audience through various types of channels. For example, a website channel’s pages only display published content on the live site.
You can publish items under the following conditions:
- If the item’s content type is under workflow, the item must be in the last step of the workflow, or you need to belong to a role with full control for the given workflow (this allows you to publish items from any step).
- For items that are not under workflow, the item must be in the Draft step.
- If content locking is enabled, the item cannot be locked by another user.
To publish a content item:
- Open the Content hub application.
- Select a content item that has recently been edited and is in the Draft status, or a workflow step from which you are allowed to publish the item.
- Use the search bar, filter or folders to find content items.
- Publish the content item. For items under workflow, select Change workflow step and choose the Schedule / Publish step.
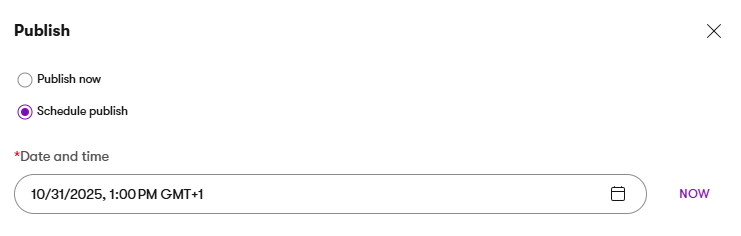
- Choose when you want to publish the item:
- Publish now
- Schedule publish – select a date and time in the future. The system will automatically publish the item at the given time (see Scheduled publishing).
- Select Confirm.
- If the item has fields linking to other reusable content items or pages, the cascade publishing dialog opens.
Once published, the item is available for use within individual channels. If content locking is enabled, publishing the item releases the content lock. When you edit a published content item, a new draft version is created. The item’s last Published version remains public.
Scheduled publishing
When publishing content items, you can choose to postpone the publish action to a later time. Select the Schedule publish option while publishing, and then pick a date and time when you want the system to automatically publish the item.
Once an item is Scheduled, it can no longer be edited (like a Published item). However, the item is not available for your audience until it actually becomes published.
If you need to edit a scheduled item, you have the following options:
- Select the Edit content item action – cancels the scheduled publish and moves the item to the first step in the item’s workflow cycle (Draft).
- Expand the Edit content item menu and select Cancel scheduled publish – cancels the scheduled publish and moves the item to the final step in the item’s workflow cycle (Draft for items without workflow).
Scheduled publish timing
We cannot guarantee that items will be published exactly at the scheduled time. The system checks if there are items scheduled to be published once per minute. If there’s a significant volume of content scheduled to be published at the same time, there may be a delay before all items are published (up to several minutes when publishing many thousands of items).
During the publishing process, reusable content items are always published before pages to ensure that content is displayed consistently.
Mass publishing
To publish multiple content items at once:
- Open the Content hub application.
- Select the content items you want to publish using the checkboxes on the left side of the list.
- Select Publish under the search bar.
The Publish selected content items? confirmation dialog opens. Items can only be published if they fulfill the following requirements:
- Items under workflow must be in the last step of the workflow, or you need to belong to a role with full control for the given workflow (this allows you to publish items from any step). Items without workflow must be in the Draft step.
- You must be allowed to publish the item under the item’s workflow restrictions for roles.
- The item must be translated in the currently selected language.
- The item cannot be locked by another user.
If any of the selected items do not fulfill the requirements for publishing, they are listed in the dialog. You can directly open () each item in the list in a new tab to make adjustments and move it to a publishable state.
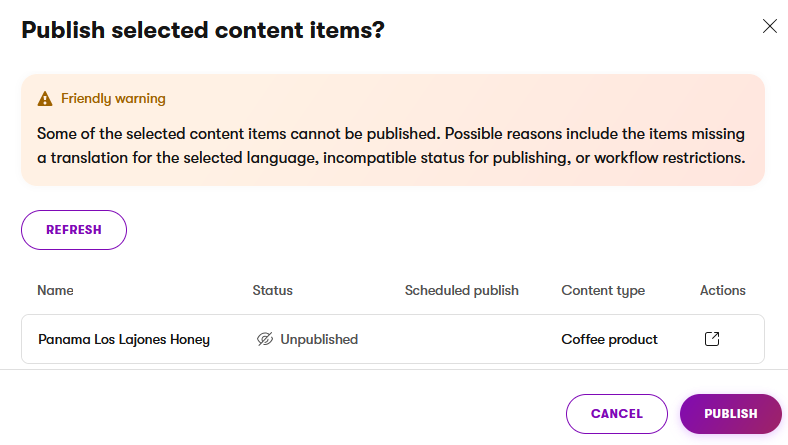
To confirm the mass publish, select Publish or Continue (appears if cascade publishing of linked items is possible for any of the published items).
Cascade publishing
When publishing (or scheduling the publish for) content items with fields linking to other reusable content items or pages, the cascade publishing dialog opens. Here you can view all items that are associated with the item you’re about to publish, but are currently not published. If you are publishing multiple items using mass publishing, the dialog displays linked items for all published items (in this case, the main published items are not listed).
You can select linked items to be published together with the main items. Linked items that currently do not fulfill the requirements for publishing are displayed, but cannot be selected. Not publishing linked items may lead to missing data or other issues in the content of the published items.
Cascade scheduled publishing
If you are scheduling an item to be published, any linked items that you select in the cascade publishing dialog are scheduled to be published at the same time as the main item. This overwrites the publish time for any linked items that are already scheduled to be published.
Linked items that are scheduled to be unpublished at a time before the new scheduled publish date cannot be selected in the cascade publishing dialog.
Cascade publishing is available when publishing all types of content, including: reusable content items in Content hub, pages, emails, and headless items.
Together with the main items, cascade publishing allows you to publish reusable content items and pages linked in the following ways:
- through the fields of an item, page or email in the Content view of the respective application
- recursively through the fields of another linked item
- linked on pages through Page Builder widget properties using the Combined content selector or Page selector form component
- linked in emails through Email Builder widget properties using the Combined content selector or Page selector form components
- pages or content item assets inserted or linked in rich text editor fields
Cascade publishing does not support the publishing of:
- headless items linked through fields with the Headless items data type
Revert content items to published status
After creating a new version of a content item, the item goes through a new editing cycle with the Draft step and optionally other custom workflow steps.
At any time before the new version is published, you can revert the item back to the last Published status. All changes made in any workflow step will be lost.
- Open the Content hub application.
- Select a content item that has been edited.
- Use the search bar, filter or folders to find content items.
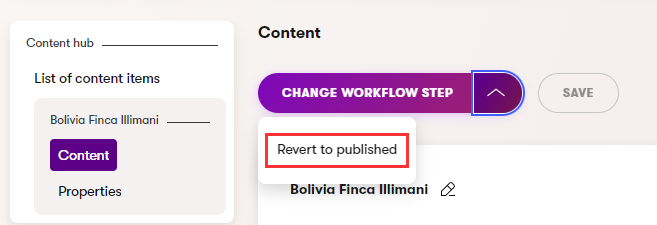
- Expand the Publish or Change workflow step menu.
- Select Revert to published to revert the changes.
The item is now reverted to its Published status. If content locking is enabled, this action releases the content lock.
Translate content items
Before you can translate individual content items in your project into other languages, you need to set those up in the Languages application. For detailed info on how to configure multiple languages in Xperience see Languages.
Afterwards you can start to translate and create language variants of your items:
Open the Content hub application.
In the header bar, open the language switcher.

The language switcher is available only if two or more languages are set up.
Select the language to translate content into.
- Tip: You can see what languages a content item is translated into in the Languages column.
Select the content item to translate.
Untranslated content items are visually marked by the Not translated () status.
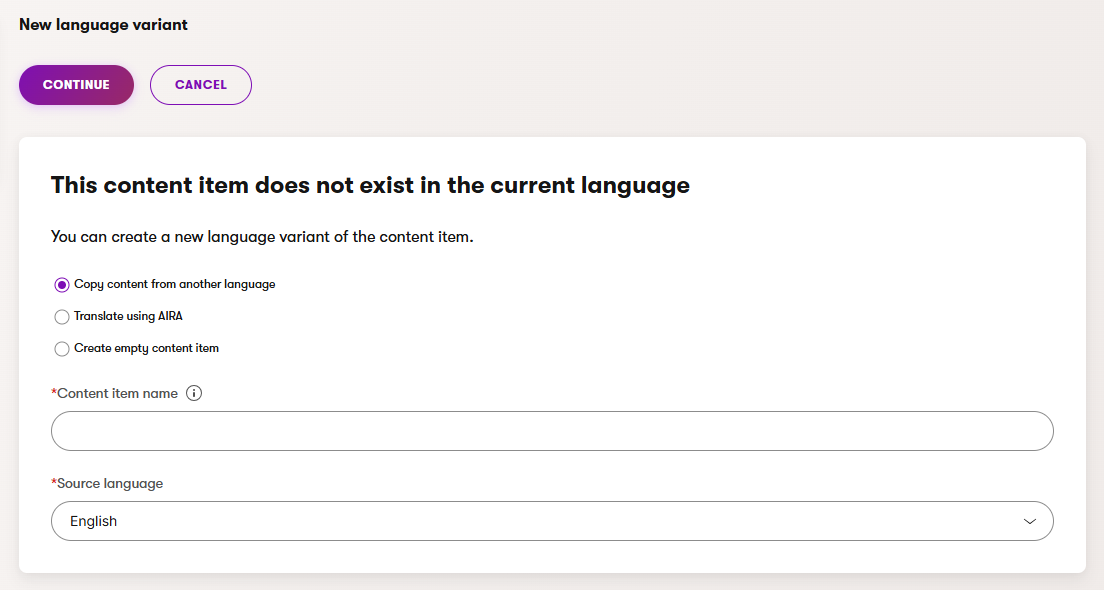
Enter the translated name of the content item. You can now choose one of the following options:
- Copy content from another language is the preselected option. By default, the closest language in the fallback chain is preselected. You can choose a different language from the drop-down list. This option lets you prefill the content item fields with the content available in the chosen language. If a linked item does not have a translated or published version, a warning will be displayed, and a fallback language variant of the item will be used.
- Create empty content item allows you to create an empty content item with blank fields. Linked items need to be re-linked, and files need to be re-uploaded into the new language variant of the translated content item.
- Translate using AIRA see Translate using AIRA for more information.
Select Continue.
Enter the translated values of the content item’s fields.
Save the translated content item.
You have now successfully translated the content item. Note that the particular language variant is now only a Draft and so won’t be accessible on the live site until you publish it. Until you do so, the language variant in the fallback language will be displayed.
If content locking is enabled, the item is now locked and only you can edit it. Variants created via Translate using AIRA are locked only once you start editing.
Translate using AIRA
When you choose Translate using AIRA and start the translation process, the name and content of your content item will be translated using AIRA.
The translation workflow changes depending on the number of items submitted for translation. For a single item, AIRA creates a new language variant of the content in the Draft state and immediately takes you to it.
However, when translating multiple content items at once (for example, when translating content items along with their linked content), your content is sent to a Translation queue. This allows the translation to be processed in the background, freeing you up to continue your work. You can check on its progress in the Translation queue application. Once the translation of your content finishes, the related items are removed from the Translation queue application.
The behavior of the translation can be configured, allowing you to specify, for example, formatting rules or brand terminology.
Existing text links to the translated content are not redirected to the new variant or translated automatically and need to be manually reviewed to ensure they lead to the correct content.
Mass translating
To translate multiple content items at once using AIRA:
- Open the Content hub application.
- Select the content items you want to translate using the checkboxes on the left side of the list.
- Select Translate using AIRA under the search bar.
- Select which of the linked items you want to include in the translation.
- Translate item with selected items.
You have successfully sent your items to be translated. The items will be placed in the “Translation queue” to be processed asynchronously. You can continue with your work or check the progress of the translation in the Translation queue application.
Secure content items
Content items are accessible to all visitors by default. Use the Membership access section on the Properties tab to restrict who can view a content item on the live site:
- Requires authentication – only members who are signed in to the website can view the item.
- Membership roles – select one or more member roles to further restrict access to signed-in members in those roles. This allows you to reserve content for particular groups, such as Premium members or Subscribers.
Secured content items show a diamond icon when listed in the Xperience admin UI.
Require authentication
To require that members sign in before they can view a content item:
- Open the Content hub application.
- Select the content item you want to secure.
- Use the search bar, filter or folders to find content items.
- Switch to the Properties tab.
- In the Membership access section, select the Requires authentication option.
- Select Save.
The content item now requires authentication. Only members who are signed in can view it on the live site. Visitors who are not signed in cannot access the item.
Restrict to member roles
If you need finer control over who can view a content item, you can restrict access to members who belong to specific member roles. For example, you might allow only Premium members to view exclusive articles.
Before you can restrict content items to member roles, your project must have member roles set up. See Member roles in the Members application to learn how to create roles and assign members.
To restrict a content item to specific member roles:
Open the Content hub application.
Select the content item you want to restrict.
- Use the search bar, filter or folders to find content items.
Switch to the Properties tab.
In the Membership access section, select the Requires authentication option.
Select the member roles that should have access to the content item.
- Only members who belong to at least one of the selected roles can view the item on the live site.

Select Save.
The content item is now restricted to the selected member roles. Members who are signed in but do not belong to any of the required roles cannot view the item.
To change or remove the role restriction later, return to the Membership access section on the Properties tab and adjust the selected roles or clear the Requires authentication option.
Availability of secured content items
Secured content items (with or without role restrictions) are only available for website channel pages, where the system can identify which members are signed in. Secured items are not included in the content of emails or headless items (even if selected in the fields of such items).
See Secure pages to learn how to secure individual pages or entire sections of website channels.
Unpublish content items
An unpublished content item is not available for use by any channels, but you can still access it from the administration.
To unpublish a content item:
- Open the Content hub application.
- Select a content item you want to unpublish.
- You can only unpublish content items that are currently in the Published status or are scheduled to be published in the future.
- Use the search bar, filter or folders to find content items.
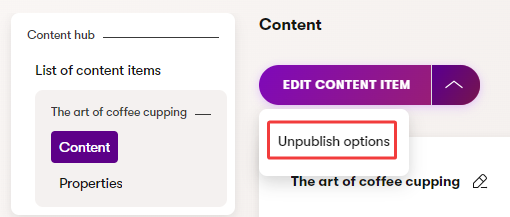
- Expand the Edit content item menu and select Unpublish options.
- Choose when you want to unpublish the item:
- Unpublish now
- Schedule unpublish – select a date and time in the future. If the item is scheduled to be published, the unpublish time must always be set after the publish time. The system will automatically unpublish the item at the given time.
- Select Confirm.
Once an item is Unpublished, it is no longer available.
To edit or re-publish an unpublished content item, select Create new version for the content item. This creates a new version of the item in the Draft step.
Change scheduled unpublish options
If you wish to cancel scheduled unpublishing for an item, expand the item’s Edit content item menu and select Cancel scheduled unpublish. To change the unpublish date and time, use the same approach to cancel the scheduled unpublish and then schedule it again.
For items that have a scheduled unpublish time while they are still scheduled for publishing, canceling the scheduled publish (or editing the item) also automatically cancels the scheduled unpublish.
Restore previous versions of content items
See Content versioning for more information. You can restore previously published versions of content items only when versioning is configured.
Delete content items
- Open the Content hub application.
- Locate the content item you want to delete.
- Use the search bar, filter or folders to find content items.
- Select Move to recycle bin ().
- If the deleted content item is used in other content, you may want to check the usage of the item and edit all content where it is used.
- Tip: You can quickly see whether a content item is used by checking the In use column of the content item listing.
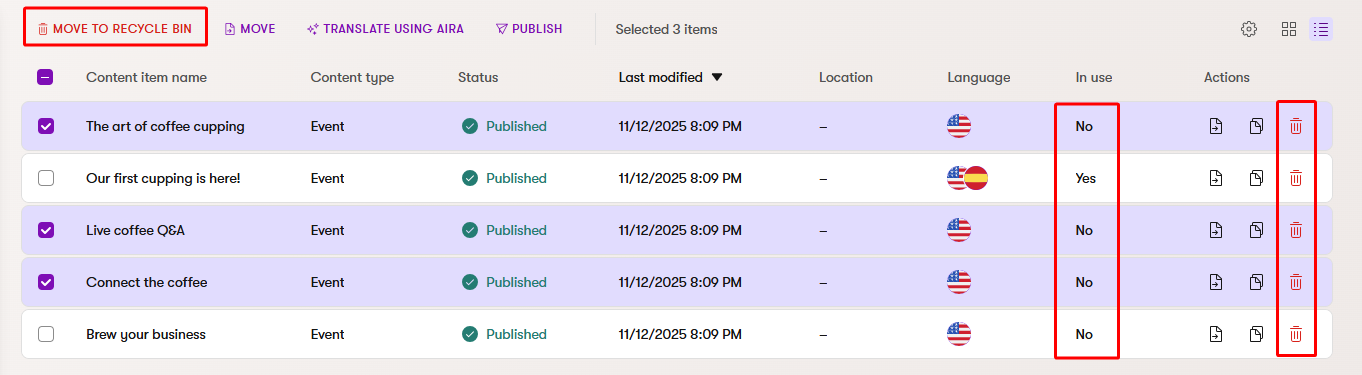
The content item is now deleted. You can find it in the recycle bin and restore it later.
To delete multiple items at once, select the items in the list and use the Move to recycle bin button under the search bar.
Restore deleted content items
Deleted content items can be recovered from the recycle bin. See Restore deleted items for more information.
Synchronize content items
Xperience allows you to easily transfer new and updated content items from one instance of Xperience by Kentico to another. For detailed information and instructions, see Content sync.
Lock and unlock content items
When content locking is enabled, the system prevents other users from editing items while you are making changes. See content locking for details.
Content items lifecycle
Content items can transition through the following statuses:
- Draft (Initial) / Draft (New version)
- Custom workflow step (the item is being edited, “between” the Draft and Published status)
- Scheduled (will be automatically published at a selected date and time in the future)
- Published
- Unpublished
- Not translated
Each status changes the behavior of the item in the system.
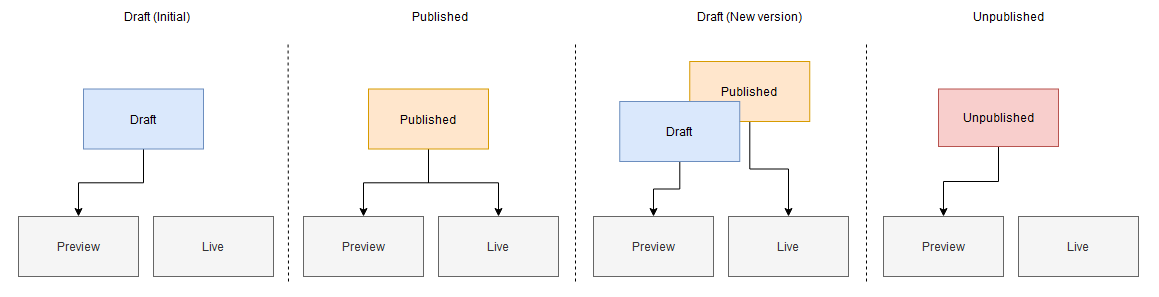
Generally, items in the Draft (Initial) status are only shown in content previews, e.g., in page previews of website channels or email previews. In live content, only Published content items are shown. When you edit a Published item and move it to Draft (New version), the published content remains the active (main) version shown live until replaced by the new draft. Unpublished items can only be found in the Content hub application. Finally, Not translated items do not exist in the currently selected language. See the following diagram:
The same general behavior also applies to linked content items. A content item in the Draft status linked to a content item in the Published status will only show up in content previews (not in live content) until it transitions to Published.
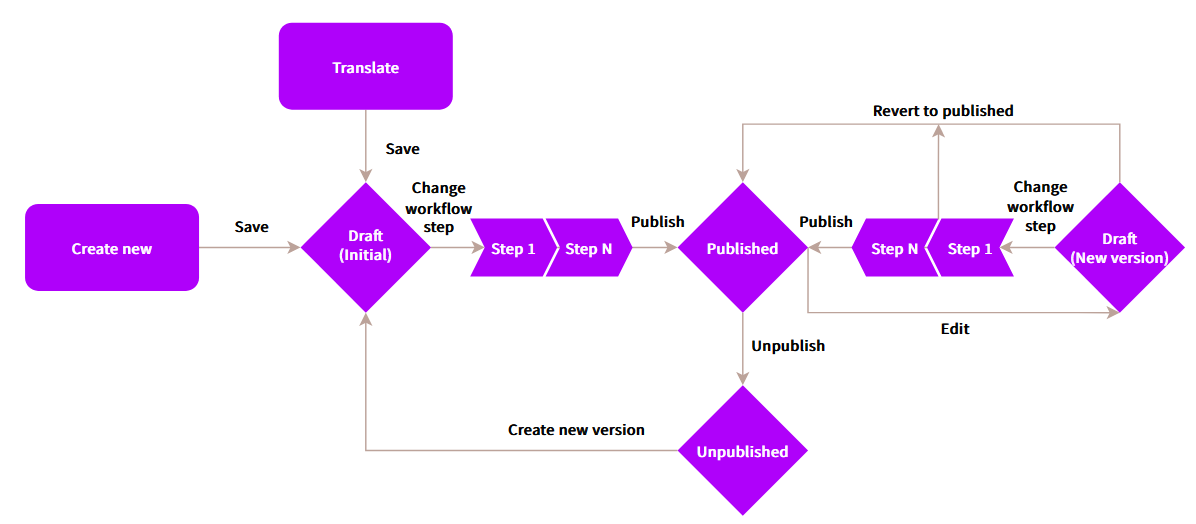
The following flowchart demonstrates available status transitions:
Advanced scenarios
This section looks at a couple of example scenarios and explains how they can be influenced by statuses.
- Mass translating
- Content item with linked items
- Creating new drafts of published (linked) content items
- Content item assets
- Publishing a content item containing non-published content items
- Publishing a content item containing items with a new draft version
Content item with linked items
Scenario: I have a content item with multiple linked content items. How does the status of the linked items impact my main item?
The status is evaluated independently for each content item. Linked content items that are in the Draft (Initial) status will not be shown as part of the main content item. For example, an FAQ section will be missing all linked “FAQ” content items that are in the Draft (Initial) status.
See the following diagram for an illustration:
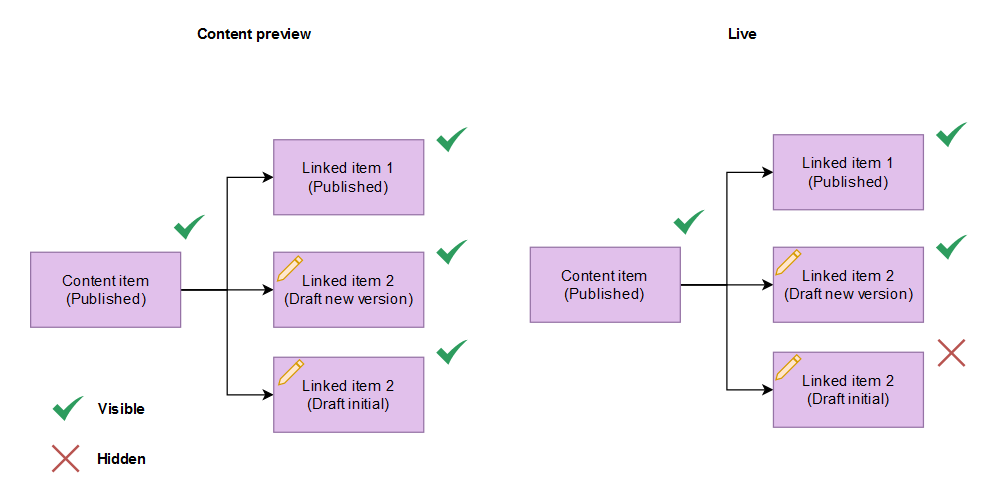
Linked item 2 (Draft new version) contains a published version that the system uses instead. However, Linked item 3 has never been published before and therefore has no version that the system can use for live content.
Creating new drafts of published (linked) content items
Scenario: I have a published content item (that may or may not be linked by other items) and create a new draft version of it. How does this affect the published data?
Creating new drafts of published items doesn’t interfere with existing public items at all. The draft version is stored in the background and when eventually promoted, silently replaces the current published version.
Content item assets
Scenario: I have content item assets linked from a content item. How does the status of the asset affect the integrity of the main content item?
Same as with regular content items, the status of content item assets is evaluated independently. Initial draft versions (i.e., newly created, never before published) will not be shown in live content until Published. Draft versions of published assets only replace the current public version when the entire item transitions to Published. Unpublished assets are not shown in the content of other content items.
Publishing a content item containing non-published content items
Scenario: I have a draft content item A which includes another draft content item B. How does the draft status of the included content item B affect the publishing of content item A?
When publishing a content item which links to content items that are not published, all of the content items can be published at once using cascade publishing.
Publishing a content item containing items with a new draft version
Scenario: I have a draft of an item that includes another linked item. Even though there’s a new version of the linked item, I want to publish the first item with the older (currently published) version of the linked item. How does the draft status of the linked item affect publishing of the first item?
When trying to publish a content item which includes content items with a new draft version, you can select which content items to publish along with it. You can choose not to publish the linked item, which means the currently published version of the item will be used, until the new version is published.