
Headless channel management
Features described on this page require the Xperience by Kentico Advanced license tier.
Headless channels encapsulate content that is intended to be served using HTTP requests and GraphQL. Such headless content can be displayed or otherwise consumed by various types of applications, services or websites (e.g., mobile apps, external websites, single-page applications running within Xperience, etc.).
Every headless channel has its own GraphQL API endpoint, which is secured by one or more API keys. Each channel also has its own application in the Xperience administration, where editors can manage content intended for headless distribution. The content is stored in items based on headless content types. These headless items can also reuse content from Content hub that is shared between all types of channels.
To start using the headless API:
- Create one or more headless channels.
- Define content types for headless content.
- Create headless items.
- Configure the headless API.
- Consume the content.
Create headless channels
To create a new headless channel:
- Open the Channel management application in the Xperience administration.
- Select New channel.
- Fill in:
Channel name – the name of the channel displayed in the administration. Also sets the name of the channel application where users manage the website’s headless items and edit content.
(Optional) Identifiers – specify the code name if you wish to use a code name different than the pre-filled value.
- Note: Channel code names must be unique across all channels (of any type).
Channel type – select Headless as the channel type.
Channel size – channels are available in two sizes: Standard and Micro. Standard channels may contain an unlimited number of content items. Microchannels are limited to 20 items, each of which can link an unlimited number of reusable content items.
Primary language – a language configured in the Languages application that specifies which language version of headless items is retrieved if no language is specified in the query.
Preview URL – URL of the environment in which you want to preview the headless content, shared for all headless items in the channel. The URL is accessible via the Preview button in the headless channel application.
As the Preview URL is common for the whole channel (it is currently not possible to assign a specific URL for each headless item separately), we recommend that developers design the target environment of the Preview URL as a link tree for easier navigation to individual headless items.
- Save the changes.
After you create a headless channel, a GraphQL API endpoint is created. However, the endpoint is inactive until you create at least one content type for headless items and assign it to the channel on the Allowed content types tab.
Assign content types to headless channels
Every headless item uses a specific content type. The content type defines the fields that users can edit when creating headless items.
To create headless items under a channel, you need to prepare suitable content types and allow them for the channel:
- Open Channel management application.
- Select a headless channel.
- On the Allowed content types tab, Select content types.
- Select or clear the checkboxes to choose which content types you want to make available in the channel.
- Save the changes.
Headless items of the selected content types can now be created in the headless channel application.
Change channel size of existing channels
You can freely change between the microchannel and standard channel size of existing channels via the General tab. Additionally, changing standard channels to microchannels does not cause any data loss in case the converted channel exceeds microchannel limits. However, you will receive a license violation warning if the resulting channel or item count oversteps the limits of your license for that particular channel type.
GraphQL API endpoints
The API endpoints of headless channels are available on all domains where the Xperience project is running. This includes:
Administration interface domain (including the System domains of SaaS environment deployments)
The GraphQL API endpoint is available on the system and default channel domains of any SaaS deployment that is publicly available. Keep this in mind when designing your project’s security.
Service domains of email channels
To find the URL on which a headless channel’s endpoint is available, follow these steps:
Select one of the domains on which the endpoint is available.
Navigate to the Channel management application → select a headless channel → General tab and copy the endpoint URL path in the GraphQL API endpoint field.
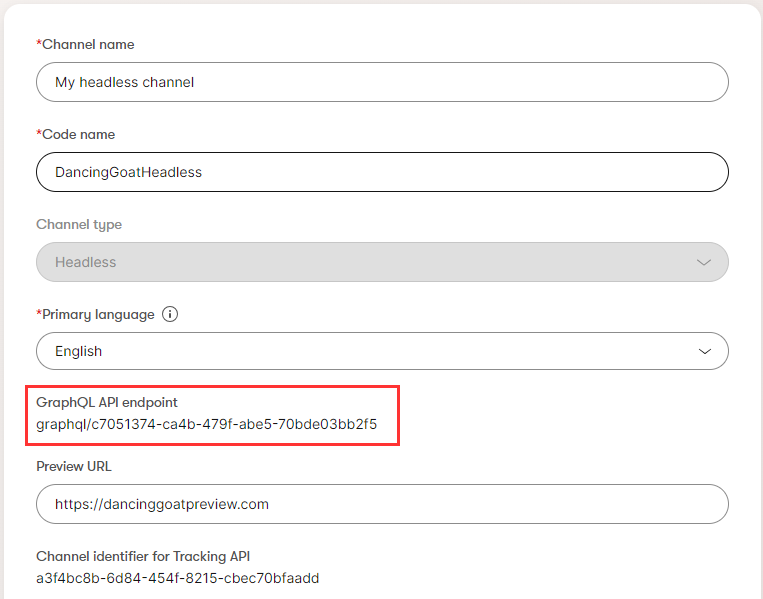
The GraphQL API endpoint URL is in format <domain>/<GraphQL API endpoint path>, e.g.:
https://example.com/graphql/09114e33-7578-4152-af81-62677bcca740The endpoint slug (‘/graphql’ by default) can be configured.
Configure the headless API
The headless API can be configured (for all headless channels) by setting the following keys in the application’s configuration file (appsettings.json by default):
CMSHeadlessEnable– a boolean value that specifies whether headless channel endpoints are enabled (both GraphQL API and Tracking API endpoints). The default value is true.EnableTracking– a boolean value that specifies whether Tracking API endpoints are enabled. Allows you to disable the tracking API while keeping the GraphQL API enabled. The default value is true.EnableComplexity– a boolean value that specifies whether complexity analysis is enabled.EnableUnionQueryOptimization– a boolean value that specifies whether performance optimizations are enabled for GraphQL queries that retrieve data with fields linking to a large number of possible content types (e.g. fields with the Pages and reusable content data type). This prevents timeout errors for queries that load data with a very large number of linked content types. The default value is true.MaxFieldCycleDepth– specifies the maximum allowed depth of field cycles in a GraphQL query. The default value is 5.AllowIntrospection– a boolean value that specifies whether GraphQL introspection is enabled (__schemaqueries and GUI tools for exploring the schema). False by default.GraphQlEndpointPath– specifies the slug used in headless channel GraphQL endpoint URLs. You need to include the leading slash (‘/’). The default value is /graphql.CorsAllowedOrigins– specifies domains that are allowed origins for CORS (Cross-Origin Resource Sharing). See Retrieve headless content to learn more.We recommend configuring allowed origins for CORS in the Settings application within the Xperience administration, via the Content → Headless → Allowed origins setting. The setting overrides any values set in your application’s configuration file or startup options.
CorsAllowedHeaders– indicates which HTTP headers are allowed for content retrieval requests. If not set, all headers are allowed by default. See Retrieve headless content to learn more.Caching– an object that contains options which allow you to customize caching behavior for headless content. The default values provide optimal caching performance for most projects.Enable– a boolean value that specifies whether caching is enabled. The default value is true.UseRequestCacheControlHeaders– a boolean property that specifies whether caching respects the Cache-Control header of individual requests. The default value is true.AddResponseCacheControlHeaders– a boolean property that specifies whether caching sets the Cache-Control response header. The default value is true.UseCacheDependencies– a boolean property that specifies whether caching uses cache dependencies to flush the cache when data in a cached response changes. The default value is true.AbsoluteExpiration– specifies the maximum expiration time for a cache entry in minutes. The default value is 12 hours.SlidingExpiration– specifies a sliding expiration date for cache entries in minutes. Cannot exceed the value ofAbsoluteExpiration. The default value is 1 hour.SizeLimit– maximum size for in-memory cache in bytes. The default value is 100 megabytes.
{
  ...

  "CMSHeadless": {
    "AllowIntrospection": true,
    "GraphQlEndpointPath": "/api",
    "Caching": {
      "AbsoluteExpiration": "360"
    }
  }
}
If you wish to use a different provider for your project configuration (e.g., Azure Key Vault), you can map the configuration in your project’s startup file (Program.cs) using the HeadlessOptions class, with properties matching the configuration keys described above:
using Kentico.Xperience.Headless;

builder.Services.AddKentico(...);

builder.Services.Configure<HeadlessOptions>(options =>
{
    // Enables introspection in the Development environment
    options.AllowIntrospection = builder.Environment.IsDevelopment();
    // Changes the endpoint slug to 'api'
    options.GraphQlEndpointPath = "/api";
    // Changes the maximum expiration of a cache entry to 6 hours
    options.Caching.AbsoluteExpiration = TimeSpan.FromHours(6);
});
Configure Preview URL overrides
Preview URL overrides enable you to better separate the Preview URL between different environments. The overrides can be configured programmatically using the HeadlessChannelUrlOptions class and ASP.NET Core configuration providers.
For example, when configured via appsettings.json:
{
  ...

  "HeadlessChannelUrls": {
    "UrlOverrides": {
      "DancingGoatHeadless": {
        "PreviewUrl": "https://preview.domain.com",
      }
    }
  }
}
using Kentico.Xperience.Headless;

builder.Services.AddKentico(...);

// Apply the Preview URL overrides configuration from appsettings.json
builder.Services.Configure<HeadlessChannelUrlOptions>(builder.Configuration.GetSection("HeadlessChannelUrls"));
Where DancingGoatHeadless is the code name of the headless channel to configure. This configuration takes priority over the channel options set via the General tab in the Xperience user interface.
You can also make use of the options pattern to set different overrides per environment by introducing corresponding appsettings.environment.json files. The following example sets the override to localhost when the project is run under the Development environment.
{
  "HeadlessChannelUrls": {
    "UrlOverrides": {
      "DancingGoatHeadless": {
        "PreviewUrl": "localhost",
      }
    }
  }
}
Manage API keys
Headless channel GraphQL API endpoints are secured. All requests to an endpoint need to have an Authorization header storing a valid and enabled API key. The API keys are managed in Xperience for each headless channel.
Permission requirements
To manage API keys on the API keys tab, users need to have a role with the Manage headless channel API keys permission for the Channel management application. Contact your project’s administrator if you cannot access the application.
Create API keys
To create a new API key:
Open the Channel management application in the Xperience administration.
Select a headless channel.
Switch to the API keys tab.
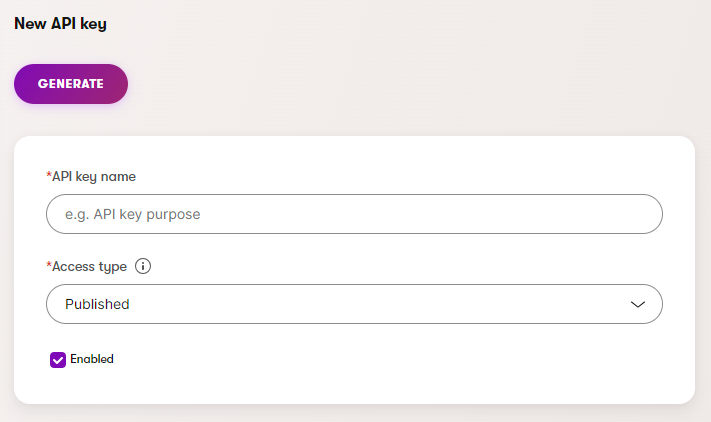
Select New key.
Enter the API key name.
- The API key name should describe the purpose and usage scope of the API key, e.g.: Production, Testing, Development, ExternalCompany
Select the Access type of the key.
- The Access type cannot be edited once the API key is created. If you need an API key with a different Access type, create a new key instead.
(Optional) If you want to create the key as disabled (e.g., when you only want to prepare the key now but enable it later), clear the Enabled checkbox.
Generate the key.
Copy the API key and store it in a safe location.
- The system does not store API keys and you cannot view them again. If you lose an API key, you need to create a new one.
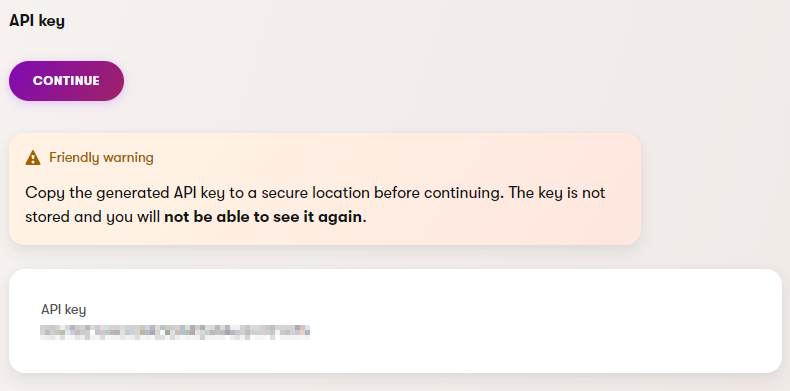
Select Continue after you have copied the key and stored it in a safe location.
You need to authenticate every request that retrieves headless content by adding the following HTTP header:
Authorization: Bearer <ApiKey>
Access types of API keys
The headless API provides different API keys for various types of scenarios.
For content retrieval requests against the channel’s GraphQL API endpoint you can use the following Access types:
Headless content - Draft – Grants access to the latest available version of headless items, i.e., items in the Draft step or a custom workflow step (if available), or the Published status.
Headless content - Published – Grants access only to Published headless items. When retrieving headless content using a key with this Access type, items without a published version will not be included in the retrieved data at all.
The type of granted access applies transitively to all linked items of accessed headless content. That is, when using a Headless content - Draft key, the linked items will also be accessed in their latest available version. Alternatively, when using a Headless content - Published key, only published linked items will be accessed.
For tracking API requests you can use the following Access type:
- Tracking API – Authorizes requests against the application’s tracking API endpoints. Allows contact creation, activity logging, consent operations, etc. For more information, see Headless tracking.
Disable API keys
To disable an API key:
- Open the Channel management application in the Xperience administration.
- Select a headless channel.
- Switch to the API keys tab.
- There are multiple ways to disable an API key:
- Select the key you want to disable and clear the Enabled check box.
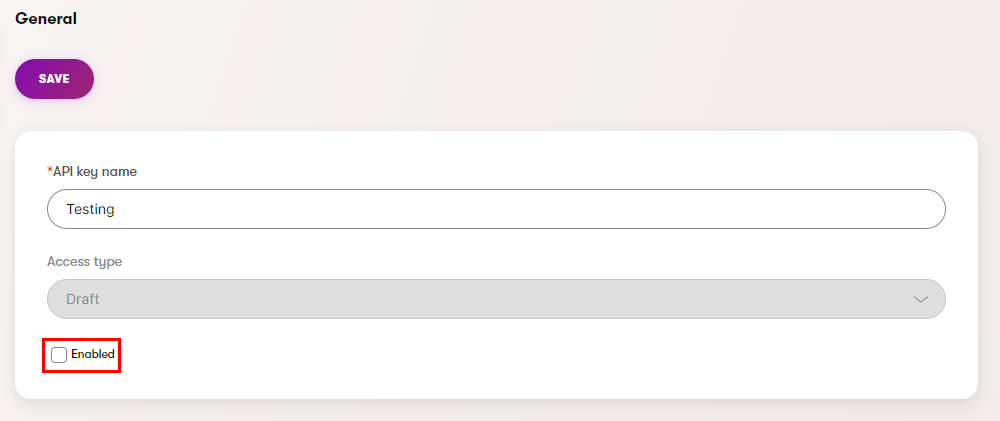
- Disable () the API key to temporarily disable the API key. You can later Enable () the API key.
- Delete () the API key to permanently remove the API key.

- Select the key you want to disable and clear the Enabled check box.
After you disable an API key, any services or applications using this key have their access immediately revoked and any further requests using this API key will result in an authorization error.
Securely use API keys
The API key needs to be sent in the HTTP header of all GraphQL requests. If sent from a client API on a public web page, it can be seen by anyone. It is recommended to not add the API key to request headers directly in the client API, but to instead use a backend proxy server to add the Authorization request header and forward the requests to the GraphQL API endpoint.
Retrieve headless content
For more information, see Retrieve headless content.