
Content item assets
Content item assets are content items of certain content types that allow you to upload and store various types of files, for example photos, pictures, sound files, videos, package files, presentations, or documents. Content item assets stored in the Content hub can be reused throughout the system. Different variants of image assets can be displayed in different contexts to ensure optimal visual presentations.
Upload a single file
To upload a file to the Content hub:
- Open the Content hub application.
- Select New content item.
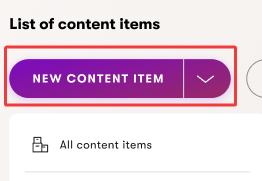
- Select a content type that has an Content item asset field.
- Search for content types named Image, Media, File, Asset, etc. The name of the content type depends on your project configuration.
- Enter the values of the content type fields and upload a file via the uploader.
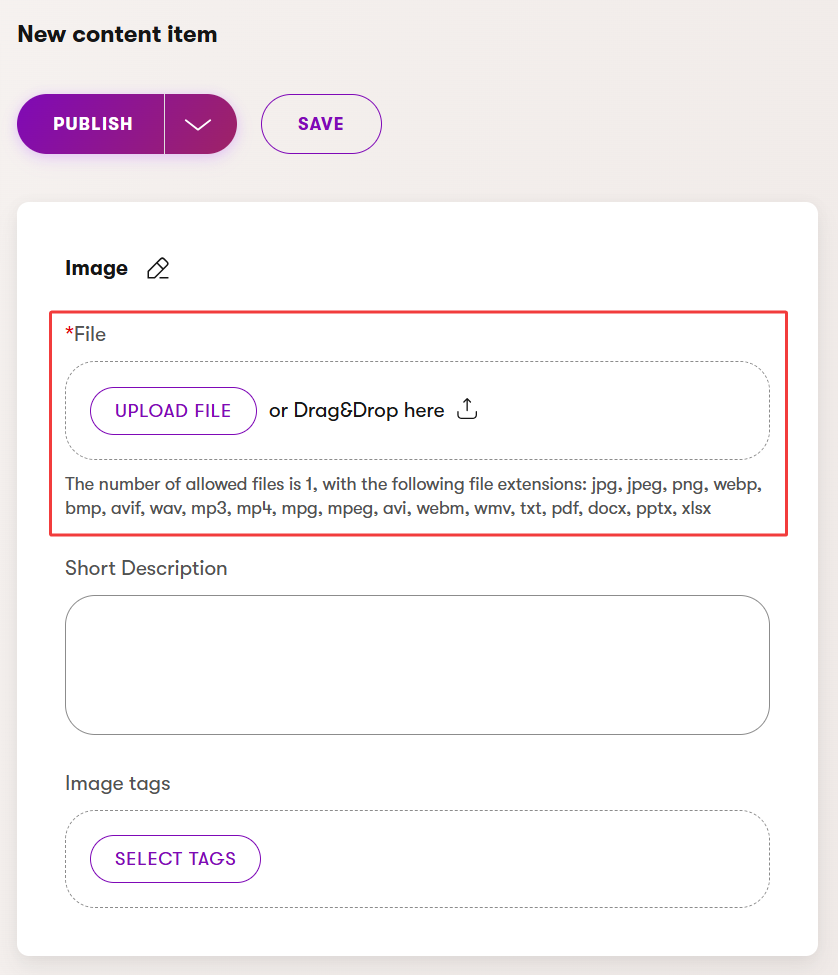
- Save the new asset.
The asset is now created in the current workspace and needs to be published before it is publicly available.
Mass asset upload
To make uploading a large number of files easier, your administrators can configure mass asset upload for your project. You can then upload multiple files in bulk and automatically convert them to content item assets of a configured content type.
- Upload files by drag and dropping them into the Content hub, combined content selector, or rich text editor. Alternatively, you can upload them by selecting New content item -> Upload files in the Content hub. Content item assets are created automatically after the upload is finished.
- When mass uploading to the Content hub with content folders enabled, the files are uploaded into the currently selected folder.
- If you cancel a mass upload in progress, the files that have already been successfully uploaded stay in the system.
- After a successful upload, you can open () each item in a new tab to edit it. Alternatively, you can edit the content item assets in the chosen location in the Content hub. The names of the created content item assets are automatically generated from the uploaded file names.
The assets are now created in the selected workspace and need to be published before they become publicly available.
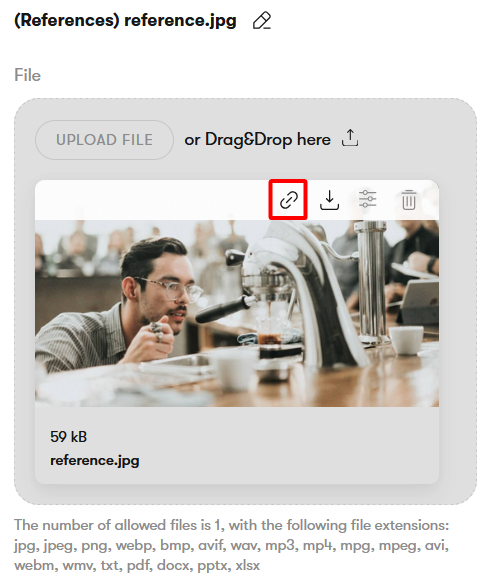
Download files
If you need to access or modify a file previously uploaded to the Content hub, you can download it from a content item asset.
To download a file from a content item asset:
Open the Content hub application.
Select a content item asset.
- Use the search bar, filter or folders to find content items.
Download () the asset.
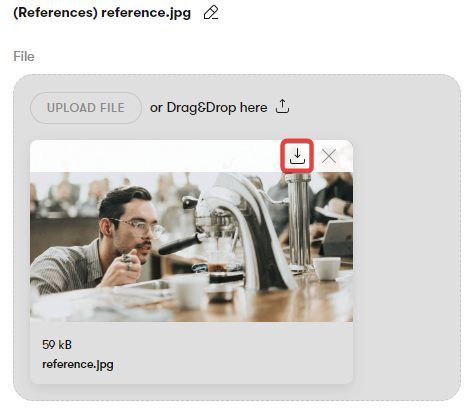
The asset is now downloaded to your device.
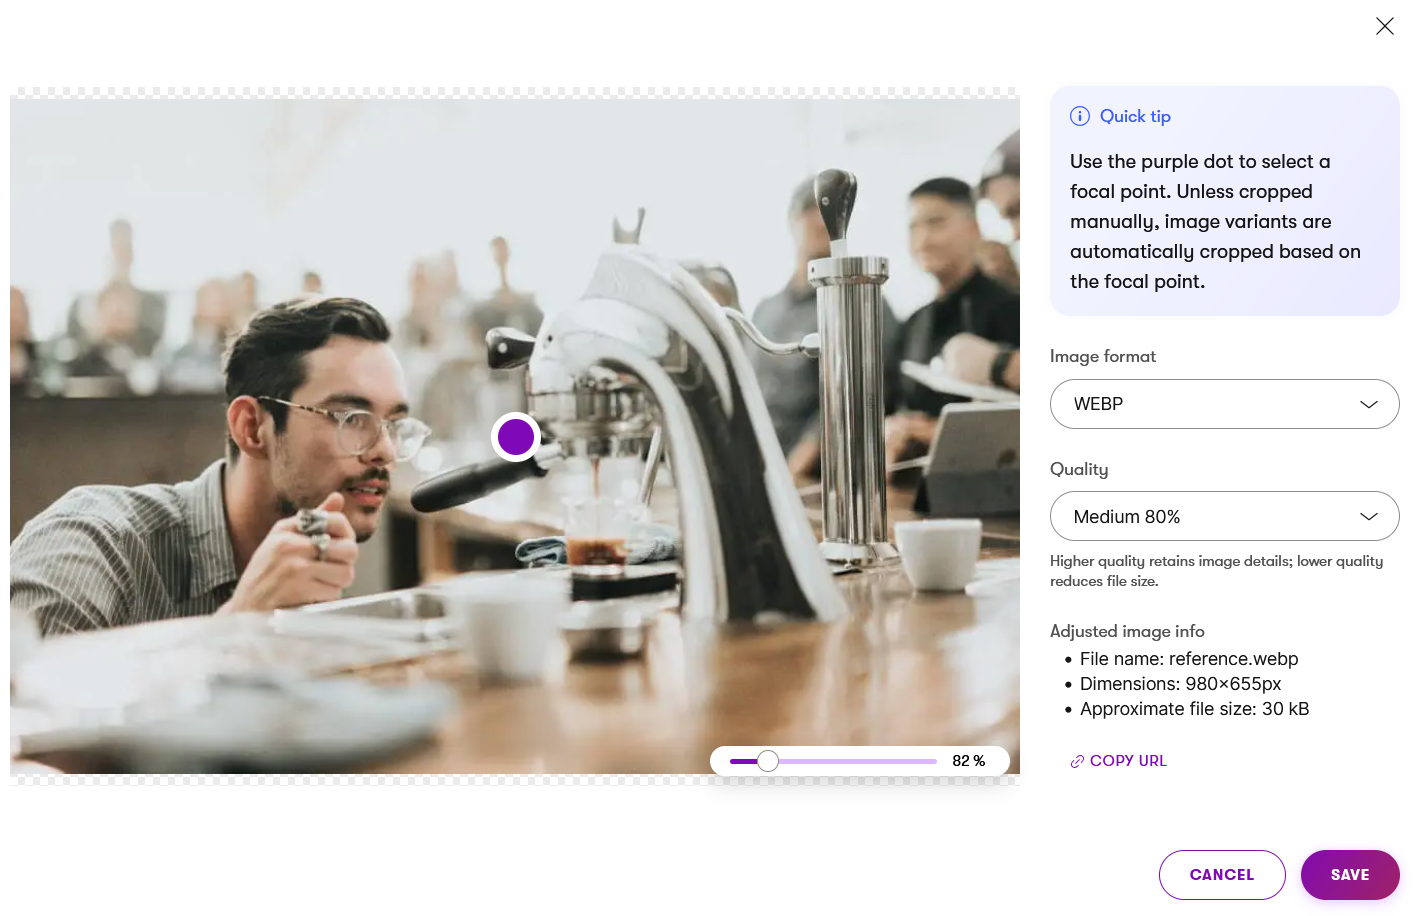
Optimize image assets
To help ensure that the images you use across different channels are properly optimized, your administrators can enable automatic image optimization. However, you can also manually optimize any image asset in the Content hub by changing the format of the image or reducing its size by adjusting image quality.
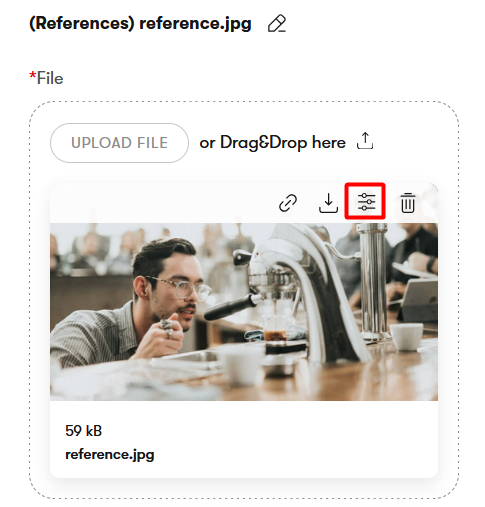
- Edit a content item asset that contains an image.
- Adjust the image ().
- If the image has variants, make sure to have the Primary image selected.
- If the image has variants, make sure to have the Primary image selected.
- Change the Image format or Quality of the image.
- Image format – while some formats like WEBP and AVIF are better suited for most modern web browsers, they may be incompatible with some legacy browsers (e.g., Internet Explorer). If you’re not sure about which image formats to use in your project, ask your project administrators.
- Quality – the overall quality of the image. While higher quality retains more image details, lowering the quality reduces the file size.
- Quality selection is unavailable for image formats that use lossless compression, like PNG.
If you notice undesired compression artifacts in the optimized image, try increasing the quality until the artifacts are no longer visible. - You can preview the outcome of your adjustments on the image in the Adjusted image info section.
- Save the changes.
Xperience preserves all original images in the background, ensuring that optimizations are always applied to the original file rather than a previously modified version. This means that multiple adjustments do not compound quality loss. For example, if you change an image’s quality from 70% to 50%, the compression is applied as if you were reducing quality directly from 100%, rather than from the already compressed 70%.
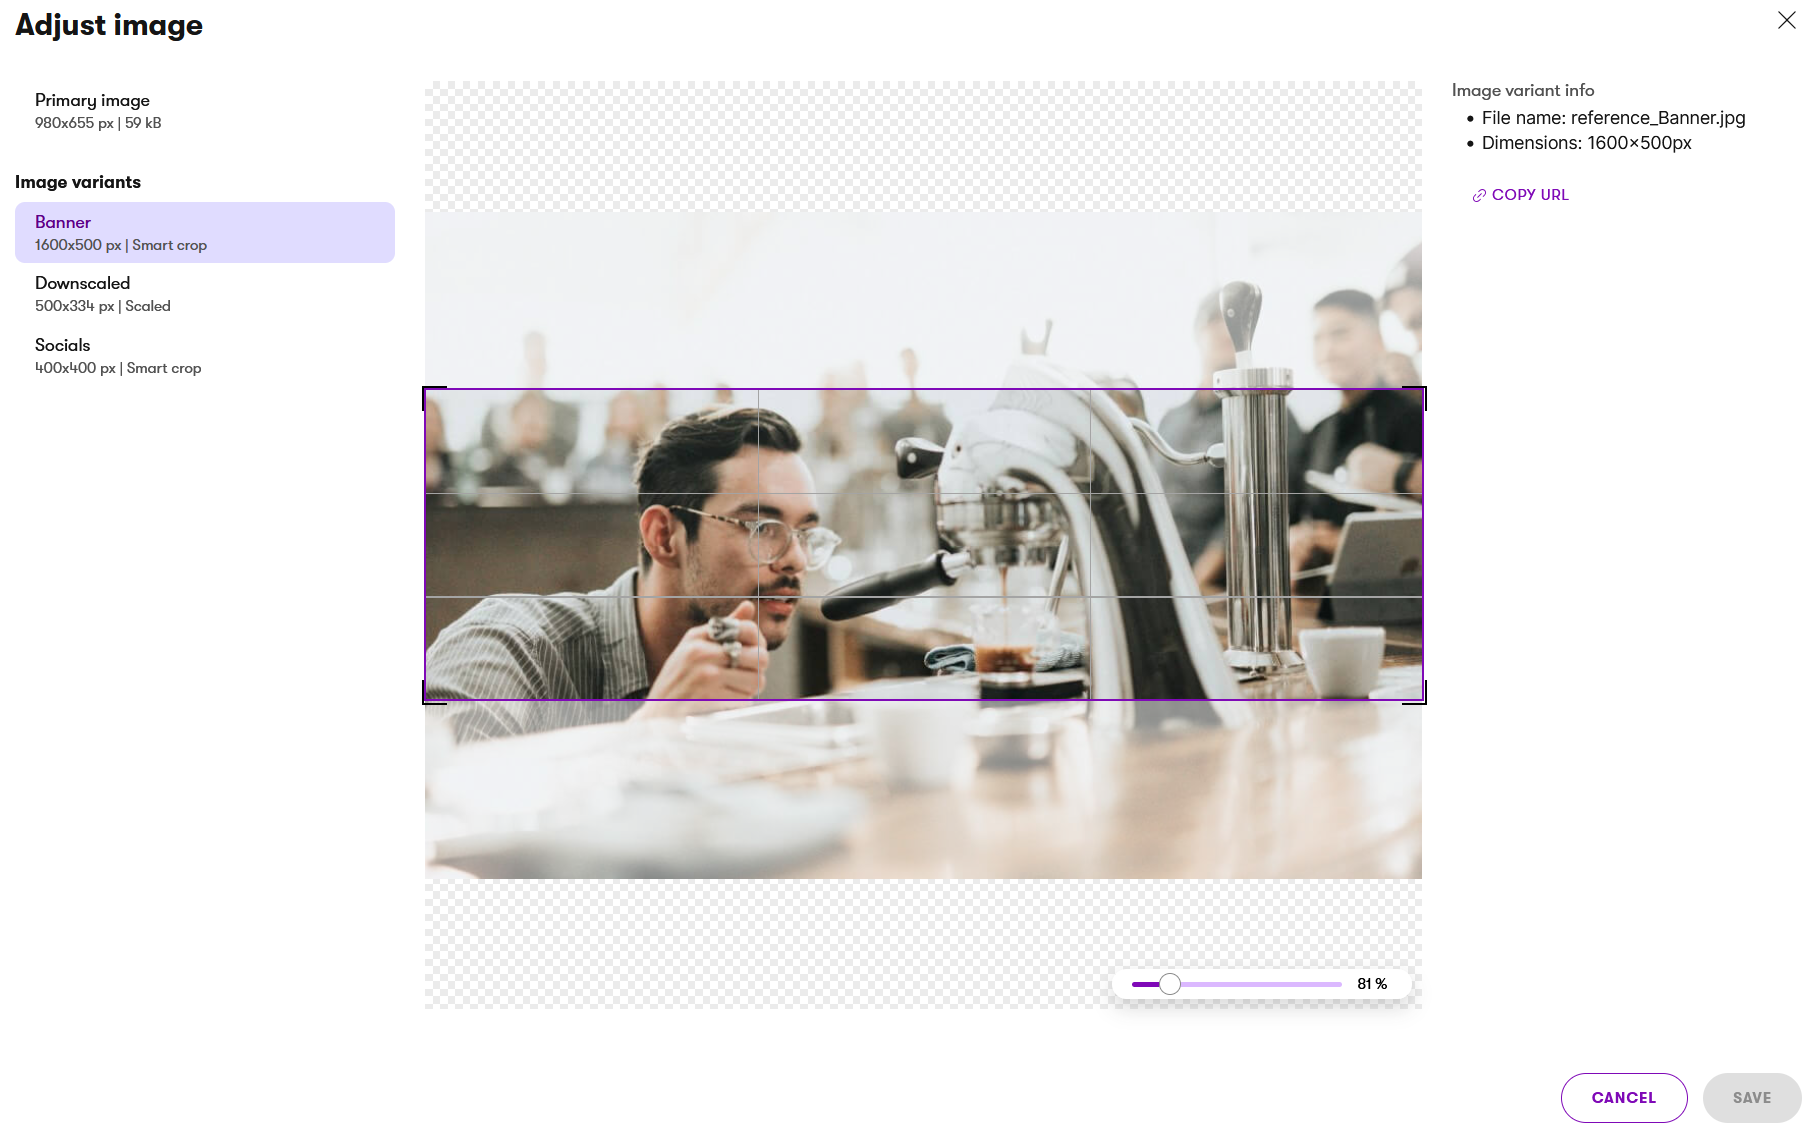
Image variants
Image variants are cropped or resized versions of an image, defined by a specific aspect ratio and pixel dimensions configured by your project administrator. They allow you to control how images appear in different contexts, such as hero banners, social media posts, or thumbnails. For example, you can adjust which part of an image is displayed in each scenario to ensure optimal visual presentation. Image variants also help with art direction or resolution switching, allowing you to display different versions of the image on various layouts.
Image variants are generated from the primary optimized image, taking into account its format and quality. The usage of image variants is currently supported only for website channels.
There are two types of image variants available:
- Scaled variant – Image dimensions are resized based on input while maintaining the original aspect ratio.
- Smart crop variant – Images are cropped based on the focal point.
When using Scaled variants, images can be scaled up if the specified dimensions exceed the original image dimensions. This may result in blurry images or increased file sizes due to image upscaling.
To see how your image will look like in various variants:
- Edit a content item asset that contains an image.
- Adjust the image ().
- Select the image variant you want to view.
Change image focal point
Image variants are automatically cropped based on the image’s focal point. When an image is uploaded, the focal point is initially placed at its center. To adjust how all image variants are cropped, move the focal point to your preferred location.
You don’t need to have any image variants defined in your project to adjust the focal point. Once administrators define new variants, they will be automatically cropped according to the selected focal point.
- Adjust the image ().
- Use the purple dot to select a new focal point.
- If the image has variants, make sure the Primary image is selected.
- You can preview the new crops by selecting any image variant.
- Save the changes.
All image variants, except those cropped manually, are now re-cropped according to the updated focal point.
Automatic focal point selection with AIRA
AIRA can automatically select the best focal point for your image during file upload. See the AIRA documentation to learn more.
Crop variants manually
You can manually crop an image variant to fine-tune its design by repositioning or resizing the crop. The crop retains the aspect ratio and dimensions defined for the variant.
- Adjust the image ().
- Select the image variant you want to crop manually.
- Adjust the crop to fit your needs.
- Save the changes.
Manually cropped images, marked by the icon, are not affected by the focal point change on the primary image.
Copy an asset URL
To use assets stored in Xperience across different platforms (such as social media), you can copy the URL of a published content item asset or an image variant. If you replace or modify the asset, you’ll need to publish it again before you can copy the URL.
To copy a URL of a content item asset:
- Open the Content hub application.
- Select a content item asset.
- Use the search bar, filter or folders to find content items.
- Copy the URL () of the asset.
To copy a URL of an image variant:
- Edit a content item asset that contains an image.
- Adjust the image ().
- Select an image variant whose URL you want to copy.
- Copy the URL () of the image variant.
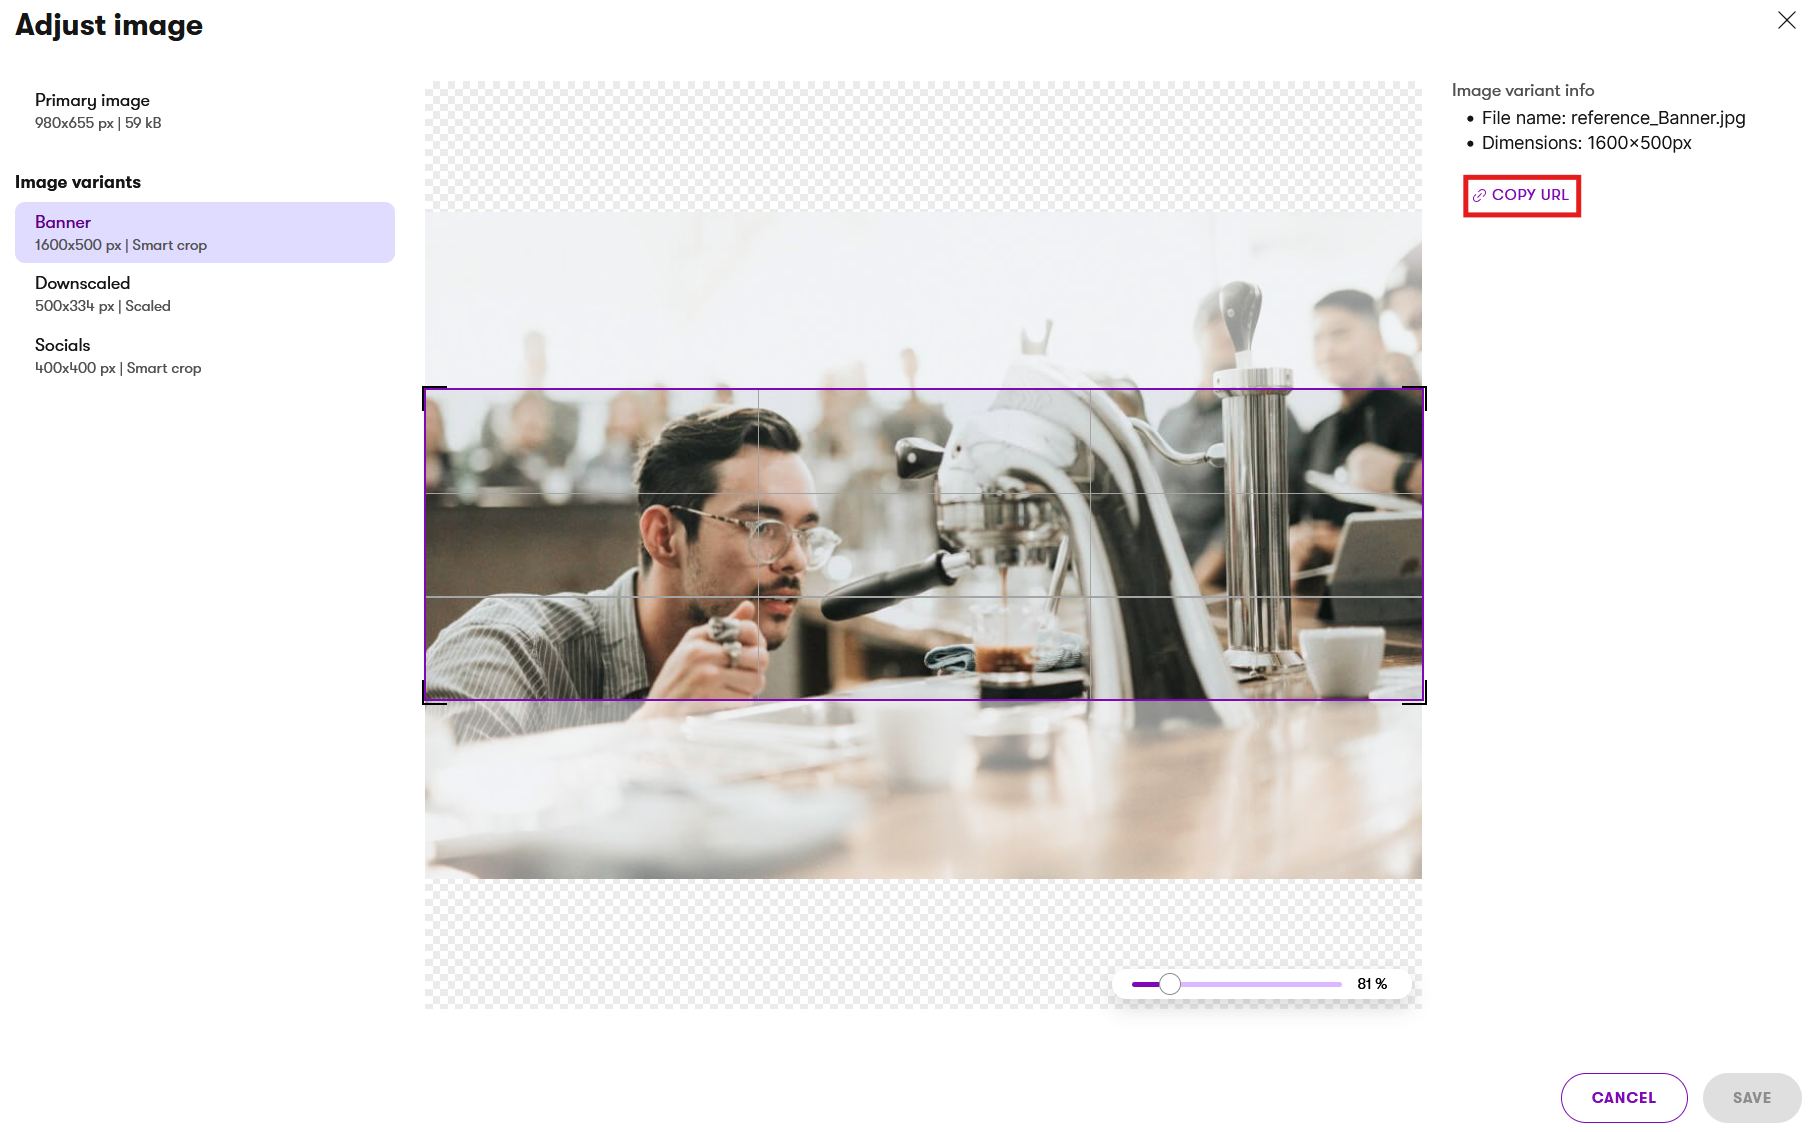
The copied URL path includes the domain of the Xperience administration by default. If you need to use a different domain, such as the domain of a website channel, manually change the corresponding part of the URL.
For example, if the copied URL is https://admin.example.com/getContentAsset/… and your website channel uses https://www.example.com, you should replace the domain accordingly to https://www.example.com/getContentAsset/….