Workspaces
Workspaces allow you to segregate content into distinct, manageable units, improving content management and access control. This separation ensures that users can efficiently locate and manage content. Additionally, you can assign permissions to roles for each application scoped under a given workspace.
Workspaces prevent editors from accidentally affecting the work of others by enabling teams to create dedicated areas for different projects. This structure ensures that only authorized users can access sensitive content, reducing the risk of data breaches.
Default workspace
The system uses the Default workspace with the KenticoDefault code name. This workspace ensures the existence of at least one workspace during the creation of new projects and support for the migration of content and permissions for applications newly scoped under workspaces.
In case you don’t need to split up your content into multiple workspaces (e.g., in small projects), you can keep using the Default workspace. Otherwise we recommend either renaming or replacing the workspace with new ones that better reflect your project’s needs.
If future updates introduce workspace support for additional applications, all the application content is assigned to the workspace with the KenticoDefault identifier. If such a workspace doesn’t exist (was renamed or deleted), it’s created with the Default workspace display name as part of the update.
Roles with permissions assigned to an application that is newly workspace-scoped have the same permissions assigned for the application in the Default workspace after the update (e.g., a role with the View permission for the Content hub has the View permission for Content hub in the Default workspace after the update).
Only a workspace with the KenticoDefault code name can work with obsolete API where a workspace parameter is not specified. Deleting the workspace or changing its code name will invalidate your code that creates objects scoped under workspaces without a specified workspace. Before modifying the workspace, update your code that creates workspace-scoped objects (e.g., the code for creating content items).
Manage workspaces
You can manage workspaces in the Workspaces application.
Create workspaces
To create a workspace:
- Open the Workspaces application.
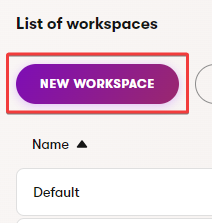
- Select New workspace.

- Enter a Workspace name which identifies the workspace in the Admin UI.
- (Optional) Identifiers – specify the code name if you wish to use a code name different than the pre-filled value.
- Save the new workspace.
The workspace is now created. To allow users to work with workspaces, grant permissions to roles for applications scoped under workspaces. These permissions can be set for each workspace and application separately.
To populate the workspace with content, create new content items or move existing content items from other workspaces.
Delete workspaces
Deleting a workspace breaks any API calls that rely on its existence. Before proceeding, make sure your project’s developers no longer use the selected workspace as a parameter of the API calls in their code.
The last workspace in the system, or a workspace containing any content (e.g., content items or smart folders), cannot be deleted.
Keep in mind that if you delete content items from a workspace that is later deleted, these content items cannot be restored from the recycle bin.
To delete a workspace:
- Open the Workspaces application.
- Locate an empty workspace you want to delete.
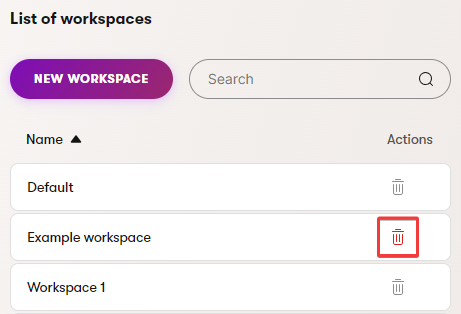
- Delete () the selected workspace.

The workspace is now permanently deleted.