
Model object type relationships
You can model the following types of relationships between object types:
- Parent-child – A parent-child relationship is a special case of a one-to-many relationship. It models dependent relationships where the existence of some objects (children) does not make sense without another object (parent). In this type of relationship, deleting the parent object also causes the deletion of all its children. An example is an employer and their employees – if the employer ceases to exist, so do all their employees.
- One-to-many (many-to-one) – A one-to-many relationship exists when a single instance of object
Amay be linked with many instances of objectB, but one instance of objectBis linked to only one instance ofA. A typical example is the set of orders a customer has made on a given site. - Many-to-many – A many-to-many relationship defines an associative structure between two or more object types using a special binding object type that stores the identifiers of all objects involved in the relationship as foreign keys. Modeling the relationship using a supplementary database table reduces the problem to modeling multiple one-to-many relationships. A typical example of a many-to many relationship is one between roles and users – a user can be assigned to many roles, and a role can include many users. The binding table associates the identifiers of user and role objects.
Parent-child relationships
A parent-child relationship is a type of hierarchy where distinct, connected objects have a logical relationship. A parent is something that comes before its child or children. At the time a child is created, its parent must already exist.
You can use the type information to define a parent-child hierarchy for the object types representing your data model. Every object (record in the database) of a child object type contains a reference to the specified parent object. Setting parent-child relationships ensures that the system can provide automation for the connected objects, such as the automatic deletion of child objects together with their parents.
To model a parent-child relationship between two object types:
- Open the Modules application and edit the data class that will be the child in the relationship.
- Switch to the Database columns tab and add a new database column with the Integer number data type. This column will store the IDs of the parent objects (a foreign key).
- Tip: A common convention is to suffix columns storing the identifiers of objects with the ID suffix.
- Generate the code for the object type again.
- Edit the code of the generated Info class.
- Set the
parentIDColumnandparentObjectTypeparameters in the constructor of theTYPEINFOmember (last two parameters):parentIDColumn – the name of the column that stores the IDs of parent objects.
parentObjectType – the name of the parent object type as defined in the type information of the parent class. Generated Info classes store the names in the static
OBJECT_TYPEconstant.C#Sample child object type info constructorpublic static readonly ObjectTypeInfo TYPEINFO = new ObjectTypeInfo( providerType: typeof(ChildObjectInfoProvider), objectType: OBJECT_TYPE, objectClassName: "Acme.ChildObject", idColumn: "ChildObjectID", timeStampColumn: null, guidColumn: null, codeNameColumn: null, displayNameColumn: "ChildObjectDisplayName", binaryColumn: null, parentIDColumn: "ParentObjectID", parentObjectType: ParentObjectInfo.OBJECT_TYPE) { TouchCacheDependencies = true, };
- Save the changes and rebuild the solution.
The parent-child relationship is now established. When creating new child objects via the API, ensure the added foreign key column is populated with the identifier of the parent object. Otherwise, the system cannot properly handle the referential relationship automatically.
To reflect this relationship in the administration interface, you need to ensure your custom interface elements create and display child objects correctly. See the following sections for details:
Parent-child relationships also come with certain inherent limitations, see the Parent-child limitations section for more information.
Child object listing pages
To show only objects that are the children of a specific parent, listing pages must filter the objects by the identifier of a specific parent. When adding listing pages, use UI page structures such as the following:
- Parent object listing
- Parent object create
- Parent object edit section (adds a URL slug with the identifier of the parent to the URL)
- Parent object edit
- Child object listing (consumes the URL slug with the parent object’s identifier)
- Child object create (consumes the identifier of the parent)
- Child object edit section (adds a URL slug with the identifier of the child to the URL)
- Child object edit (consumes the identifiers of the selected parent and child)
And parse the parent identifier using page model binders. To filter the set of objects according to the currently selected parent, use a query modifier.
[assembly: UIPage(
    parentType: typeof(ParentObjectEditSection),
    slug: "children",
    uiPageType: typeof(ChildObjectList),
    name: "Child object listing",
    templateName: TemplateNames.LISTING,
    order: 200)]

public class ChildObjectList : ListingPage
{
    protected override string ObjectType => ChildObjectInfo.OBJECT_TYPE;

    // Parses the parent object's identifier from the URL
    [PageParameter(typeof(IntPageModelBinder))]
    public int ParentId { get; set; }

    public override Task ConfigurePage()
    {
        ...

        // Ensures links to child object edit pages
        // Child edit pages are parameterized by the identifier of the parent
        // and the identifier of the child (PageParameterConstants.PARAMETERIZED_SLUG)
        // For this reason, you need to specify the identifier of the current parent
        // (the method automatically appends the identifier of each child - row item - to the URL)
        PageConfiguration.AddEditRowAction<ChildObjectEdit>(parameters:
            new PageParameterValues
                {
                    { typeof(ParentObjectEditSection), ParentId }
                });

        // Displays only the children of the parent identified by 'ParentId'
        PageConfiguration.QueryModifiers
            // Displays only children of the currently selected parent object
            .AddModifier((query, _) =>
            {
                return query.WhereEquals(nameof(ChildObjectInfo.ParentID), ParentId);
            });

        return base.ConfigurePage();
    }
}
Child object create pages
When creating the child object via the administration interface, create pages must populate the foreign key column with the identifier of the parent object. To finalize an object after it was created via the UI, the create page template provides the FinalizeInfoObject method. The create page must also obtain the identifier of the parent object. You can leverage UI page hierarchies such as the following to parse the parent identifier using page model binders:
- Parent object listing
- Parent object create
- Parent object edit section (adds a URL slug with the identifier of the parent to the URL)
- Parent object edit
- Child object listing (consumes the identifier of the parent)
- Child object create (consumes the identifier of the parent)
- Child object edit section (adds a URL slug with the identifier of the child to the URL)
- Child object edit (consumes the identifiers of the selected parent and child)
[assembly: UIPage(
    parentType: typeof(ChildObjectList),
    slug: "create",
    uiPageType: typeof(ChildObjectCreate),
    name: "Child object create",
    templateName: TemplateNames.EDIT,
    order: UIPageOrder.First)]

// Child object create page that redirects to 'ChildObjectEdit' after the object is created
public class ChildObjectCreate : CreatePage<ChildObjectInfo, ChildObjectEdit>
{
    // Gets the identifier of the parent from the URL (dictated by the UI page hierarchy)
    [PageParameter(typeof(IntPageModelBinder), typeof(ParentObjectEditSection))]
    public int ParentId { get; set; }

    public ChildObjectCreate(IFormComponentMapper formComponentMapper, IFormDataBinder formDataBinder, IPageLinkGenerator pageLinkGenerator)
        : base(formComponentMapper, formDataBinder, pageLinkGenerator)
    {
    }

    public override Task ConfigurePage()
    {
        // Ensures correct URL for child object edit pages when redirected after object creation
        AdditionalLinkParameters.Add(
            new PageParameterValues
            {
                { typeof(ChildObjectEditSection), ParentId }
            });

        return base.ConfigurePage();
    }

    protected override Task FinalizeInfoObject(ChildObjectInfo infoObject, IFormFieldValueProvider fieldValueProvider, CancellationToken cancellationToken)
    {
        // Sets the parent identifier to the foreign key column 'ParentID'
        infoObject.ParentID = ParentId;

        return base.FinalizeInfoObject(infoObject, fieldValueProvider, cancellationToken);
    }
}
Child object edit pages
Child object edit pages behave as regular edit page. The only difference is that, depending on the UI page hierarchy of your implementation, their URLs may be parameterized multiple times. For example, assuming the following page hierarchy:
- Parent object listing
- Parent object create
- Parent object edit section (adds a URL slug with the identifier of the parent to the URL)
- Parent object edit
- Child object listing (consumes the identifier of the parent)
- Child object create (consumes the identifier of the parent)
- Child object edit section (adds a URL slug with the identifier of the child to the URL)
- Child object edit (consumes the identifiers of the selected parent and child)
The edit page URL is parameterized by:
- the identifier of the parent (parent object edit section)
- the identifier of the child (child object edit section)
When generating links to these pages, you need to keep this in mind and pass the appropriate parameters. For example, the AddEditRowAction ListingPage extension method must be supplied with the identifier of the parent (the method ensures the identifier of the child – a row in the listing – automatically).
See the following snippets for a sample implementation:
using Kentico.Xperience.Admin.Base;

[assembly: UIPage(
    parentType: typeof(ChildObjectListing),
    slug: PageParameterConstants.PARAMETERIZED_SLUG,
    uiPageType: typeof(ChildObjectEditSection),
    name: "Edit section for child objects",
    templateName: TemplateNames.SECTION_LAYOUT,
    order: UIPageOrder.NoOrder)]

public class ChildObjectEditSection : EditSectionPage<ChildObjectInfo>
{
}
The following example assumes the object type has a corresponding “edit” UI form defined.
using Kentico.Xperience.Admin.Base;
using Kentico.Xperience.Admin.Base.Forms;

[assembly: UIPage(
    parentType: typeof(ChildObjectEditSection),
    slug: "edit",
    uiPageType: typeof(ChildObjectEdit),
    name: "Edit child",
    templateName: TemplateNames.EDIT,
    order: UIPageOrder.First)]

public class ChildObjectEdit : InfoEditPage<ChildObjectInfo>
{
    public ChildObjectEdit(IFormComponentMapper formComponentMapper, IFormDataBinder formDataBinder) : base(formComponentMapper, formDataBinder)
    {
    }

    [PageParameter(typeof(IntPageModelBinder), typeof(ChildObjectEditSection))]
    public override int ObjectId { get; set; }
}
Parent-child limitations
Content item or page objects as parents
Custom child objects under content item or page classes as the parent are NOT supported. Content items and pages in Xperience are complex data structures that consist of multiple classes and have special logic for handling other factors, such as workflows and multilingual support.
Parent-child relationships that include content items or pages do not provide the automatic functionality that works for other classes, such as deleting of child objects along with the parent page.
Self-referencing parent-child relationships
The system does NOT support self-referential parent child relationships. Such cases would lead to various problems, for example when creating the first object of the given object type (an existing parent must be assigned to each object).
The recommended approach is to create a separate object type for each level of the hierarchy, with a root that does not have a parent at the top. If you need to model a tree hierarchy with variable depth, you can create database columns that store references to the same object type, and use those to handle the parent-child hierarchy.
One-to-many relationships
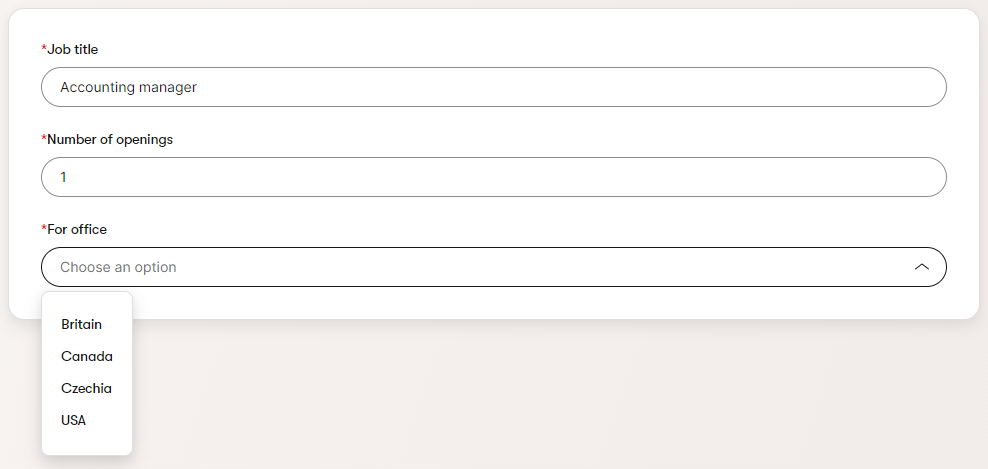
One-to-many relationships are based on database columns that store references to objects of other types (foreign keys). Such references allow each object of the given object type to have a relationship with an object of another type. For example, you can assign users, members, or any other object in the system to custom objects.
To ensure that the system automatically handles dependencies for your references, you need to register the reference fields in the type information. With correct configuration, the system maintains referential integrity of relationships for CI/CD, or when removing references to deleted objects.
You can define references in two possible directions:
- From a custom object type to another object type
- From any extendable system class to custom object types
References to content item or page objects are not supported
The system does NOT support creating references from custom classes to content item or page objects. Content items and pages are complex data structures that consist of multiple classes and have special logic for handling other factors, such as workflows and multilingual support.
Add references from custom object types
To create a reference from a custom object type to another object type:
- Open the Modules application.
- Edit the custom module and data class where you wish to add the reference.
- On the Database columns tab, create a New field.
A common convention is to suffix identifier columns with the ID suffix.
Set the field’s Data type to Integer number.
Select the target object type in the Reference to selector.
Choose a Reference type to determine how the system handles referential integrity and automatic removal of objects when a referenced object is deleted. For more information about the available options, see the table describing the
ObjectDependencyEnumvalues below.The Required flag in the field settings controls whether the reference field must have a target object set (not to be confused with the Required option of the Reference type setting).
- Select Save. You can create any number of reference fields using the same approach.
- Regenerate the code for the modified object type. If you have already customized the Info, IInfoProvider or InfoProvider classes, manually compare and copy the differences caused by the reference fields to avoid overwriting your changes.
- (Optional) Set the ID columns as foreign keys in your database. See Configure foreign key columns in the database for more information.
Important: The Reference settings that you configure for fields on the Database fields tab only serve as input for the default code generated for the Info class. Changing the field settings after you generate your code does NOT change the behavior of the reference fields. To make changes, you need to adjust the code of the given Info class or regenerate the code.
The type information definition in the generated Info code automatically includes the required object dependencies based on the Reference settings of your fields. If you view the code, you can see that the DependsOn property in the initializer of the TYPEINFO member contains a List collection of ObjectDependency objects.
// Defines references from a custom object type to User and Culture
DependsOn = new List<ObjectDependency>
{
    // CustomTypeUserID and CustomTypeCultureID identify the foreign key columns defined for the custom object type
    new ObjectDependency("CustomTypeUserID", UserInfo.OBJECT_TYPE, ObjectDependencyEnum.Required),
    new ObjectDependency("CustomTypeCultureID", CultureInfo.OBJECT_TYPE, ObjectDependencyEnum.NotRequired)
},
Each ObjectDependency object defines one reference from the custom object type to another type in the system. ObjectDependency objects have the following parameters:
column (string) – the name of the foreign key column that stores the IDs of the referenced objects.
object type (string) – the name of the object type that is the target of the reference (accessible via the
OBJECT_TYPEconstant exposed by Info classes).reference type (ObjectDependencyEnum) – determines how the system handles referential integrity and automatic removal of objects when a referenced object is deleted. The value must be one of the options from the
ObjectDependencyEnum:Value
Description
NotRequired
Represents an optional (weak) reference. If the referenced object is deleted, the system sets a
nullvalue to the foreign key column.The column that stores the IDs of the referenced objects must support empty/null values (the Required flag cannot be enabled).
RequiredHasDefault
If the referenced object is deleted, the system automatically assigns a default object instead of setting
nullto the foreign key column.To set the default object for your custom object types, you need to override the
GetDefaultObjectmethod in the code of the given Info class.C#Assign a default objectprotected override BaseInfo GetDefaultObject()::newline::{::newline::::tab::// Gets the object of the custom type whose code name is "default"::newline::::tab::CustomTypeInfo defaultObject = CustomInfo.Provider.Get("default");::newline::::tab::return defaultObject;::newline::}::newline::Required
The system always maintains the integrity and consistency of the reference as long as a value is set (strong reference). The value can still be
nullif the Required flag is disabled for the given field.If the referenced object is deleted, the system automatically deletes all objects connected as references.
Binding
Only intended for the reference fields of dedicated binding object types used to model many-to-many relationships (via associative tables). Works the same way as the
Requireddependency type.
Add references from extendable system objects
You can extend existing objects in the system to store references to custom object types.
- Open the Modules application.
- Edit the module and the data class that you wish to extend.
- On the Database columns tab, create a New field using the field editor.
- A common convention is to suffix identifier columns with the ID suffix.
- Set the field’s Data type to Integer number.
- Either keep the field hidden and handle the values in code, adjust an existing UI form, or create a completely new UI form that manages the dependency.
- There are no Reference settings to configure for the field with this type of reference.
- Save the field.
- (Optional) Set the ID columns as foreign keys in your database. See Configure foreign key columns in the database for more information.
You can repeat the process above for any number of customizable system object types. Once the reference database columns (foreign keys) are created, you need to register them as dependencies in the type information of your custom class:
In an IDE, edit the Info code of the custom object that is the target of the reference.
In the initializer of the TYPEINFO object, assign a List collection of
ExtraColumnobjects into theExtendsproperty.- Create an
ExtraColumnobject for each custom reference that targets the given object type.
- Create an
Save the changes and rebuild the project.
ExtraColumn objects accept the following parameters:
- extended object type (string) – the name of the object type where you added the reference field (the extendable system object).
- column (string) – the name of the foreign key column in the extended class that stores the IDs of the referenced objects.
- reference type (ObjectDependencyEnum) – determines how the system handles referential integrity and automatic removal of objects when a referenced object is deleted. The value must be one of the options from the
ObjectDependencyEnum. See the table in the Add references from custom object types section for details.
// Defines references from the Contact and User classes to a custom class
Extends = new List<ExtraColumn>()
{
    new ExtraColumn(ContactInfo.OBJECT_TYPE, "ContactCustomClassID", ObjectDependencyEnum.Required),
    new ExtraColumn(UserInfo.OBJECT_TYPE, "UserCustomClassID", ObjectDependencyEnum.NotRequired)
}
The code informs the system that the specified field of the extended class stores references to another class. During the initialization of the application, the system automatically inserts an object dependency into the type information definition of the extended class.
Edit references from the UI
To make the added reference (foreign key) columns editable from the create or edit pages of the corresponding object, follow this general approach:
- Open the Modules application and edit the extended data class.
- Switch to the UI Forms tab and edit the UI form used to create or edit the object (the process is analogous for both).
- Add a new to the UI Form with the following properties:
- Database column: New field without database column
- Field name: choose a suitable name, you will be accessing and configuring this field via the API
- Data type: Text
- Required: Yes (checkbox selected)
- Form component: Dropdown selector
- Data source: leave empty (will be populated later using the API)
- Save the changes.
The modified UI form now displays an empty Dropdown selector. The next step is to populate it with the available reference targets.
In an IDE, edit the UI page used to create or edit the extended object (the process is analogous for both).
Override the
GetFormItemsmethod and populate the dropdown selector field with the identifiers and display names of the target objects.C#Dropdown data source using GetFormItems()// Populates the dropdown with custom Office objects protected override async Task<ICollection<IFormItem>> GetFormItems() { // Gets the collection of form components for the UI form displayed by this page var items = await base.GetFormItems(); // Gets all items that can be the target of the relationship // Formats the data according to the requirements of the 'Dropdown selector' component: <identifier>;<displayName> // Use constructor dependency injection to obtain required services var selectorOptions = officeInfoProvider.Get().GetEnumerableTypedResult() .OrderBy(s => s.OfficeName) .Select(x => $"{x.OfficeID};{x.OfficeName}"); // Gets the Dropdown form component by its UI form field name var officeSelector = items.OfType<IFormComponent>() .FirstOrDefault(i => i.Name == "OfficeSelect") as DropDownComponent; // Sets the Dropdown component's data source property officeSelector.Properties.Options = string.Join("\r\n", selectorOptions); return items; }Override the
FinalizeInfoObjectmethod and ensure the identifier from the selector is saved into the foreign key column.C#Set foreign key references using FinalizeInfoObject()protected override Task FinalizeInfoObject(OfficeJobInfo infoObject, IFormFieldValueProvider fieldValueProvider, CancellationToken cancellationToken) { base.FinalizeInfoObject(infoObject, fieldValueProvider, cancellationToken); // Gets the submitted value from the UI form field dropdown fieldValueProvider.TryGet<string>("OfficeSelect", out var value); // Sets the value to the foreign key column // The field is required, so no validation is needed, we know the value is always there and in the format we need infoObject.OfficeJobParentID = Int32.Parse(value); // Sets the object to the database return Task.CompletedTask; }Rebuild the project.
If you navigate to the page with the edited UI form, you can use the added dropdown selector to set the target of the dependency. Note that if the edited UI form is present on multiple pages, you need to repeat the process for each affect page or separate the logic to a shared base class.
Many-to-many relationships
A many-to-many relationship occurs when multiple records in a table are associated with multiple records in another table. A typical example of a many-to many relationship is one between roles and users. A user can be assigned to many roles, and a role can include many users.
MSSQL doesn’t allow you to implement a direct many-to-many relationship between tables. However, you can break the many-to-many relationship into multiple one-to-many relationships by using a binding object type with its own table (an associative table). Each record in the binding type’s table contains the value of the primary keys of the object types it associates (foreign keys).
References to content item or page objects are not supported
The system does NOT support creating binding object types between custom objects and content item or page objects. Content items and pages are complex data structures that consist of multiple classes and database tables, and have special logic for handling other factors, such as workflows and multilingual support.
Add binding classes
Use the following steps to create a binding between objects:
- Open the Modules application and edit the custom module where you want to create the binding.
- Select the Classes tab and click New class.
- Fill in the Class name and Code name.
- Select Save.
Now define the database columns storing the foreign keys of the related objects:
- Switch to the Database columns tab.
- Select New field and fill in the following values using the field editor.
- Data type: Integer number
- Required: yes (checkbox selected)
- Reference to: select the appropriate object type
- Reference type: Binding
- Repeat for all foreign keys in the relationship (two at minimum).
The system creates the corresponding table in the database. Perform the following steps to configure the binding and finalize the database table:
- Generate the binding’s code.
- Include the files into your project.
- See Integrate custom code for best practices.
- Edit the generated Info class and find the
TYPEINFOmember. - Add the
IsBindingproperty to theObjectTypeInfoinitializer and set the value totrue. See Object type configuration for details. - Save the changes and rebuild the solution.
- (Optional) Set the ID columns as foreign keys in your database. See Configure foreign key columns in the database for more information.
The binding object type is now ready. You can create relationships between objects using the API or prepare a user interface for this purpose.
Object type configuration
The type information is code that defines the general behavior and basic properties of object types. You can configure the type information inside the Info class of a given binding using the TYPEINFO member.
Generated binding Info classes have most of the type information set automatically by the code generator. You need to configure the remaining properties and verify the rest is set correctly.
Parameters of the ObjectTypeInfo constructor:
- idColumn (4) – the name of the identity column of the binding.
- parentID (11) – the name of the column that stores the ID of the first object type in the relationship.
- parentObjectType (12) – the object type name of the first object type in the relationship. Get the value from the
OBJECT_TYPEconstant in the given type’s Info class.
Properties in the ObjectTypeInfo initializer:
- IsBinding – must always be set to true for bindings. This property is not automatically set by the code generator and must be added manually!
- DependsOn – List of
ObjectDependencyobjects representing the object types in the relationship. Add anObjectDependencyfor each related object except for the one specified via the parent parameters in the constructor.
// Sample type information definition for a general binding
// The first object in the binding ALWAYS needs to be defined in the ObjectTypeInfo constructor
public static ObjectTypeInfo TYPEINFO = new ObjectTypeInfo(
    providerType: typeof(ObjectBindingInfoProvider),
    objectType: OBJECT_TYPE,
    objectClassName: "Acme.ObjectBinding",
    idColumn: "ObjectBindingID",
    timeStampColumn: null,
    guidColumn: null,
    codeNameColumn: null,
    displayNameColumn: null,
    binaryColumn: null,
    parentIDColumn: "ForeignKeyOne",
    parentObjectType: "ObjectType.One")
{
    // Must be added manually, not handled by code generators
    IsBinding = true,
    // Adds other object types to the binding relationship
    DependsOn = new List<ObjectDependency>()
    {
        new ObjectDependency("ForeignKeyTwo", "ObjectType.Two", ObjectDependencyEnum.Binding),
    },
};
Add objects to a many-to-many relationships from the UI
You typically add objects to many-to-many relationships from the editing interface of one of the objects in the association. That is, you can leverage the following UI page structure to obtain the identifier of the object using page model binders:
- Object listing page
- Object edit section (adds a URL slug with the identifier of the source object to the URL)
- Source object edit
- Source object many-to-many relationship management (typically a binding page)
- Object edit section (adds a URL slug with the identifier of the source object to the URL)
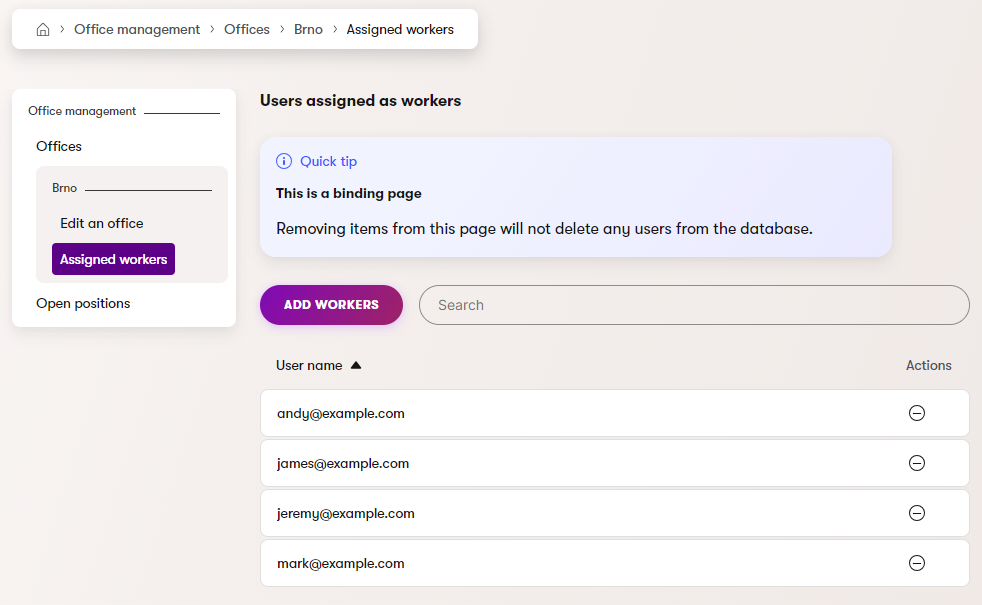
For example, you add roles to users either when editing the role object or the user object. Therefore, you can always obtain the identifier of one of the objects in the association from the UI page hierarchy.
Implementation
To create the page that manages the many-to-many relationship (this process is analogous for all object types associated via a given binding relation), create a binding UI page that lists objects associated to the object being edited.
- Use a page model binder to get the identifier of the edited object from the URL.
// Demonstrates how to manage a many-to-many relationship for a custom Office object that is associated
// to UserInfo objects (system users). This association is constructed from the Offices side of the relationship
// (i.e., the page URL structure contains the identifier of an office object)

public class OfficeWorkers : InfoBindingPage<OfficeUserInfo, UserInfo>
{
    // Configures the ID of the edited binding object
    [PageParameter(typeof(IntPageModelBinder))]
    public override int EditedObjectId { get; set; }

    // Returns the name of the property that is used as the source in the binding object type
    protected override string SourceBindingColumn => nameof(OfficeUserInfo.OfficeID);

    // Returns the name of the property that is used as the target in the binding object type
    protected override string TargetBindingColumn => nameof(OfficeUserInfo.AssignedUserID);

    // Configures the listing of workers assigned to the office
    public override async Task ConfigurePage()
    {
        // Configures captions of buttons and listings
        PageConfiguration.AddBindingButtonText = "Add workers";
        PageConfiguration.ExistingBindingsListing.Caption = "Users assigned as workers";
        PageConfiguration.SaveBindingsButtonText = "Confirm";
        PageConfiguration.BindingSidePanelListing.Caption = "Select users as workers";

        // Configures columns displayed in the listing of existing bindings
        PageConfiguration.ExistingBindingsListing.ColumnConfigurations
            .AddColumn(nameof(UserInfo.UserName), "User name", searchable: true, defaultSortDirection: SortTypeEnum.Asc);

        // Configures columns displayed in the listing of available object
        PageConfiguration.BindingSidePanelListing.ColumnConfigurations
            .AddColumn(nameof(UserInfo.UserName), "User name", searchable: true, defaultSortDirection: SortTypeEnum.Asc);

        await base.ConfigurePage();
    }
}
The basic management UI is now ready. Users can create and remove associations using the added interface elements.
Configure foreign key columns in the database
The system does not provide automatic management of foreign keys on the database level. You need to manually set the added foreign key columns as foreign keys in the corresponding database tables. This is not required to ensure correct functionality of foreign key columns, but is recommended to leverage the performance and data consistency advantages of foreign key constraints.
You can either use SQL Server Management Studio or execute an SQL script. See Create Foreign Key Relationships for more information.