
Content hub folders
Content hub allows you to create folders that help organize and efficiently navigate through content items. The following types of folders are available:
Smart folders
Smart folders provide a dynamic way to organize and filter content items. Each smart folder is based on a filtering condition, such as “items modified in the last 7 days”, “items with the Draft status”, “items with the Acme tag”, etc. The condition is evaluated dynamically, so items move in and out of smart folders as their fields and metadata change. A single content item can belong into any number of smart folders.
Smart folders can be used to organize content items in the administration interface, and also to dynamically control content delivery and filter content. Out-of-the-box, Xperience allows dynamic content delivery via smart folders for website channels (headless and email channels are currently not supported).
Create smart folders
To create a smart folder:
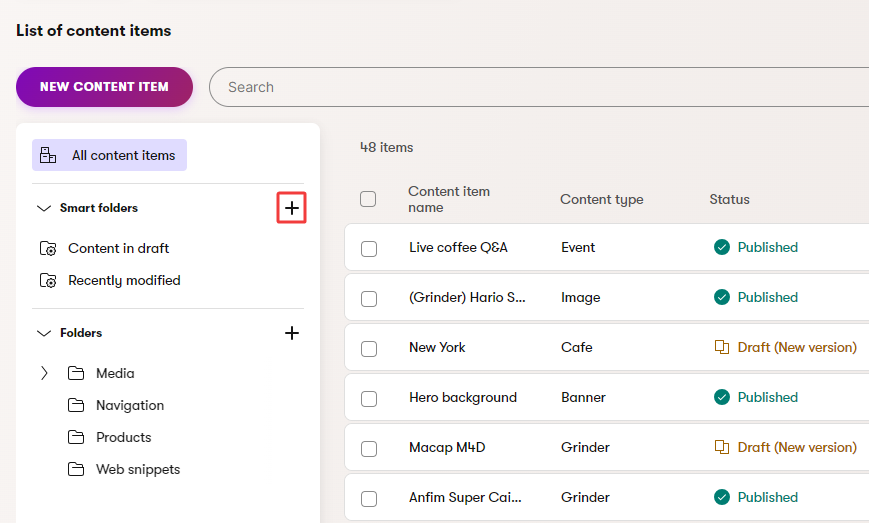
Select the Create new smart folder () button in the top-right corner of the Smart folders section in the left-side panel.
Choose whether to Enable dynamic content delivery for the smart folder.
- See Enable content delivery for smart folders for detailed information.
- If you’re not sure, you can enable content delivery at any point after you create the folder.
Set up the folder’s filter conditions.
Select Continue.
Enter a Smart folder name.
Select Save.
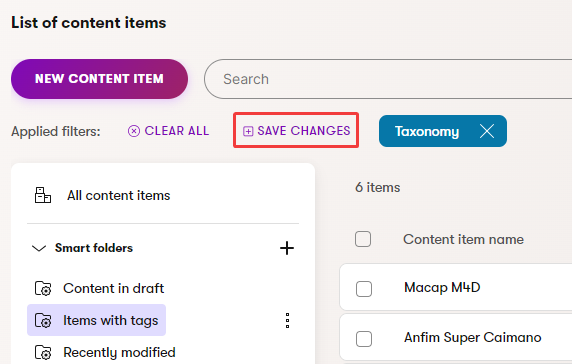
Alternatively, you can Save any filter applied to the content hub listing as a new smart folder.

Note that the smart folder only saves the Filter conditions. Search inputs are not reflected by the new smart folder.
When you select a smart folder in the left-side panel, the listing displays all content items that currently match the folder’s filter conditions. In addition to the Content hub application, smart folders are also available in all content item selectors throughout the system.
Clone smart folders
When creating new smart folders, you can save time by reusing the filter conditions of an existing folder.
- Expand the Menu actions () next to the original folder.
- Select Clone.
- Choose whether to Enable dynamic content delivery for the new folder.
- Select Clone in the confirmation dialog.
You can then adjust the new folder’s condition as required.
Edit smart folders
You can adjust a smart folder’s filter conditions at any time:
- Select the smart folder in the left-side panel.
- Select the Filter button or any filter summary item displayed in the Applied filters section above the listing.
- Change the filter conditions as required.
- Select Apply.
- Check the results in the listing and select Save changes.
To change a folder’s name, expand the Menu actions () next to the folder and select Rename.
Enable content delivery for smart folders
Dynamic content delivery allows developers to retrieve content items matching a smart folder’s filter criteria. This gives you the power to control which items are delivered by editing the filter conditions of smart folders directly in the Content hub UI, without needing to adjust code. Out-of-the-box, Xperience allows smart folder content delivery for website channels (headless and email channels are currently not supported).
Note that smart folders with dynamic content delivery have the following limitations on their filter conditions:
- Content type – most content delivery scenarios will be limited to a specific content type or content types that share a reusable field schema. This means that the final content delivered through the smart folder may not include items from all selected content types. Consult your project’s developers if you are not sure.
- Status, Requires authentication, Last modified – these filter options are not supported for smart folders with dynamic content delivery. Retrieval of content based on published status or authentication requirements is controlled by developers, and the Last modified value is not intended for public use outside of the administration interface.
The order and maximum number of retrieved items is controlled by developers, and you cannot configure these parameters through a smart folder’s filter conditions or other settings.
To enable dynamic content delivery for a smart folder:
- When creating new smart folders, select the Enable dynamic content delivery option at the top of the filter conditions.
- For existing folders, expand the Menu actions () next to the folder and select Enable dynamic content delivery.
Be careful when editing or deleting items that are included in a smart folder with dynamic content delivery. Changes may affect how the content is displayed in your website channels.
You cannot disable content delivery for a smart folder after you choose to enable it. If necessary, you can clone the folder to create a new copy without dynamic content delivery – expand the Menu actions () next to the folder and select Clone.
Select smart folders in content
When editing content, you may encounter fields that allow you to select a smart folder (depending on your project’s content model). For example, you could find smart folder selectors among the fields of content items and pages, or in the Page Builder when configuring the properties of a widget.
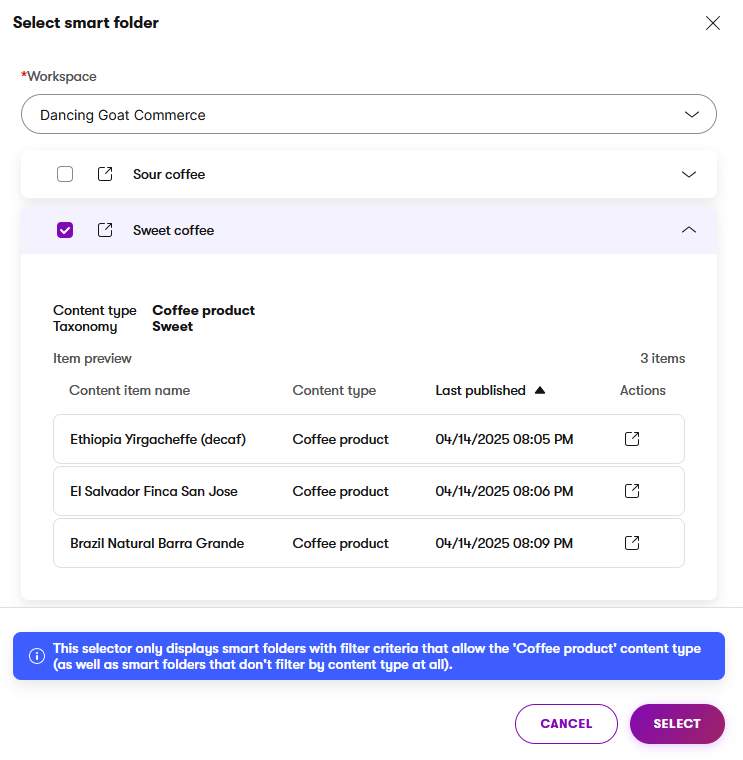
After you select a folder, developers can then use the field to retrieve content items from the selected smart folder and display or otherwise use them in the related channel.
Content folders
Content folders may be disabled or enabled for your project. If the folders are not available and you wish to use them, contact your administrators or see the Content hub configuration documentation.
You can use a hierarchy of content folders to catalog content items. Folders can greatly help you organize and efficiently navigate through content items in the administration interface, particularly when your project contains a large number of items.
Unlike with smart folders, content items are placed into content folders manually, and each item can only be located in one content folder.
The purpose of content folders is only to help organize content items in the administration, and they cannot be used to control content delivery.
- To add a content folder, use the Create new folder () button in the top-right corner of the folder tree.
- The system supports up to 20 levels of subfolders.
- Expand the Menu actions () next to folders if you wish to:
- Rename a folder
- Add a new subfolder
- Delete a folder
- Move a folder under a different folder or workspace (together with all subfolders and contained items)
- View a folder’s Properties (identifiers, created and last modified timestamps, other metadata)
- If you select a folder in the tree, the listing on the right only displays items located directly in the given folder. You can use the search function to find items, including subfolders.
- To access the full list of all content items in the current workspace (from all folders), select All content items above the folder tree.
- When creating content items, you can choose the folder Location for each new item.
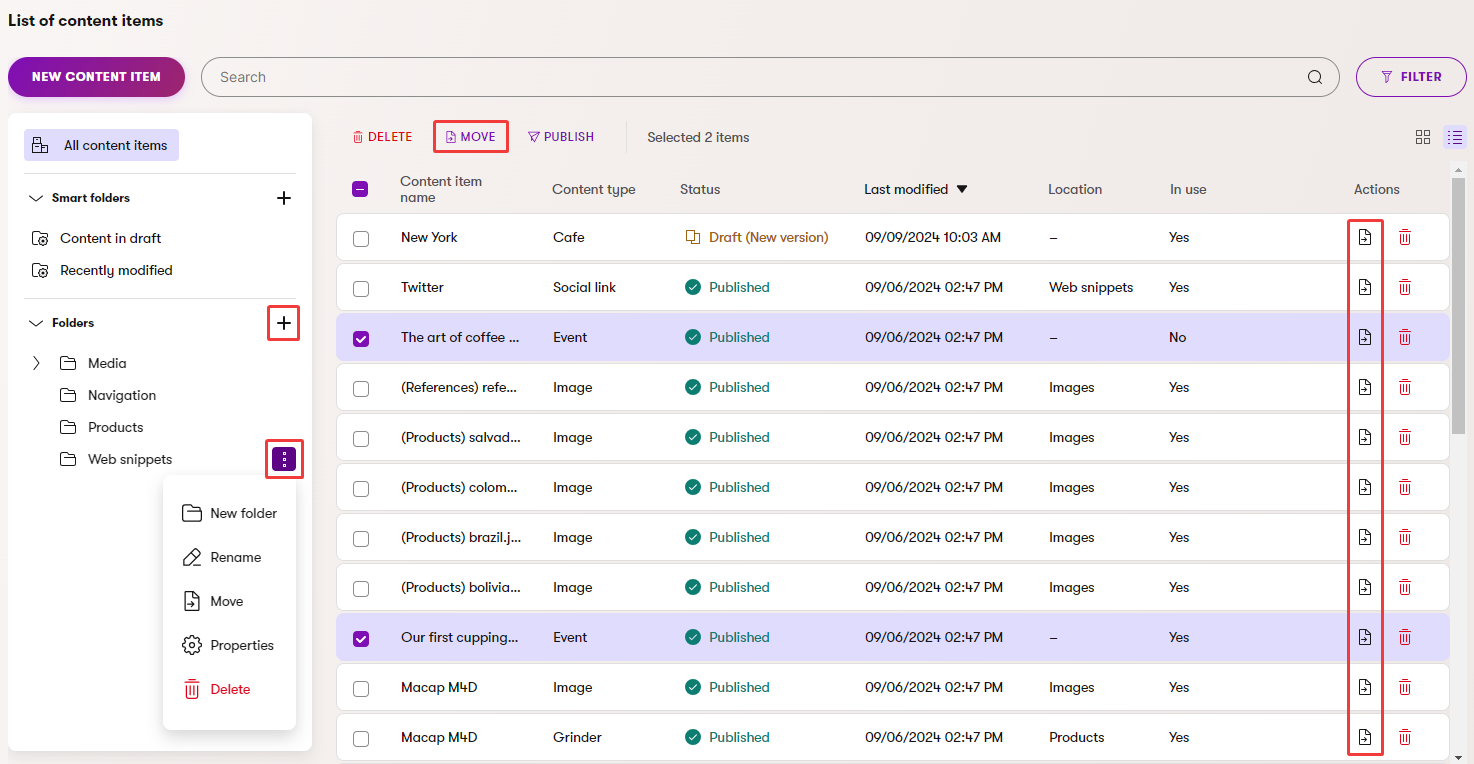
- You can move items between content folders or workspaces at any time using the Move () action.