
Edit and publish pages
Key points
You can:
- edit structured content of pages in the Content view mode.
- edit pages built with the Page Builder in the Page Builder view mode.
- edit, rename and publish pages only in the Draft step or a custom workflow step.
- unpublish Published pages.
Edit content of structured pages
Structured pages contain data stored within editable page fields. The fields depend on the specific content type. For instance, the fields can be used to store text, numbers, or images.
To edit a structured page:
- Open a website channel application.
- In the content tree, select the page that you want to edit.
- Make sure the page is in the Draft status or another custom workflow step.
When a page is Published or Scheduled, select Edit page to move the page to the Draft step.

When a page is Unpublished, select Create new version to move the page to the Draft step.

- In the Content view mode, edit the fields of the page.
- If content locking is enabled, the page has been automatically locked when you started editing. Only you can edit until the lock is released.
- Save the changes.
Note that the changes are not visible on the live site until you publish the page.
Overwrite protection
The system has a basic overwrite protection even when content locking is not enabled. When you and another user are both editing the same item and the other user saves their changes first, the system prevents you from saving your changes. Reopen the item in a new tab to load the latest version, apply your changes, and save.
Edit content of Page Builder pages
Add tags to pages
Depending on the configuration of your project, pages may support taxonomies and tags.
- Edit a page that has a field with the tag selector.
- Select tags that describe the page.
- Save the changes.
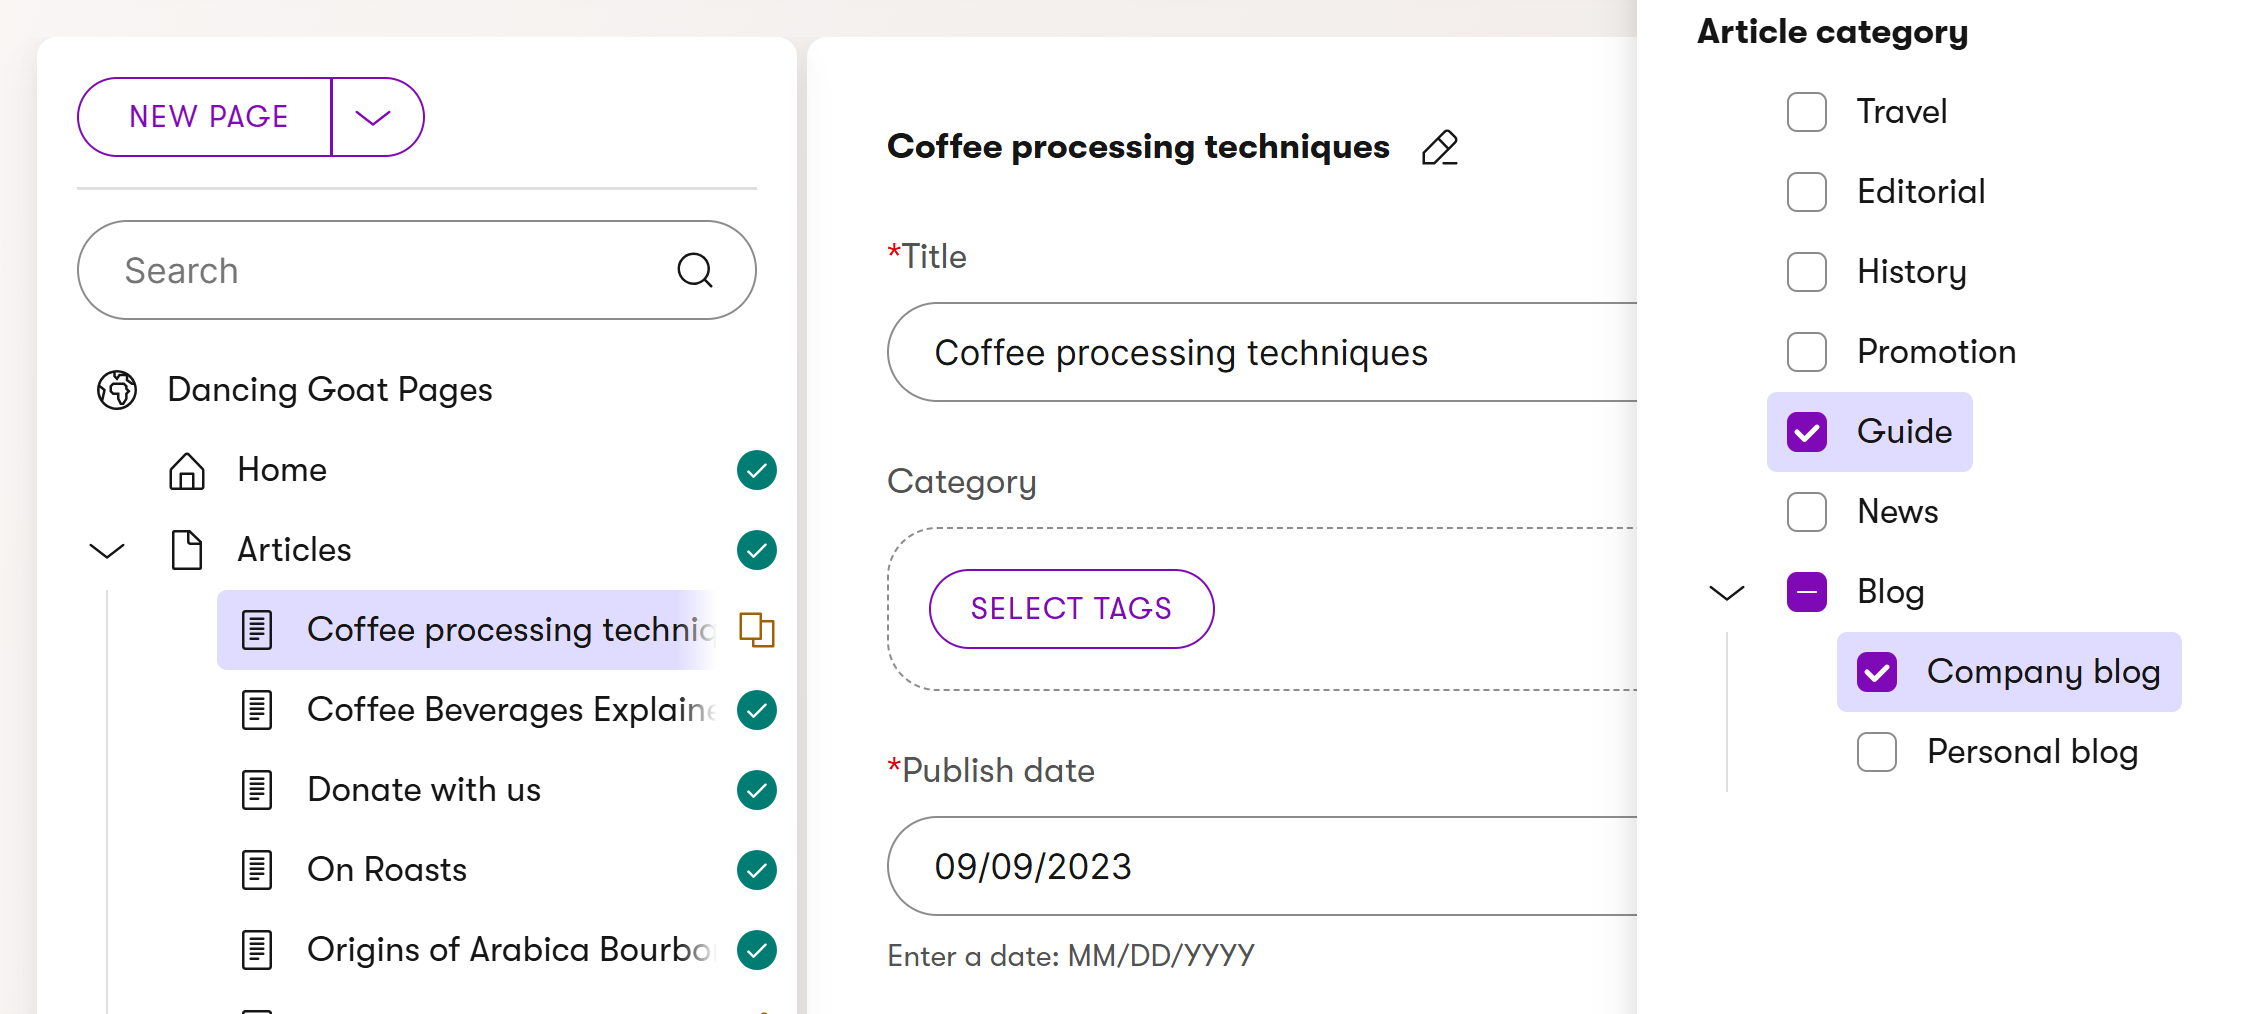
The selected tags are now stored with the page. Developers can use the information to display content based on tags.
Share page previews
If you need to share a page preview with external contributors before publishing, use a shareable preview URL.
Publish pages
Pages can be published under the following conditions:
- If the page’s content type is under workflow, the page must be in the last step of the workflow, or you need to belong to a role with full control for the given workflow (this allows you to publish pages from any step).
- For pages that are not under workflow, the page must be in the Draft step.
- If content locking is enabled, the page cannot be locked by another user.
Required page permissions
In addition to the conditions above, users need the appropriate page permissions (Read and Update) for the page they are publishing. Users with the Administrator role or the Manage permissions permission are exempt from page permission checks.
In order to publish a page:
- Open a website channel application.
- In the content tree, select the page that you want to publish.
- Make sure the page has the Draft status, or is in a workflow step from which you are allowed to publish the page.
- If a page is Unpublished, select Create new version to move the page to the Draft step.
- If a page is Unpublished, select Create new version to move the page to the Draft step.
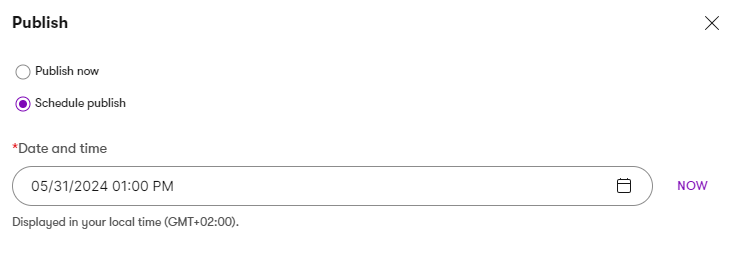
- Select Publish. For pages under workflow, select Change workflow step and choose the Schedule / Publish step.

- Choose when you want to publish the page:
- Publish now
- Schedule publish – select a date and time in the future. The system will automatically publish the page at the given time (see Scheduled publishing).
- Select Confirm.
- If the page has fields or Page Builder widgets linking to reusable content items or pages, the cascade publishing dialog opens. You can view all linked items that are currently not Published. Select any of the listed items to publish them together with the page. To learn more, see Cascade publishing.
Once Published, the page is available on the live site. If content locking is enabled, publishing the page releases the content lock.
Scheduled publishing
When publishing pages, you can choose to postpone the publish action to a later time. Select the Schedule publish option while publishing, and then pick a date and time when you want the system to automatically publish the page.
When scheduling the publish of a page together with cascade publishing of linked content items or pages, the selected linked items are scheduled to be published at the same time. This overwrites the publish time for any linked items that are already scheduled to be published.
Once a page is Scheduled, it can no longer be edited (like a Published page). However, the page is not available on the live site until it actually becomes published.
If you need to edit a scheduled page, you have the following options:
- Select the Edit page action – cancels the scheduled publish and moves the page to the first step in the page’s workflow cycle (Draft).
- Expand the Edit page menu and select Cancel scheduled publish – cancels the scheduled publish and moves the page to the final step in the page’s workflow cycle (Draft for pages without workflow).
Scheduled publish timing
We cannot guarantee that pages and content items will be published exactly at the scheduled time. The system checks if there are items scheduled to be published once per minute. If there’s a significant volume of content scheduled to be published at the same time, there may be a delay before all items are published (up to several minutes when publishing many thousands of items).
During the publishing process, reusable content items are always published before pages to ensure that content is displayed consistently.
Revert changes
After creating a new version of a page, it goes through a new editing cycle with the Draft step and optionally other custom workflow steps.
At any time before the new version is published, you can revert the page back to the last Published status. All changes made in any workflow step will be lost.
- Open a website channel application.
- In the content tree, select the page whose changes you want to revert.
- Revert to published the changes.

If content locking is enabled, this action releases the content lock.
Unpublish pages
An unpublished page is not available on the live site, but you can still access it from the administration. You can redirect visitors who try to reach the unpublished page to another page.
If you unpublish a page targeted by redirects, the redirect configuration of this page can affect other pages. See section Unpublishing or deleting pages targeted by redirects for details.
To unpublish a page (and thus remove it from the live site):
- Open a website channel application.
- In the content tree, select the page that you want to unpublish.
- You can only unpublish pages that are currently in the Published status or are scheduled to be published in the future.
- Expand the Edit page menu and select Unpublish options.

- Choose when you want to unpublish the page:
- Unpublish now
- Schedule unpublish – select a date and time in the future. If the page is scheduled to be published, the unpublish time must always be set after the publish time. The system will automatically unpublish the page at the given time.
- Choose where to redirect visitors when they try to reach the unpublished page. Your options depend on the page’s language variants.
- If a page variant in a fallback language is available, select one of the two options below:
- Serve content in fallback language
- Redirect to a page
- If chosen, continue with Select existing page.
- Navigate to the target page for the redirect in the content tree on the left.
- Select the page in the list on the right.
- Confirm the configuration with the Select button.
- If there’s no fallback available, you can:
- Create a redirect using Select existing page.
- Navigate to the target page for the redirect in the content tree on the left.
- Select the page in the list on the right.
- Confirm the configuration with the Select button.
- Leave the page without a redirect. Visitors will receive a 404 error when they try to reach the unpublished page.
- Create a redirect using Select existing page.
- If a page variant in a fallback language is available, select one of the two options below:
- Select Confirm.
Once a page is Unpublished, it is no longer available. Depending on the option you chose, visitors trying to access the page are either redirected, receive an error, or are served content in a fallback language.
To edit or re-publish an unpublished page, you first need to select Create new version. This transitions the page back to the Draft workflow step.
Change scheduled unpublish options
If you wish to cancel scheduled unpublishing for a page, expand the Edit page menu and select Cancel scheduled unpublish. To change the unpublish date and time, use the same approach to cancel the scheduled unpublish and then schedule it again. When you cancel a scheduled unpublishing with a scheduled redirect, the redirect is also canceled. Scheduled redirects can be edited on the URLs tab of the corresponding page.
For pages that have a scheduled unpublish time while they are still scheduled for publishing, canceling the scheduled publish (or editing the page) also automatically cancels the scheduled unpublish.
Redirects from unpublished and deleted pages
When you unpublish or delete a page, you can redirect visitors who try to access it to another page. Redirects can be used to ensure that visitors land on an alternative page and don’t get a 404 error.
All URLs (system URL, vanity URLs, former URLs) of the given page are redirected when a redirect is created.
The table below shows options available when unpublishing or deleting a page.
|
Redirect set up |
No redirect set up |
|
|
Page with a fallback language variant |
Redirect to the target page |
Serve content in a fallback language |
|
Page without a fallback language variant |
Redirect to the target page |
404 error |
Changing redirects
The following table describes where you can change redirect configuration.|
Redirects from unpublished pages |
Redirects from deleted pages |
|
|
Edit a redirect |
URLs application and the URLs tab corresponding to the page where the redirect is coming from |
|
|
Add a redirect |
Not possible in the admin UI, redirects can be added by developers. |
|
|
Delete a redirect |
Create a new version of the page and go through the workflow again. |
Unpublishing or deleting pages targeted by redirects
If a page that is targeted by a redirect is unpublished or deleted, the target of the original incoming redirect is automatically adjusted according to the option chosen when the page is unpublished/deleted. The table below shows what happens for each option that can be chosen.
|
Option chosen for the page targeted by a redirect |
Adjusted behavior of the incoming redirect |
|
Serve content in fallback language |
The target of the redirect stays the same, and the content in a fallback language is automatically served. This behavior can be disrupted by further actions, see Redirects to untranslated pages. |
|
Redirect |
The target of the incoming redirect is now the same as the target of the redirect from the newly unpublished/deleted page. The system doesn’t keep track of previous redirects. |
|
No redirect |
The incoming redirect is deleted, and visitors get a 404 error. Deleted redirects from deleted pages cannot be added again via the admin UI. These redirects can be added only via code, for example by developers. |
Former URLs are automatically updated according to the changes that occur.
Redirects that target pages that are scheduled to be unpublished are adjusted when the page they are targeting is unpublished. Until then, they keep their original configurations.
Republishing pages
Redirects from unpublished/deleted pages reflect the final target of the redirect. If a page targeted by redirects is unpublished, redirected to another page, and later published again, the redirects that originally targeted this page will keep their last target and won’t be rolled back.
For example, a page called Christmas sale was unpublished and redirected to a page called January sale. Later, the page January sale was also unpublished and redirected to the Home page. Both Christmas sale and January sale now redirect to the Home page. The page Christmas sale is no longer redirected to the page January sale. If the January sale page is published again, the Christmas sale page is still redirected to the Home page.
Redirects to untranslated pages
When a redirect is created to an untranslated page, visitors are automatically served a fallback language variant of this page if available. If no fallback language variant is available, visitors receive a 404 error. This applies even if the last fallback variant of the page was unpublished or deleted with a redirect.
If a redirect targeting an untranslated page is created and the page is later translated, visitors accessing the page via the redirect will be served the translated variant.
Scheduled redirects
When a page is scheduled to be unpublished, you can also create a redirect. The redirect is scheduled and applied once the page is unpublished. The scheduled redirect is not listed as a former URL in the URLs application until the page is unpublished. The scheduled redirect can be edited only on the URLs tab of the corresponding page. If the scheduled unpublishing is canceled, the scheduled redirect is also canceled.
A page can have an active redirect and a scheduled redirect. This can happen in the following situation: A page was unpublished with a redirect. Subsequently, the page was scheduled to be published and then scheduled to be unpublished again with a new scheduled redirect. The Redirect section on the URLs tab shows only the active redirect. The scheduled redirect can’t be edited in this situation. You need to cancel the scheduled unpublishing and then schedule the unpublishing with a new redirect configuration.
Unpublishing or deleting the home page
Unpublishing or deleting a home page can cause problems if not handled properly. Make sure that you’re aware of all consequences before proceeding with this action.
If you want unpublish or delete your current home page and create a redirect to a new one, you also need to configure the new home page. If you create a redirect without configuring the new home page, the root domain will be inaccessible, and visitors will receive a 404 error.
Rename pages
To rename a page:
- Open a website channel application.
- Navigate to the web page you want to rename.
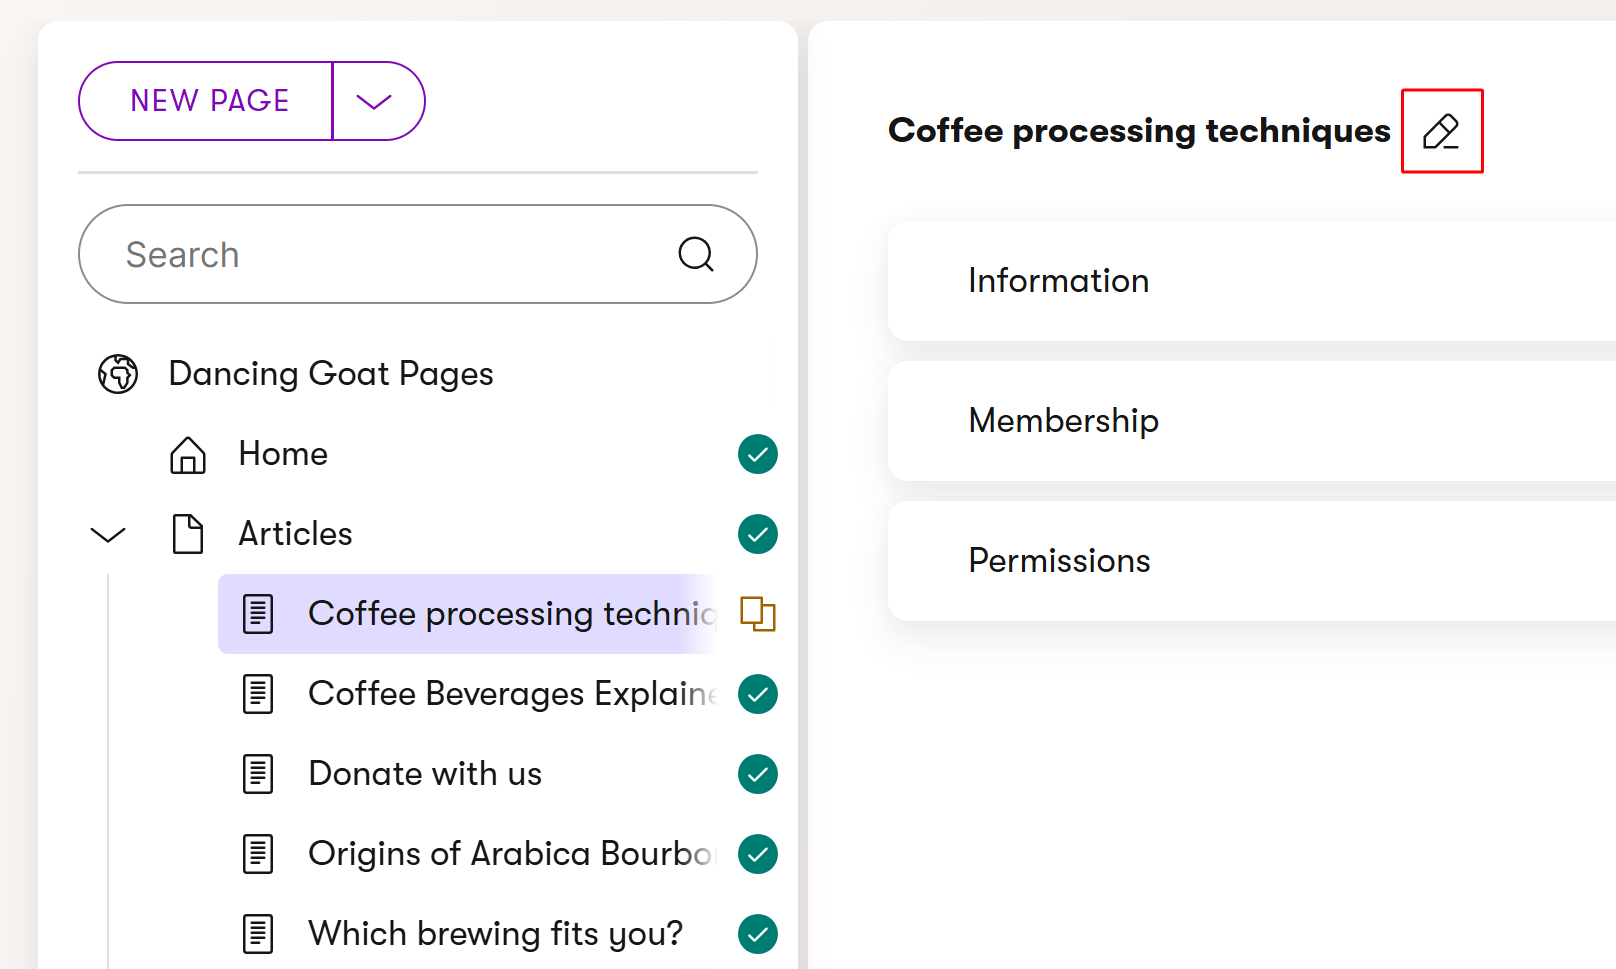
- In the Content view mode, select the edit () button next to the page name.
- Enter the new name and Save the changes.
The change of the page name is immediately reflected in the page tree.
Move pages
Possible side-effects of moving pages
Depending on how your website is implemented, page structure and order in the content tree can represent more than a simple visual structure within the website channel application. Also, moving pages may affect what you and other editors are allowed to do with them.
Consult with your website administrator if you are not sure about how moving pages in the content tree reflects on your website.
To move or reorder pages in the content tree:
Open a website channel application.
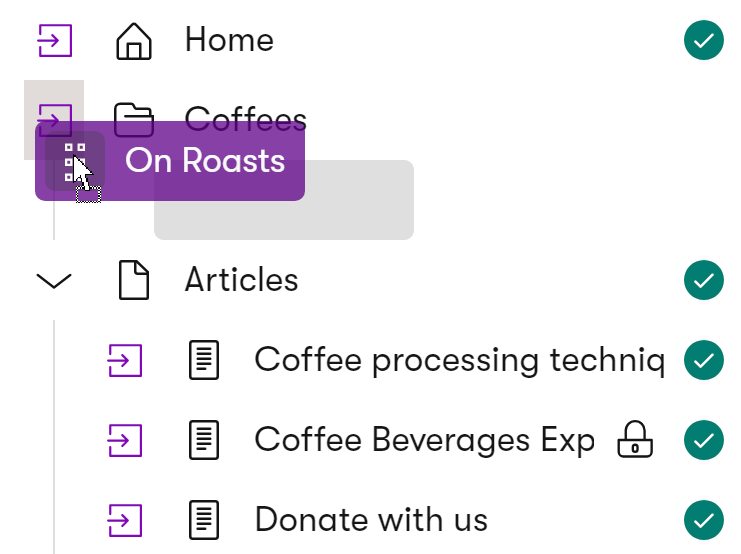
In the content tree, select the page you want to move. The drag handle icon () is displayed next to the page name.
Drag the page to the desired location. To move a page under a different parent page, hover over the dropzone to the left of the new parent page:
After moving or reordering pages, the changes are immediately saved and reflected on the live site.
Restore previous versions of pages
See Content versioning for more information. You can restore previously published versions of pages only when versioning is configured.
Change URLs of pages
See Manage page URLs.
Lock and unlock pages
When content locking is enabled, the system prevents other users from editing the page while you are making changes. See content locking for more information.