
Media library migration
Media libraries have been officially sunset, and their related API members have been marked as obsolete. Support will continue for a year (until July 24, 2026), after which the feature and all associated APIs will be removed. Content item assets are the long-term replacement, offering a more structured and future-ready way to manage files in Xperience by Kentico.
This guide walks you through migrating media library files to content item assets in Xperience by Kentico projects. It covers how assets are transformed, which metadata is preserved (such as GUIDs, custom fields, and system fields), and how legacy URLs are handled during the transition.
Migrate media libraries from Kentico Xperience 13
For information about migrating media libraries from Kentico Xperience 13 to Xperience by Kentico, see Upgrade from Kentico Xperience 13 or the upgrade walkthrough guide.
Migration overview
When you migrate your media library files, each one is transformed into a content item asset within a dedicated workspace in the Content hub application.
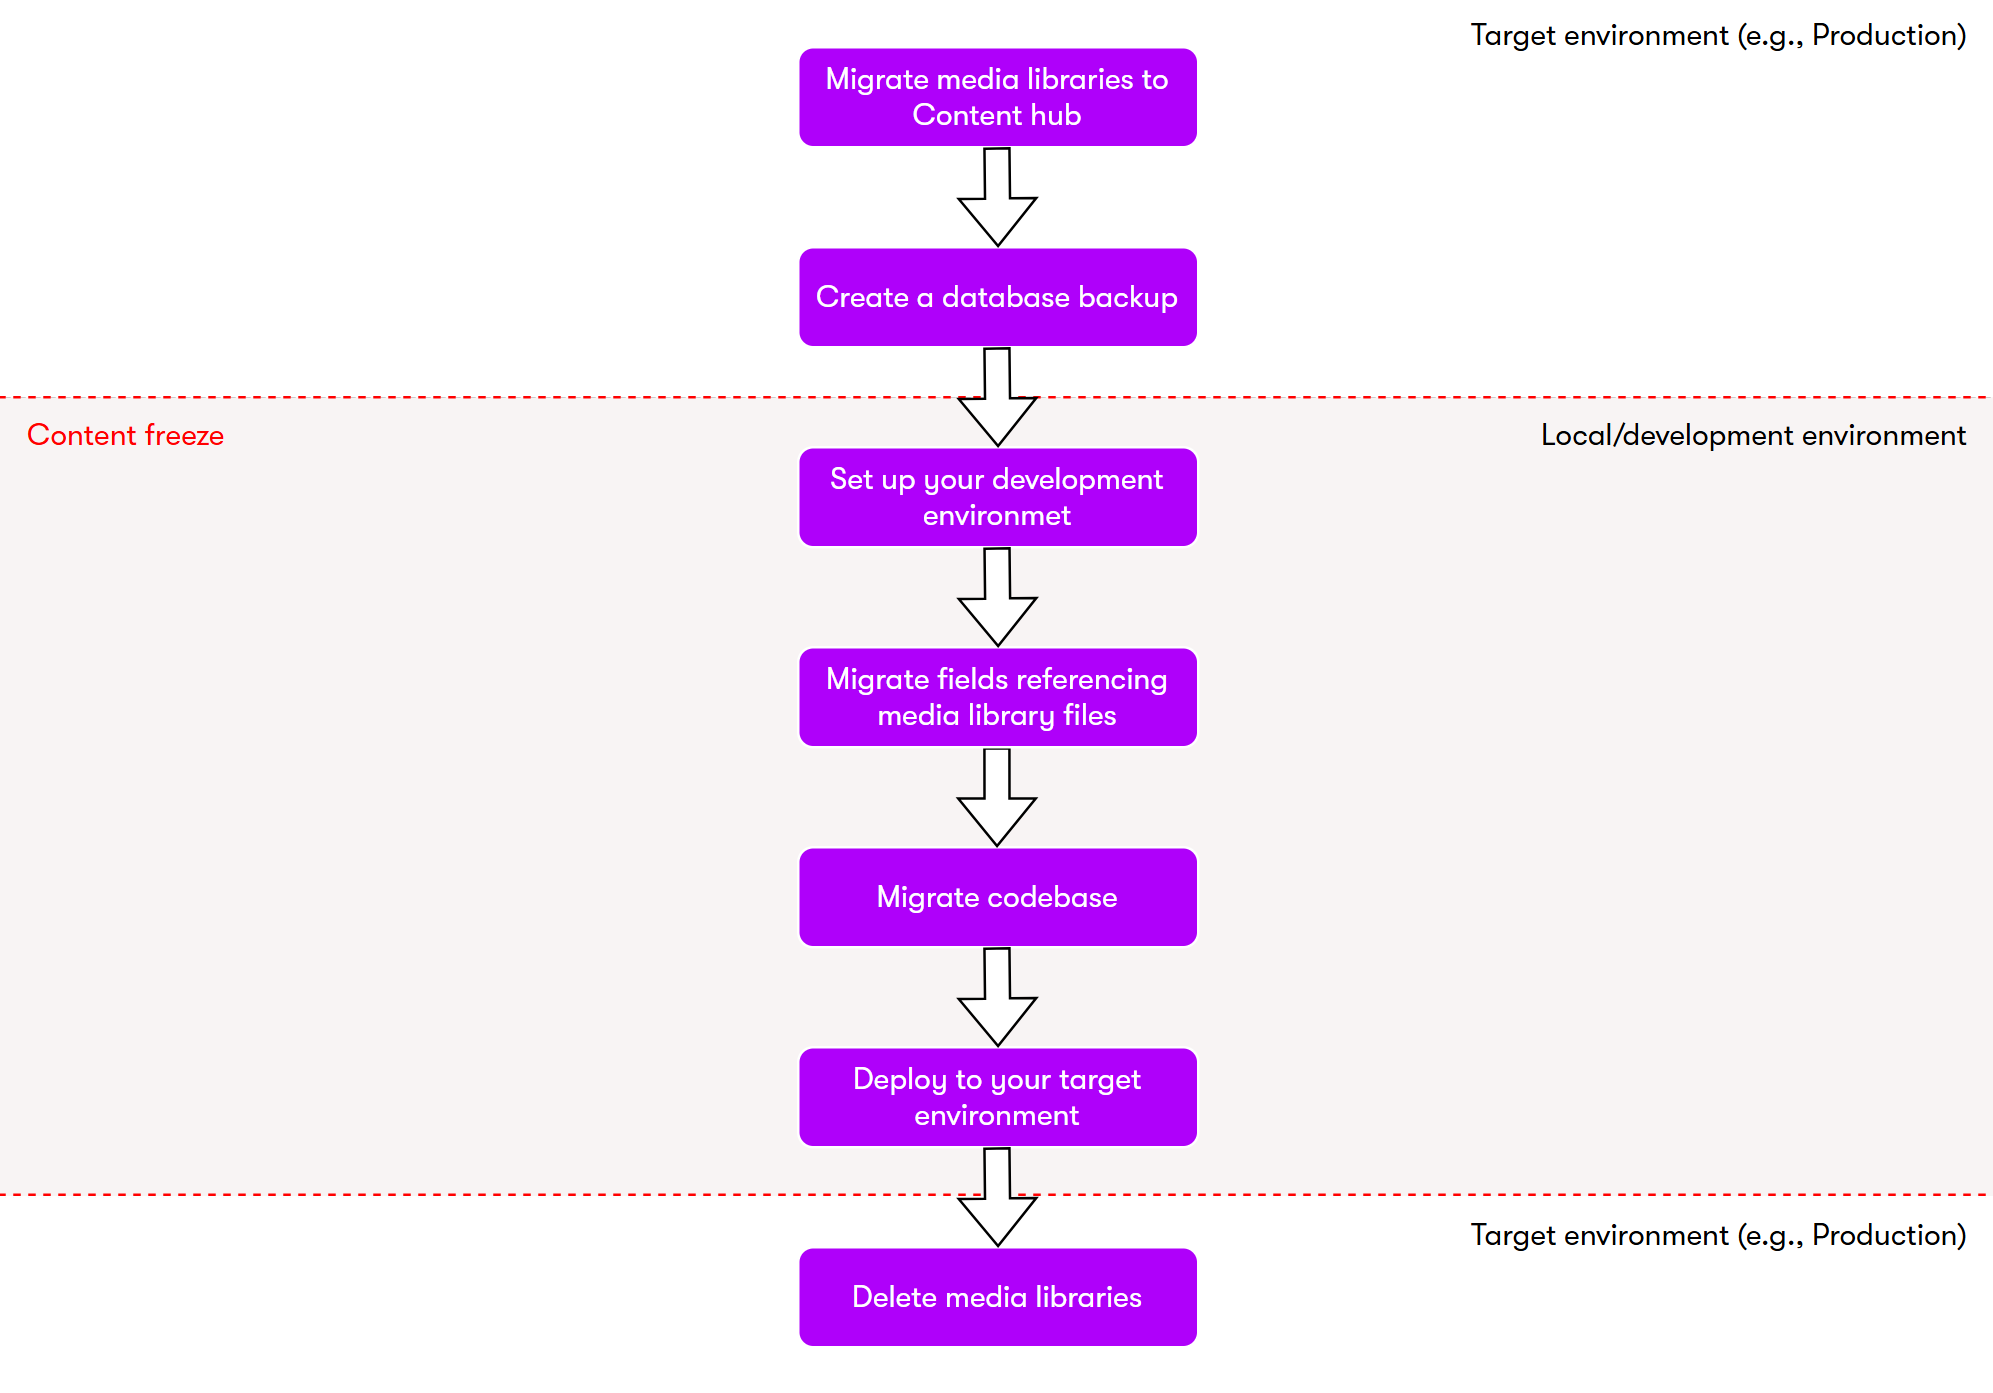
The full migration involves the following high-level steps:
- Migrate media library files to Content hub
- Create a database backup
- Set up your development environment
- Migrate fields referencing media files
- Migrate codebase
- Deploy
- Delete media libraries
How media library files are transformed
Each media library file becomes a content item of type MediaLibrariesMigration.MigratedMediaFile.
The newly created content items:
- Retain their original unique identifier (GUID).
- Preserve all custom fields.
- Include all system fields.
Folder structure and workspaces
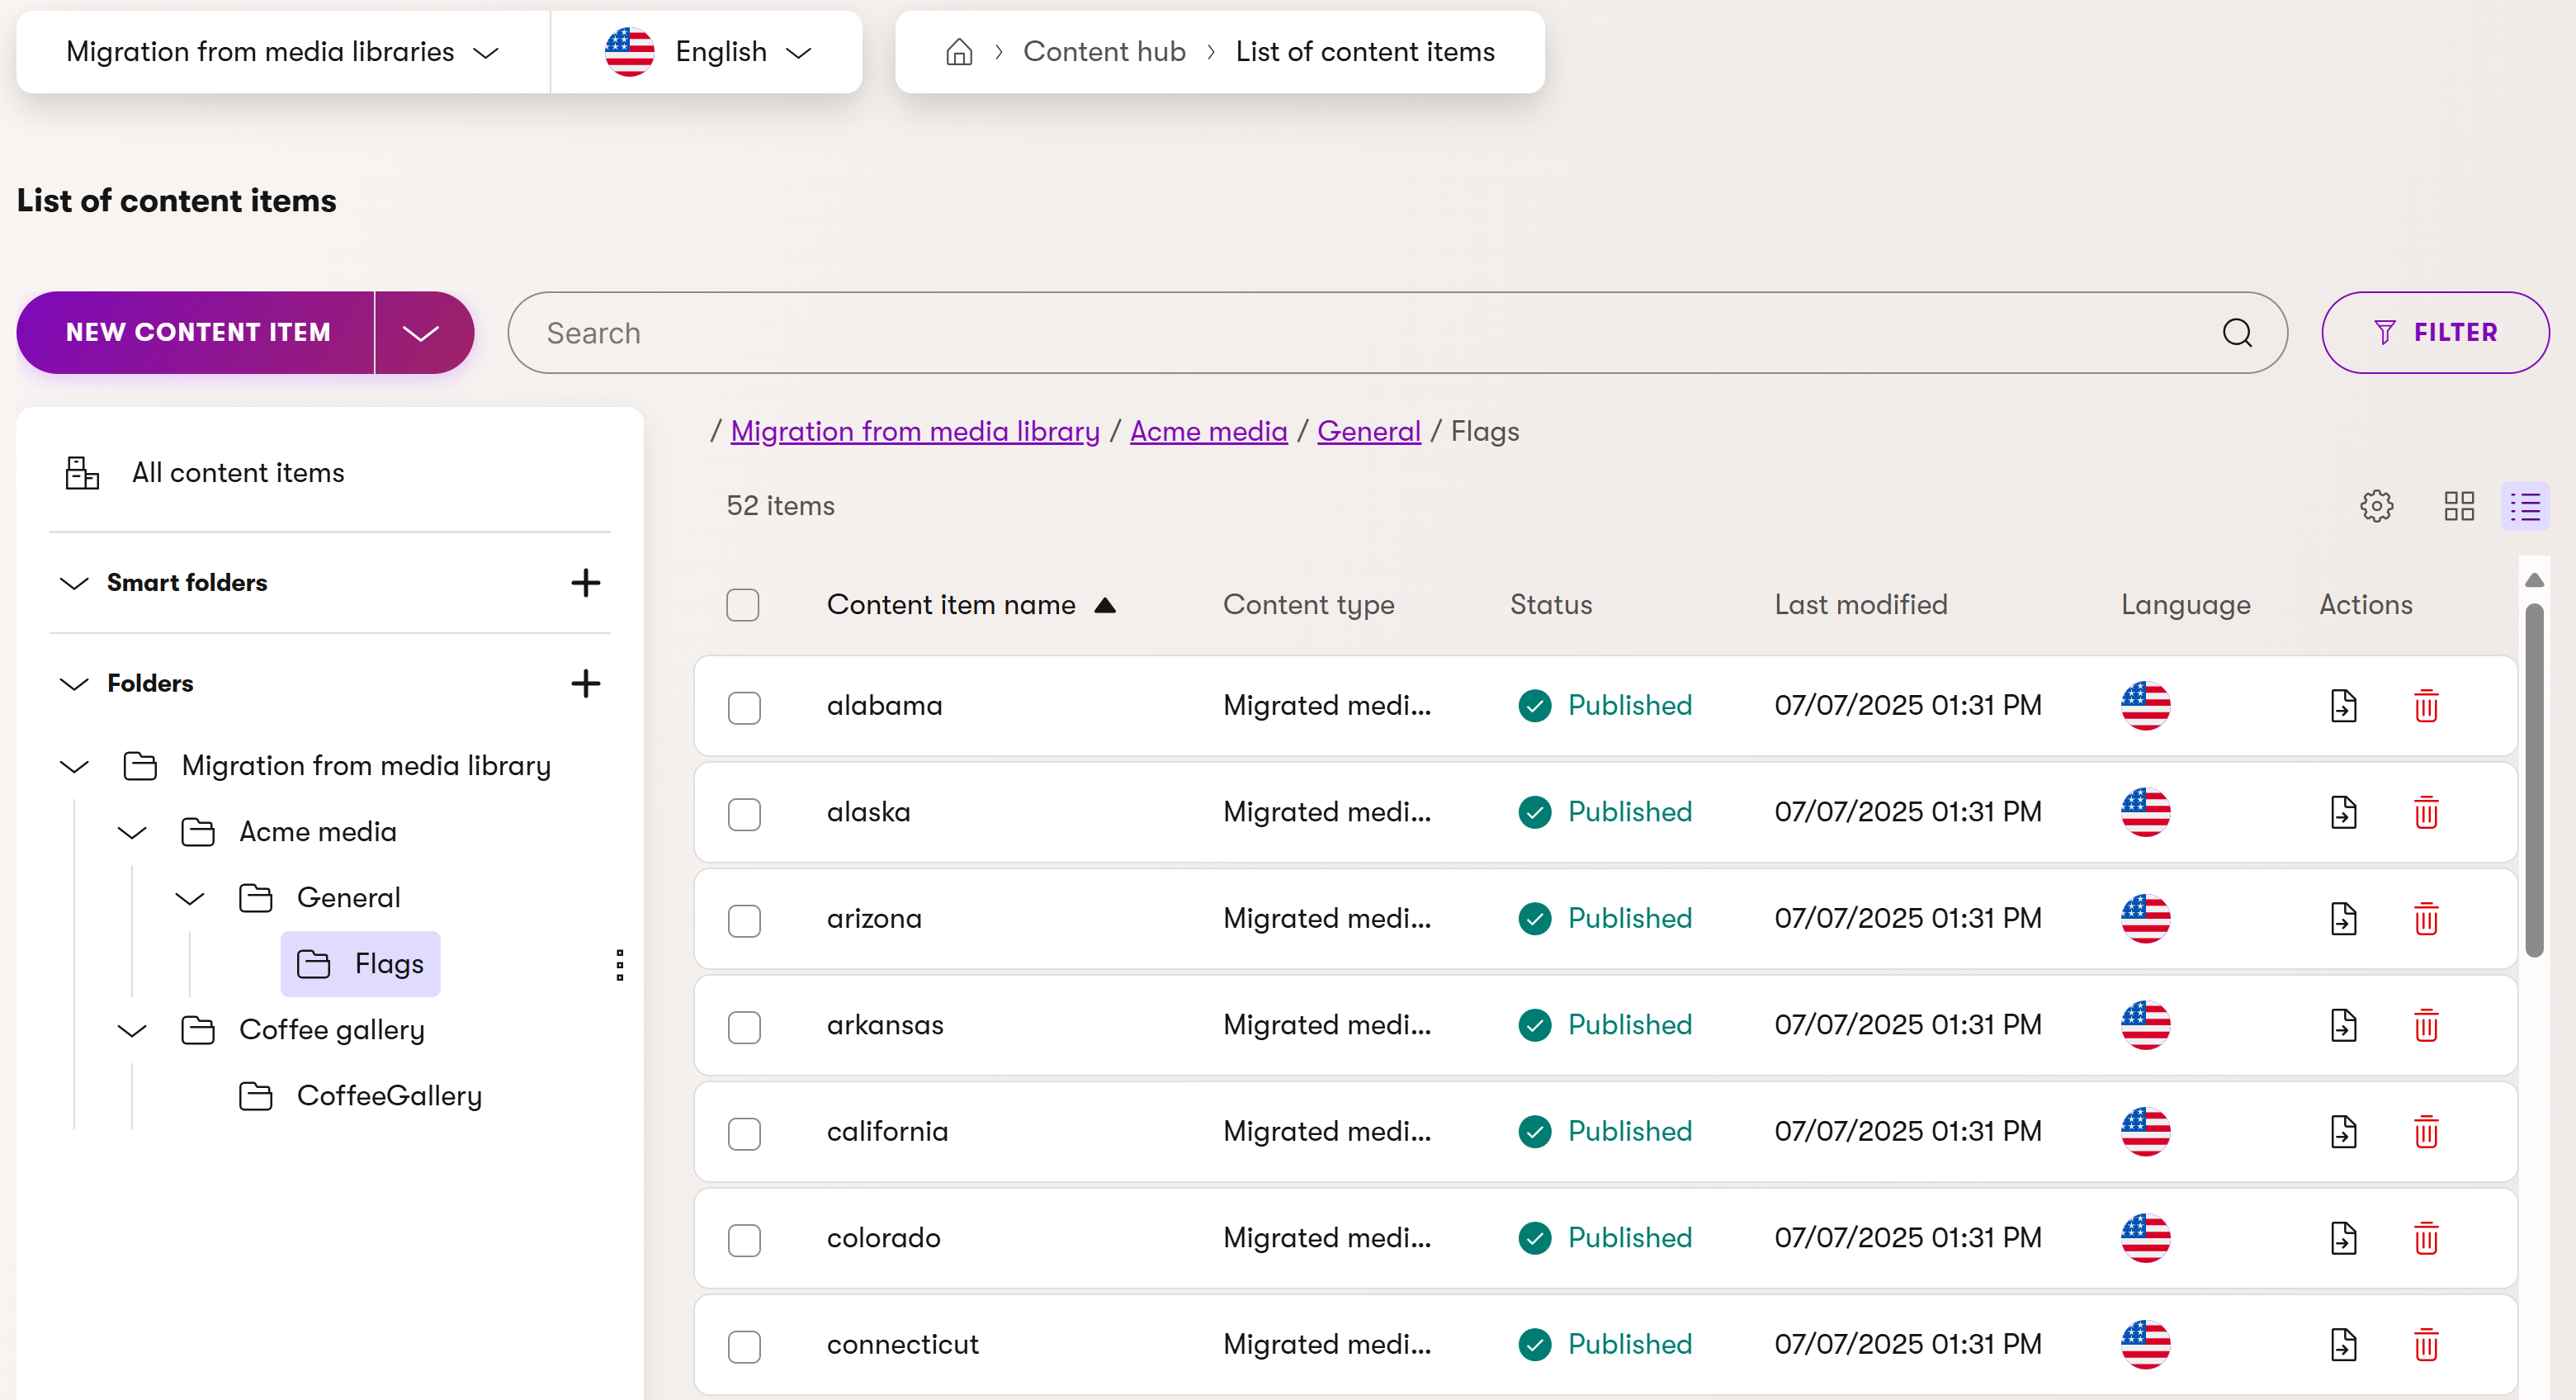
Migration places the files in the Migration from media libraries workspace, which is created when the migration is first run in the Media libraries application.
The folder hierarchy in the migration workspace mirrors the original structure in the media libraries. For example, a file in ~/AcmeMediaLibrary/Icons/ will be located under ~/AcmeMediaLibrary/Icons/ in the Migration from media libraries workspace.
Linking and redirect behavior
All existing ~/getmedia/... links are automatically redirected to their ~/getcontentasset/... counterparts. This ensures that legacy links continue to function without modification.
Legacy ~/getmedia/... links leading to migrated content item assets do not support URL-based image resizing.
Usage of media library files (now content items) linked through ~/getmedia/... links is tracked only for the default language variant of the content items.
Direct path media library URLs (e.g., ~/AcmeMediaLibrary/coffee_cup.png) are not supported for redirections.
Migration process
The migration from media library files to content item assets involves a combination of tool-assisted and manual steps. Follow these steps in order to ensure a complete and consistent migration.
Migrate media library files to Content hub
Important: To avoid the need to include the newly created content type and its items in your deployment package, run the migration directly in your target environment (e.g., Production). This is especially important for enviroments where the size of your deployment package has a limit, for example the SaaS environment.
This migration step is done in the administration interface of your application and can only be performed by users with the Administrator role or a role with the Migrate media library permission for the Media libraries application.
Each media library file is copied into a content item of type MediaLibrariesMigration.MigratedMediaFile in the project’s default language, and retains its unique identifier (GUID). The items are created in a Migration from media libraries workspace, which is created when running the migration for the first time. The folder structure in the workspace is identical to the folder structure in the original media libraries.
This is a non-destructive migration – it does not remove or alter the original media library files. Instead, it creates a copy in the Content hub application (in the Migration from media libraries workspace). As a result, any existing functionality or features in your application that rely on media libraries will continue to work without modification.
This migration step migrates only media libraries that have not been migrated yet, ensuring no duplicate content is created even if the step is rerun. Users who had permissions for the Media libraries application keep the same level of access to files in the Migration from media libraries workspace. This means that:
- Users with the Manage media library permission for the Media libraries application get full permissions in the migration workspace.
- Users with other permissions (View, Create, Update, Delete) for working with media libraries get View permission in the migration workspace.
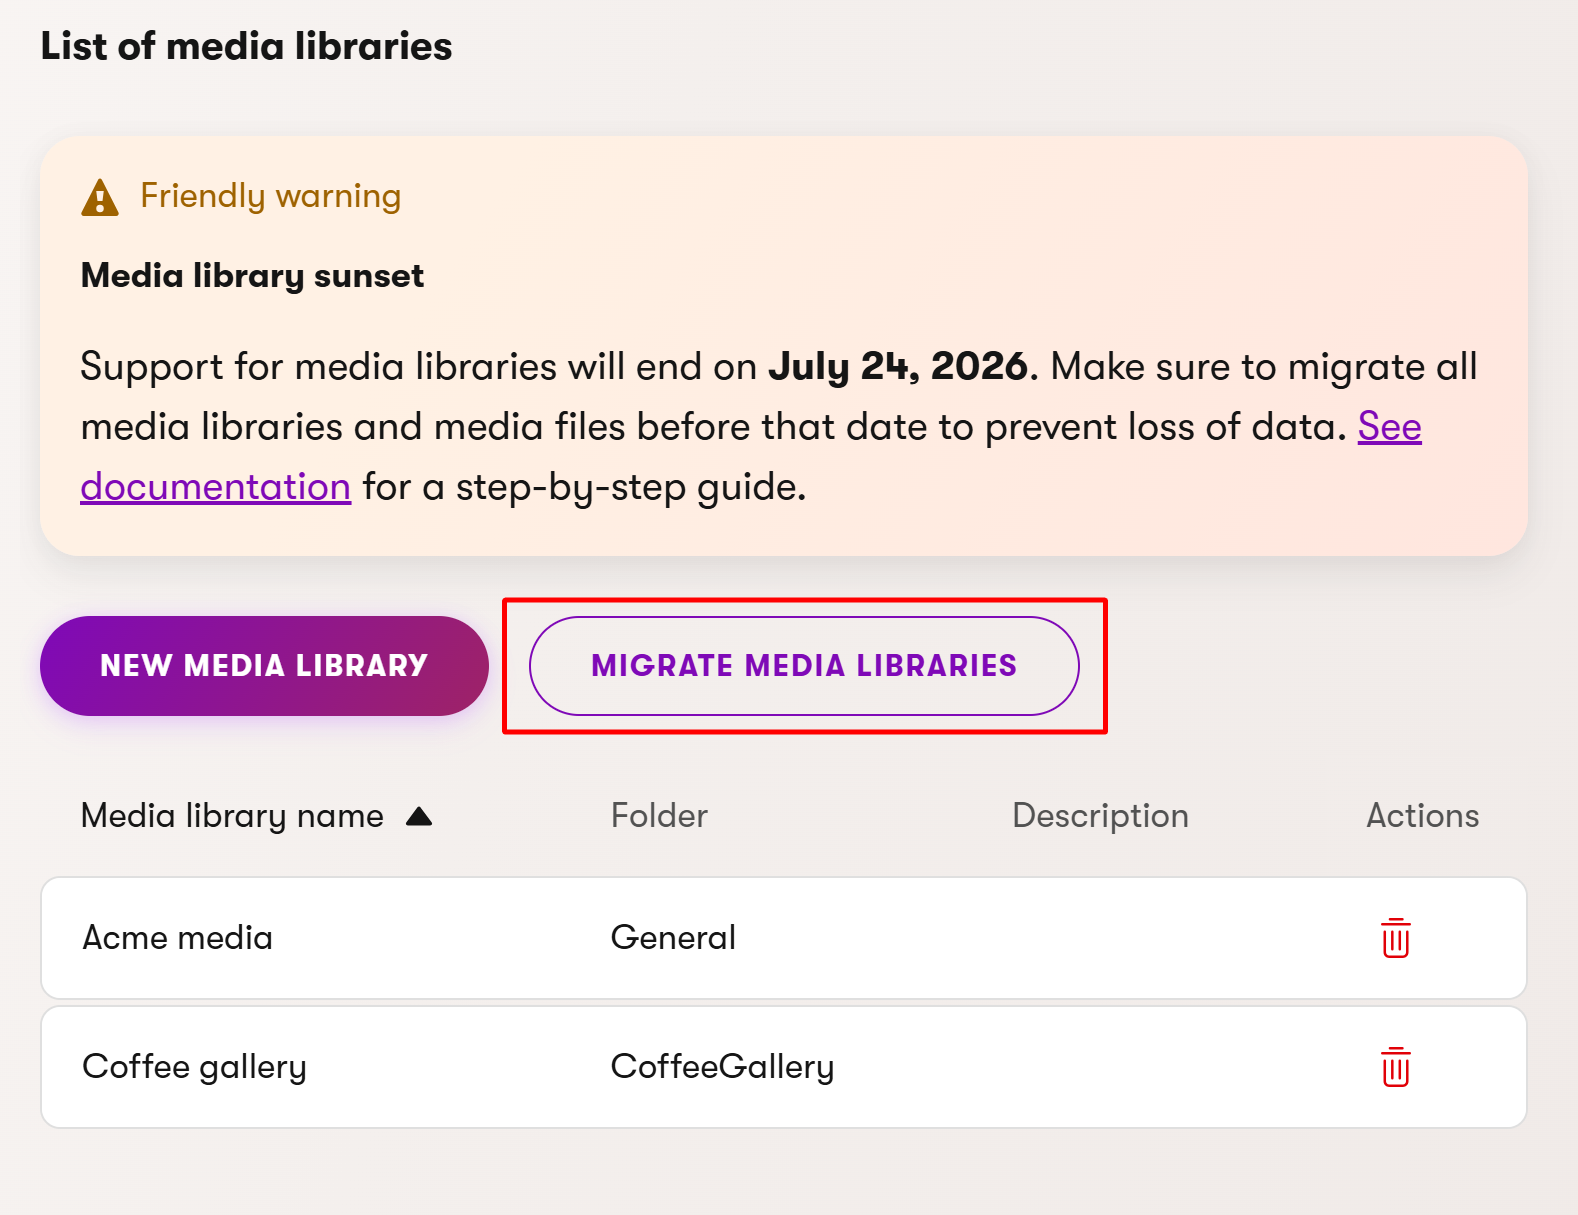
To migrate media libraries along with their files:
Open the Media libraries application.
Migrate your media libraries.
After the migration finishes you can check its result in the Event log application.
You have successfully migrated your media libraries including their files.
Create a database backup
Before proceeding with any further modifications, create a full database backup of your target environment where you performed the migration of media library files. This allows you to recreate the state of your target’s database in your local environment and you can roll back safely if needed during the fields or codebase migration.
Content freeze
After your backup is created, make sure no changes are made to your existing media library files, links to media library files are not changed, and no changes are made to content types with a Media files field. This ensures no media library files or their references are lost during the following migration steps.
Set up your development environment
Restore your local (or other development) environment’s database using the database backup created in the previous step to replicate the target environment’s database in your local environment. You’ll use this local environment to carry out the upcoming migration steps safely before deploying your changes back to the target environment.
Migrate fields referencing media library files
Before you migrate the fields that reference your media files, ensure that all media files in your media library have been successfully migrated and that your Xperience application is not running.
The field reference migration is handled entirely through the .NET Command Line Interface (CLI).
The migration CLI script migrates database definitions of fields, including their data, which reference media files. This means that fields that referenced media files are changed to reference content items on the database level. The codebase migration is done separately.
The fields of the Media files data type are migrated to the Pages and reusable content data type. The original Media file selector admin UI form component for the field is also changed to the Combined content selector. After migration, the allowed content type for the Combined content selector for the migrated fields is automatically set to the new replacement Migrated media file content type. The value set for the maximum number of files is also migrated, which corresponds to the MaximumAssets configuration property in media file selector and MaximumItems in combined content selector.
The migration includes:
- Field definitions – fields of the Media files data type across:
- Content type fields
- Reusable field schema fields
- Custom class fields
- Custom fields in extendable system object types
- Module class UI forms
- Builder configurations – Page Builder and Email Builder widget, section, and template property data stored in the database.
The migration does not rewrite ~/getmedia/... URLs stored in rich text (e.g., in content type fields or widget inline editors). These URLs do not need to be manually replaced – they continue to work through the automatic redirect to their ~/getcontentasset/... counterparts. Migrated content items referenced through these legacy links also appear in usage tracking (the Used in tab) automatically.
The migration script is safely rerunnable without the risk of creating duplicate data. If a field fails to migrate (e.g., because of a collision in field names), an error is logged in the command line, and the process continues.
To begin the migration, open the command line and run the following command:
dotnet run --kxp-migrate-media-file-fields
Migrate codebase
Review your project’s codebase and manually replace references to now obsolete media library API members.
We’ve suggested a replacement for each outdated API to make your migration easier. These are just recommendations – feel free to take a different approach if it better suits your project.
|
Original |
Target |
Description |
|
MediaFileInfo |
Generated model class of a given content type |
The content type needs to have a content item asset field. |
|
MediaLibraryInfo |
ContentFolderInfo |
|
|
IInfoProvider<MediaFileInfo> |
IContentItemManager |
You can use the |
|
IInfoProvider<MediaLibraryInfo> |
IContentFolderManager |
You can use the |
|
AssetRelatedItem |
ContentItemReference |
|
|
AssetSelectorComponent |
ContentItemSelectorComponent |
Use the combined content selector admin UI form component instead of the obsolete media file selector. |
|
IMediaFileUrlRetriever |
No direct replacement |
There’s no built-in way to resolve URLs of retrieved assets or to resize images via URL parameters during migration. But with a bit of custom development, you can create a similar solution that fits your needs. |
|
IMediaFileUrl |
No direct replacement |
There is no direct replacement. However, URLs of assets can be obtained from properties of the |
|
IMediaProtectionService |
No direct replacement |
There is no direct replacement. Content items do not support URL-based image resizing. |
|
ObjectQuery |
The same functionality as the |
Deploy
Once all fields and their data have been successfully migrated and corresponding fixes in the codebase were made, deploy your changes to the desired environment. See Deployment for information about deploying to different environments.
When using the continuous deployment feature or deploying to the SaaS environment, ensure the newly created content type (MediaLibrariesMigration.MigratedMediaFile) is excluded when serializing your data to a deployment package. Additionally, set the CD restore mode to at least CreateUpdate during serialization.
Delete media libraries
After you deploy your application and confirm that all assets are working as intended, you can delete the original media libraries from your environment.
You can delete a media library using the bin icon () beside its name in the Media libraries application.
When you delete all your media libraries, make sure to update roles which have permissions to them to prevent others from accidentaly creating new media libraries or files.
To remove the permissions for the Media libraries application from a given role:
- Open the Role management application.
- Select the role you want to remove the permissions for.
- Switch to the Permissions tab of the selected role.
- Delete permissions for the Media libraries application.
You have successfully removed permissions for the Media libraries application for a given role.